• Surface Iron Fishing Guide for Southern California

    Surface Iron Fishing Guide for Southern California

    Surface iron fishing is one of the most exciting and uniquely Southern California techniques in all of saltwater fishing. There’s nothing quite like watching a boil of yellowtail or bluefin erupt on the surface, whipping a heavy chrome jig into the chaos, and feeling a fish hammer it on the retrieve. It’s raw, visual, and demands skill — which is why it’s become a badge of honor among SoCal anglers.

    This guide covers everything you need to know: the right irons, how to cast them, retrieval techniques, gear setup, and when conditions are right for throwing iron.

    What Is Surface Iron Fishing?

    Surface iron refers to heavy metal jigs — typically 3 to 7 ounces of chrome, lead, or zinc — cast to breaking fish and retrieved rapidly across the surface. The iron skips, wobbles, and darts, imitating a panicked baitfish fleeing a school of predators. The visual nature of the strikes is what hooks anglers for life — fish explode on the iron at the surface in full view.

    The technique originated in SoCal in the mid-20th century, and brands like Tady, Salas, and Jri are local legends. While jig fishing exists everywhere, the surface iron tradition — heavy jigs, fast retrieves, brutal strikes — is a distinctly Southern California thing.

    Essential Surface Irons

    You don’t need 50 different irons. A handful of proven models in the right sizes covers every situation. See our best yellowtail jigs guide and best tuna jigs guide for more detail on each model.

    Tady 45 (4.5 oz): The all-around standard. Casts well, has a wide wobble, and catches everything. If you own one iron, own this one. Blue/white, scrambled egg, and mint are the essential colors.

    Salas 7X (3 oz): The finesse option. Lighter weight matches smaller bait profiles. Great when fish are picky or the bait is small. Chrome and blue/white are reliable.

    Tady A1 (6 oz): The distance iron. When you need to reach fish that are boiling far from the boat, the extra weight gets it there. Also produces a deeper, wider action that big fish prefer. Doubles as a tuna iron.

    Salas 6X (4 oz): A narrower profile than the Tady 45, the 6X has a tighter, faster wobble. Excellent when fish want a slimmer bait profile. Many anglers keep both the 45 and 6X and switch between them until the fish tell them which one they want.

    Tady 9 (3.5 oz): A compact, heavy-for-its-size jig that sinks fast and casts like a bullet. Great for wind and when you need to get the iron down quickly before retrieving on the surface.

    Hooks: Replace the factory trebles on every iron you buy with Owner ST-66 trebles in 2/0–3/0. Factory hooks are made from soft wire that straightens on yellowtail and tuna. The ST-66 is 4X strong — it’s the single most important upgrade you can make. See our hooks by species guide for the right treble size for each iron.

    Gear Setup for Surface Iron

    Iron fishing demands specific gear. A spinning reel is preferred for casting distance — the open spool design lets you launch irons much farther than a conventional reel, which matters when fish are boiling 80+ yards away.

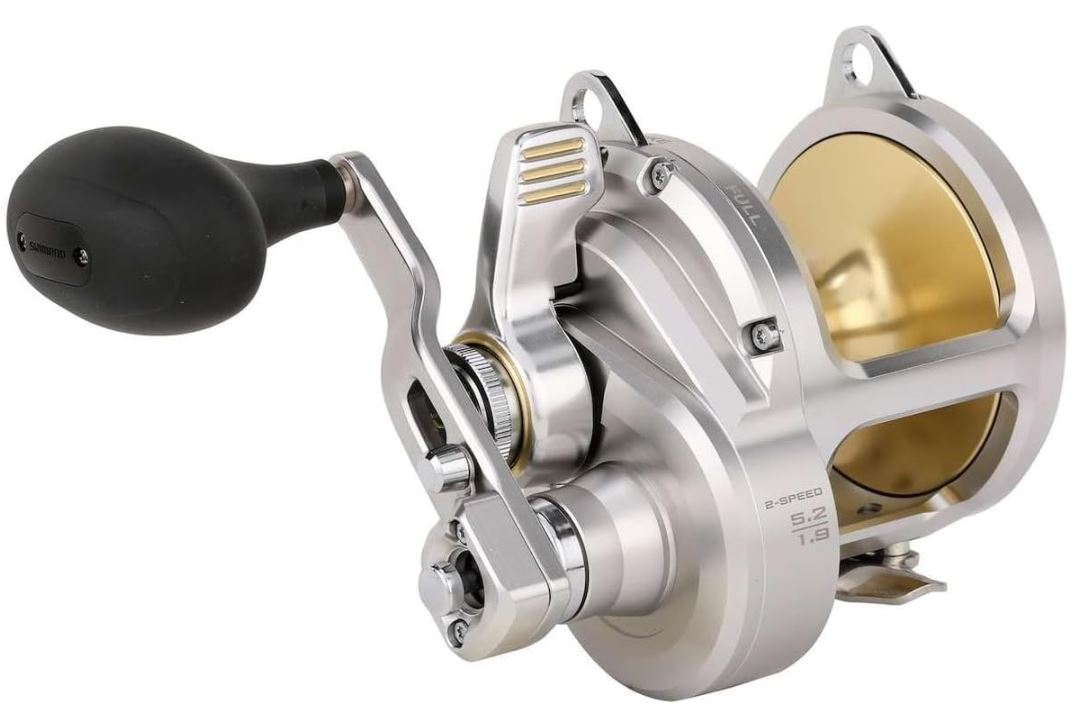
    Reel: Spinning reel in the 6000–10000 size class with a fast retrieve ratio (6.0:1 or higher). You need to burn the iron back fast, and a high-speed reel does the work. The reel also needs a strong, smooth drag — yellowtail will smoke you in the kelp if your drag hesitates. See our yellowtail reel guide and bluefin reel guide for specific models.

    Rod: 7–8 foot medium-heavy to heavy power with a fast action. You need the backbone to launch heavy irons and the stiffness to work them aggressively on the retrieve. A soft rod kills the iron’s action. A good iron rod has a moderate butt section for leverage and a fast tip for working the jig. See our 7-foot and 8-foot rod guides for specific models.

    Line: 40–65lb braided line. Braid’s thin diameter maximizes casting distance, and the zero stretch transmits every jig movement and every bite directly. No leader needed for most iron fishing — the speed of the retrieve and the flash of the iron means fish commit before they can inspect the connection. Some anglers add a short (3-foot) 40lb fluorocarbon leader for extra-clear water or line-shy bluefin. See our fishing line guide for specific braid recommendations and our knots guide for the FG knot connection.

    For complete rod and reel pairing advice, see our best rod and reel combo guide.

    How to Cast Surface Iron

    Casting a 4.5-ounce jig is different from casting a lure. The weight is substantial, and a bad cast can be dangerous to everyone on the boat.

    The overhead cast: Point the rod at the fish, open the bail, and load the rod behind you with a smooth, controlled backswing. Drive forward with your body and arms together — the power comes from your hips and core, not just your arms. Release the line at about 45 degrees above the horizon. The jig should fly in a tight arc, not wobble or helicopter. If it helicopters, you’re not loading the rod smoothly enough.

    The sidearm cast: Used when the wind is at your back or when you need a low trajectory to reach fish just beyond casting range. Same mechanics but on a horizontal plane. Keep the rod tip low and the arc tight.

    The lob: For shorter distances, a simple underhand lob gets the iron out without the drama of a full cast. Useful when fish pop up close to the boat unexpectedly.

    Safety: Always look behind you before casting. A 4.5-ounce chunk of metal traveling at high speed will seriously injure anyone in its path. Call out “casting!” so people around you know to duck. Keep your swing controlled — wild, uncontrolled casts are dangerous and inaccurate.

    Retrieval Techniques

    The speed burn: The most common surface iron retrieve. Crank the reel as fast as you can, keeping the rod tip low and the iron skipping on or just below the surface. The speed triggers a reaction strike from competitive fish. This is exhausting — your forearm will burn after a few casts — but it’s what catches fish in a frenzy.

    The yo-yo burn: Retrieve fast, but periodically drop the rod tip and let the iron sink 5–10 feet before burning it back to the surface. This mimics a baitfish trying to dive for safety and then being forced back up. The change of direction often triggers a strike from following fish that won’t commit to a straight retrieve.

    The slow roll: A moderate-speed retrieve that keeps the iron wobbling just below the surface. Used when fish are boiling lazily or when the bite is slow. Less dramatic but can be more effective when fish aren’t in full attack mode.

    The dead stick: Cast the iron past the boil, let it sink to the depth you think the fish are at, and then begin a medium-speed retrieve. Effective when fish are feeding subsurface and not breaking the top. Watch for subtle taps.

    When to Throw Iron

    Surface iron is at its best when fish are actively feeding on the surface. Look for these signs: boiling water (fish crashing bait on the surface), birds diving and circling, bait balls getting pushed to the surface, and meter marks showing fish high in the water column.

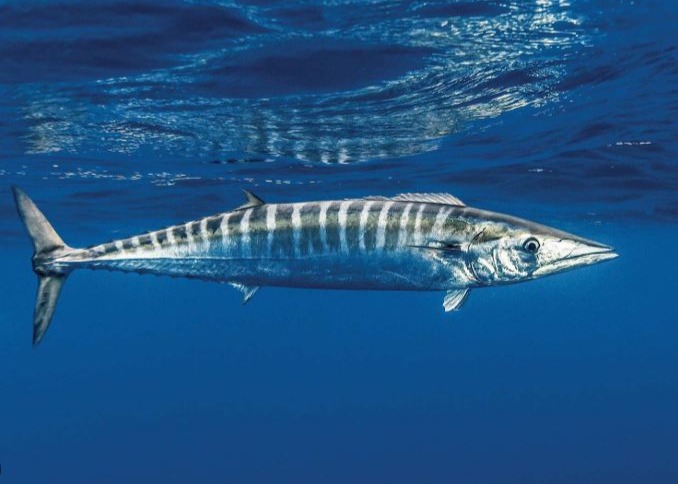
    In SoCal, the best iron fishing happens from late spring through fall when yellowtail and bluefin tuna push into the warm water that moves in. The Coronado Islands, La Jolla kelp, Catalina, and San Clemente Island are legendary iron grounds. Check the SST chart for warm water edges where bait concentrates and predators follow.

    Surface Iron vs Other Techniques

    SituationBest Approach
    Fish actively boiling on surfaceSurface iron (speed burn)
    Fish showing but not committingSwitch to lighter iron or poppers
    Fish deep on structureYo-yo jig or flat-fall
    No surface activity, fish on meterLive bait (fly-line or slider)
    Wind killing your cast distanceHeavy iron (Tady A1) or switch to bait

    For a complete comparison of all the artificial techniques, see our jigs vs irons vs poppers guide.

    When iron isn’t working: If fish are boiling but refusing iron, try poppers — the surface commotion triggers a different response than the flash-and-speed of iron, and fish that have been seeing the same Tady 45 from every angler on the boat will sometimes eat a popper without hesitation. See our dorado lures guide and tuna lures guide for other casting options including swimbaits and spoons.

    Plan Your Trip

    The best iron bite requires warm water, bait, and active fish. Check conditions:

    Related Guides

    Tight lines!

  • Carolina Rig Setup for Saltwater Fishing

    Carolina Rig Setup for Saltwater Fishing

    The Carolina rig is one of the most effective bottom-fishing rigs for Southern California saltwater. It keeps your bait pinned to the bottom where halibut, corbina, and croaker feed, while giving the bait just enough freedom to look natural. If you surf fish or target halibut from a boat, you need this rig in your playbook.

    Setting up a Carolina rig is straightforward, but the details matter — the wrong weight, hook, or leader length can mean the difference between limits and getting skunked. Here’s exactly how to tie one and when to use it.

    What Is a Carolina Rig?

    A Carolina rig separates your weight from your bait using a leader. The weight sits on the main line above a swivel, and the bait hangs below on a separate length of leader. This design lets the weight anchor to the bottom while the bait floats or drifts naturally in the current — exactly how a real baitfish or sand crab moves.

    Compare this to a dropper loop rig where the weight hangs below and the bait sits higher in the water column. The Carolina rig excels when fish are feeding right on the bottom — which is most of the time for halibut, corbina, and California croaker.

    Carolina rig diagram showing egg sinker, bead, swivel, fluorocarbon leader, and circle hook setup for halibut fishing

    How to Tie a Carolina Rig (Step by Step)

    What you need: An egg sinker (1–4 oz depending on current and surf), a plastic bead, a barrel swivel (size 3–5), fluorocarbon leader line (15–20lb), and a hook (circle or kahle style, size 1/0–4/0).

    Step 1: Slide the egg sinker onto your main line. The line passes through the hole in the center of the sinker, allowing it to slide freely.

    Step 2: Slide a small plastic bead onto the main line after the sinker. This bead protects your knot from being damaged by the sinker banging against it. Don’t skip this step — without the bead, your knot will fail at the worst possible moment.

    Step 3: Tie your main line to one end of the barrel swivel using a Palomar knot or improved clinch knot. The swivel acts as a stopper — the sinker and bead sit above it on the main line, free to slide. See our knot guide for step-by-step tying instructions.

    Step 4: Cut a length of fluorocarbon leader — typically 18 to 36 inches. Tie one end to the other eye of the barrel swivel.

    Step 5: Tie your hook to the free end of the leader. A Palomar knot works perfectly here.

    That’s it. Bait the hook, cast it out, and let the sinker pull everything to the bottom. The sinker sits on the sand, the leader extends out with the current, and your bait drifts naturally right in the strike zone.

    Dialing in the Details

    Sinker Weight

    Use the lightest weight that holds bottom. In calm surf or from a boat in minimal current, 1–2 ounces is plenty. In moderate surf, go to 3 ounces. In heavy surf or strong current, 4 ounces or even a pyramid sinker (which grips the sand) keeps you in place. Too much weight kills the natural presentation. Too little and you’re rolling down the beach.

    Leader Length

    This is the most important variable. A longer leader gives the bait more freedom to move but makes casting harder and reduces sensitivity. A shorter leader keeps better contact but looks less natural.

    For halibut in the surf, 24–36 inches is ideal — halibut are ambush predators and won’t chase a bait far, but they do like it to look natural. For corbina, 18–24 inches works better because they pick up baits delicately and a shorter leader means you feel the bite sooner. From a boat targeting halibut in bays or along the coast, 18–24 inches keeps good control.

    Hook Selection

    Circle hooks in 2/0–4/0 are the best all-around choice for Carolina rigs. They hook in the corner of the mouth almost every time, which means better hookup rates and easier releases. When a halibut picks up your bait, just reel tight and the circle hook does the work — no big hookset needed. The Owner Mutu Light Circle (5114) in 2/0–3/0 is ideal for halibut Carolina rigs — light wire for better penetration on a soft-mouthed fish. For a complete breakdown of hook models and sizes, see our hooks by species guide.

    Line and Leader

    Main line should be braided line in the 15–30lb range. Braid’s sensitivity lets you feel the slightest bump — critical for detecting halibut bites, which are often just a subtle “tick.” The fluorocarbon leader (15–20lb) provides abrasion resistance against sand and rocks plus near-invisibility in clear SoCal water. The swivel prevents the braid from twisting as the sinker slides. Connect your braid to the swivel with a Palomar knot, and for braid-to-leader connections elsewhere in your setup, see our complete knot guide.

    Best Baits for a Carolina Rig

    The beauty of the Carolina rig is that it works with almost any bait. For halibut, live or frozen sardines, smelt, and squid strips are all productive. Cut squid is especially effective because it stays on the hook well and halibut love it. For corbina and perch in the surf, sand crabs (soft-shell when possible), bloodworms, and mussels are the top producers. Swimbaits and grubs also work on a Carolina rig — thread a 3–4 inch soft plastic on a jig head or weedless hook and fish it exactly the same way.

    When and Where to Use It

    The Carolina rig shines in these SoCal situations: surf fishing sandy beaches for halibut, corbina, and perch — particularly in the troughs between sandbars. Bay fishing from shore or kayak for halibut and spotted bay bass. Slow drifts along sandy bottom from a boat. And fishing structure edges where halibut stage to ambush bait moving along the sand-to-rock transition.

    Check the SST chart before heading out — halibut start feeding aggressively when nearshore water hits the upper 50s to low 60s. Read our halibut temperature guide for seasonal patterns. For beach-specific advice, our Doheny surf fishing guide and halibut surf fishing guide walk you through reading the sand and finding productive troughs.

    Tackle Setup

    The right rod and reel make a big difference on Carolina rigs — you need sensitivity to feel light bites and enough backbone to cast weighted rigs:

    Surf: A 9–11 foot surf rod paired with a 4000–5000 spinning reel. The longer rod gives you casting distance to reach the sandbars, and the spinning reel handles the lighter weights well.

    Boat: A 7-foot medium rod paired with a 20lb class reel — either spinning or conventional. Shorter rod for working the rig vertically on a drift.

    Line: 15–20lb braid with 15–20lb fluorocarbon leader. See our line guide for specific brand recommendations.

    For complete rod and reel pairing advice, see our best rod and reel combo guide.

    Plan Your Trip

    Check conditions before you head out:

    Related Guides

    Tight lines!

  • Spinning vs Conventional Reels — Which Is Better for Saltwater Fishing?

    Spinning vs Conventional Reels — Which Is Better for Saltwater Fishing?

    Spinning or conventional? It’s one of the most common questions in saltwater fishing — and the answer depends entirely on what you’re fishing for, where you’re fishing, and how much experience you have.

    The short version: spinning reels are easier to use, better for casting light baits, and ideal for surf fishing and finesse applications. Conventional reels deliver more power, better line capacity, and superior drag performance for big fish and heavy tackle. Most serious SoCal anglers own both.

    This guide breaks down exactly when to use each type, with specific recommendations for Southern California species and situations.

    Quick Comparison

    Factor Spinning Reel Conventional Reel
    Ease of use Very easy — no backlash risk Moderate — requires thumb control
    Casting distance Excellent with light lures Good, but risk of backlash (birdnest)
    Drag power Good (8–20 lbs typical) Excellent (15–50+ lbs)
    Line capacity Moderate High — holds more heavier line
    Cranking power Lower gear ratio leverage Higher — two-speed options available
    Best line class 8–25 lb 20–80+ lb
    Price range $50–$400 $100–$800+

    When to Use a Spinning Reel

    Surf fishing. Spinning reels are the clear winner from shore. They cast farther with lighter weights, don’t backlash in wind, and are easier to use when you’re standing in the surf. A 4000–5000 size spinning reel is the standard for SoCal surf fishing. See our guide to the best surf fishing reels.

    Light line applications (8–20 lb). When you’re fishing light tackle for calico bass, spotfin croaker, halibut in the bays, or other inshore species, spinning reels give you better casting performance and more natural bait presentation.

    Throwing swimbaits and light jigs. If you’re casting swimbaits for halibut or light jigs for calico bass, spinning reels let you work lighter lures more effectively. The bail closure and line management is more forgiving than a conventional for repetitive casting.

    Beginners. If you’re new to saltwater fishing, start with spinning. Zero risk of backlash, intuitive operation, and you’ll spend more time fishing instead of untangling line. You can always step up to conventional later.

    Pier and jetty fishing. The casting advantage of spinning reels makes them ideal for reaching fish from structures where casting distance matters.

    When to Use a Conventional Reel

    Party boat fishing (20–40 lb class). Conventional reels dominate on SoCal sportfishing boats. When you’re dropping heavy jigs, fighting yellowtail on 30lb, or winding up rockfish from deep water, conventional reels provide the cranking power and drag performance that spinning reels can’t match. See our guides to best 20lb reels, best 30lb reels, and best 40lb+ reels.

    Yellowtail fishing. A strong yellowtail will run 100+ yards of line off your reel. Conventional reels with 15–25 lbs of drag and 300+ yards of capacity are the standard for targeting yellows. Check our best reel for yellowtail guide.

    Tuna fishing. Whether it’s bluefin or yellowfin, tuna require heavy drag, massive line capacity, and grinding power. Two-speed conventional reels are the standard for anything over 30 lbs — and they’re essential for 50lb+ tuna. See our best reel for bluefin tuna guide.

    Trolling. Conventional reels are designed for trolling applications. The spool design handles the constant pressure of dragging lures at speed, and the clicker system lets you know when a fish hits without holding the rod.

    Surface iron fishing. Throwing heavy surface irons and jigs for yellowtail requires the kind of casting distance and retrieve speed that conventional reels deliver. Experienced iron fishermen prefer conventional reels for the higher gear ratios and better casting control.

    Bottom fishing (deep). When you’re dropping to 200+ feet for rockfish, lingcod, or sheephead, conventional reels with low gear ratios make cranking up heavy fish from depth manageable. Spinning reels don’t have the mechanical advantage for this application.

    The SoCal Arsenal: You Need Both

    Most experienced SoCal anglers end up with a mix of both types. Here’s what a well-rounded setup looks like:

    Setup 1 — Surf/Inshore (spinning): 4000–5000 spinning reel on a 9–10 foot surf rod spooled with 20lb braid and a fluorocarbon leader. Use it for: surf fishing halibut and perch, bay fishing, casting swimbaits, light rock fishing. This covers your shore fishing needs.

    Setup 2 — Party boat standard (conventional): Medium conventional reel on a 7-foot rod spooled with 30lb braid. Use it for: calico bass, yellowtail, bonito, small tuna on day trips. This is your all-around boat rod and the most-used setup on SoCal sportfishing boats.

    Setup 3 — Big game (conventional): Heavy two-speed conventional on an 8-foot rod spooled with 50–65lb braid. Use it for: bluefin tuna, big yellowtail, wahoo on overnight trips. This is the heavy stick you bring when the big fish are biting.

    For complete recommendations on pairing rods and reels, see our best rod and reel combo guide.

    Spinning vs Conventional by Species

    Target Species Best Reel Type Why
    Halibut (surf) Spinning Casting distance from shore, light presentations
    Halibut (boat) Either Spinning for swimbaits, conventional for Carolina rigs
    Calico bass Either Spinning for plastics/swimbaits, conventional for iron
    Yellowtail Conventional Drag power and line capacity for long runs
    White seabass Conventional Need 20–30lb drag and heavy line capacity
    Bluefin tuna Conventional Non-negotiable — need 30+ lbs drag, two-speed
    Yellowfin tuna Conventional Same as bluefin — heavy tackle required
    Dorado Either 25lb spinning works; conventional for bigger fish
    Barred surf perch Spinning Light line, long casts from the beach
    Rockfish Conventional Cranking power from deep water

    Common Mistakes

    Using a spinning reel for big tuna. Spinning reels above 8000 size exist for tuna, but they’re specialist tools. The drag systems aren’t as durable as conventional reels under prolonged heavy pressure. Unless you’re an experienced angler who specifically wants the challenge, stick with conventional for anything over 40 lbs.

    Buying a conventional for surf fishing. A casting conventional (baitcaster) can work from shore, but it requires practice to avoid backlash, especially in wind. For most surf anglers, spinning is the right choice — it lets you focus on fishing instead of managing your reel.

    Overspending on one type. It’s better to have a solid $150 spinning reel AND a solid $200 conventional than one $400 reel that only covers half your fishing situations. Versatility matters more than having one premium reel.

    Key Features to Compare

    Drag system: Conventional reels typically use larger carbon fiber washers that dissipate heat better during long fights. For fish that make extended runs (yellowtail, tuna), this matters. Spinning reels have improved dramatically, but conventional still wins for sustained heavy drag.

    Gear ratio: Conventional reels offer two-speed options — high gear for fast retrieves and low gear for power cranking. This is a huge advantage when fighting big fish or working heavy jigs from deep water. Spinning reels are single-speed only.

    Line lay: Conventional reels spool line evenly with a level-wind or manual thumb guidance. Spinning reels use an oscillating spool that can cause line twist over time, especially with certain lures. Use a swivel when fishing lures that spin to prevent this.

    Corrosion resistance: Both types are available in saltwater-specific models with sealed bearings and corrosion-resistant materials. Always buy reels rated for saltwater use — freshwater reels will corrode quickly in the salt environment. Rinse any reel with fresh water after every trip.

    Plan Your Next Trip

    Related Gear Guides

    Tight lines!

  • Best Water Temperature for Wahoo Fishing

    Best Water Temperature for Wahoo Fishing

    Wahoo are one of the fastest fish in the ocean — and they demand the warmest water of any species you’ll target from a Southern California sportfishing boat. If you’re not fishing in 72–82°F water, you’re probably not fishing for wahoo.

    These fish are creatures of tropical and subtropical currents. Off our coast, that means long-range trips to Baja California banks, or the rare warm-water years when wahoo push north into SoCal waters. Either way, water temperature is the single best indicator of whether wahoo are in the area.

    The Wahoo Temperature Window

    Temperature Range Activity Level Notes
    Below 70°F Very low Wahoo are rarely found — too cold for this species
    70–72°F Low–moderate Fringe water; possible but not reliable
    72–76°F High Active feeding, especially near structure and current edges
    76–82°F Peak Prime wahoo water — this is the sweet spot
    Above 82°F Moderate Still fishable but wahoo may go deep to find cooler water

    The 76–80°F range is where wahoo fishing is at its best. This is significantly warmer than bluefin tuna (60–68°F) or yellowtail (62–72°F), which is why wahoo are primarily a long-range target for SoCal anglers.

    Where to Find Wahoo Water

    From a Southern California port, you’ll typically need to head south to find consistent 72–82°F water. Here are the primary wahoo grounds:

    Guadalupe Island. Located about 150 miles southwest of Ensenada, Guadalupe sits at the intersection of warm currents from the south and cooler California Current water. When the warm side pushes in, wahoo stack up around the island’s structure. Check the SST charts for a defined warm-water edge near the island.

    Hurricane Bank (Banco Hurricane). One of the premier wahoo spots in the Pacific, located roughly 250 miles south of Cabo. Long-range boats out of San Diego run here during late summer and fall. Water temps consistently hold in the 78–82°F range.

    San Benedicto and the Revillagigedo Islands. Deep offshore seamounts surrounded by warm tropical water. These are multi-day long-range destinations that produce wahoo alongside yellowfin tuna and giant trevally.

    Outer banks off Baja. Seamounts and ridges like Uncle Sam Bank, Thetis Bank, and the Finger Bank can hold wahoo when warm currents push through. Use chlorophyll maps to identify productive edges where warm, clear water meets nutrient-rich upwelling zones.

    SoCal (rare years). During El Niño events or exceptionally warm seasons, wahoo occasionally push as far north as the Coronado Islands, San Clemente Island, or even Catalina. These events are unpredictable — but when you see 74°F+ water at the offshore islands on the SST chart, it’s worth paying attention to fish reports. You may also find dorado and yellowfin in the same warm-water push.

    How to Use SST Charts for Wahoo

    Wahoo fishing and SST charts go hand in hand. Here’s what to look for:

    Find the 74–80°F contour line. Pull up the SST chart and look for where this temperature range intersects with underwater structure — seamounts, banks, island drop-offs, and ridges.

    Look for temperature breaks. Wahoo love edges. A sharp transition from 72°F to 78°F over a short distance concentrates bait and predators. These temperature breaks are where you want to focus your trolling passes.

    Watch for warm-water intrusions. Tongues of warm water pushing north or onshore can bring wahoo into areas they don’t normally inhabit. Track these intrusions day by day on the SST chart — if the warm water is expanding and holding, wahoo may follow it in.

    Cross-reference with chlorophyll. Wahoo prefer clean, blue, low-chlorophyll water. If you see high chlorophyll (green water) at the right temperature, that’s more likely yellowfin tuna or dorado water. Wahoo want warm AND clear. The chlorophyll map makes this easy to check — see our chlorophyll map guide for how to read the edges.

    Wahoo Fishing Techniques

    High-speed trolling is the primary method. Wahoo are built for speed — they can hit 60 mph in short bursts. Trolling at 8–14 knots with skirted lures, Rapala X-Rap Magnums, or rigged ballyhoo behind wire leaders is the standard approach. This is similar to trolling for tuna but at significantly higher speeds — wahoo want the lure moving fast.

    Wire leaders are essential. Wahoo have razor-sharp teeth that will slice through even heavy fluorocarbon in a fraction of a second. Use single-strand wire or braided wire leaders in the 60–90lb range. This is the one species where fluorocarbon leader alone won’t cut it — literally.

    Vertical jigging over structure produces big wahoo. Drop a heavy speed jig (200–400g) to the bottom over a seamount or bank, then work it back up with fast, aggressive retrieves. Knife jigs and heavy flat-falls in chrome or blue/silver work well. This is where a quality 40lb+ conventional reel earns its keep — you need both speed to work the jig and stopping power when a wahoo screams back toward the structure.

    Live bait on the drift. When wahoo are in the area but not responding to trolling, slow-drifting live mackerel or skipjack on a wire leader can trigger strikes. Fish them at mid-depth using a slider rig with a wire bite leader. Use a J hook rather than a circle — wahoo hit and run fast, and you need the instant hookset.

    Wahoo Gear and Lure Guides

    Wahoo require stout tackle. Their initial run is explosive and their teeth will destroy anything that isn’t purpose-built for the job. Here’s the setup plus links to our detailed guides:

    Reel: A quality conventional reel in the 30–50lb class with a smooth drag and at least 400 yards of capacity. Two-speed reels are ideal for switching between high-speed retrieves and grinding power. The Shimano Talica 12 is a proven wahoo reel.

    Rod: A 6–7 foot heavy-action rod with fast tip for trolling, or an 8-foot rod for jigging applications. See our rod and reel combo guide for complete pairings.

    Line: 50–65lb braided line with a heavy fluorocarbon wind-on leader, topped with wire. See our fishing line guide for specific braid recommendations.

    Terminal: Always wire leader for wahoo. Palomar knots for the fluoro sections and haywire twists for wire connections. For the hook, see our hooks by species guide — J hooks on trolling lures, assist hooks on vertical jigs.

    Plan Your Trip

    Wahoo trips require planning — you need to know the water is right before committing to a long-range voyage. Start with the data:

    Related Guides

    Tight lines!