• Best Lures for Dorado (Mahi Mahi) Fishing

    Best Lures for Dorado (Mahi Mahi) Fishing

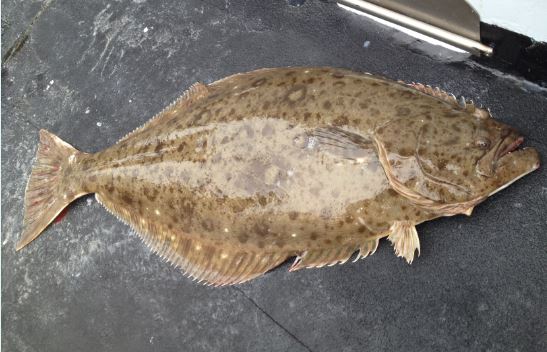
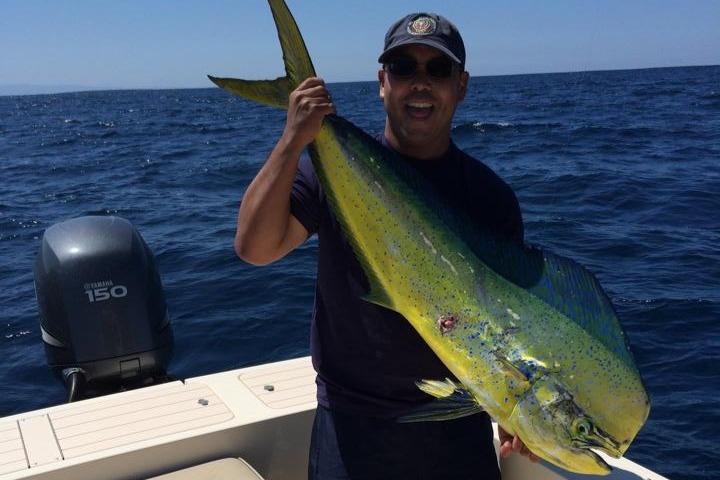
    Dorado — also called mahi mahi or dolphinfish — are the most aggressive lure-eating fish you’ll encounter in SoCal and Baja waters. They hit hard, they hit often, and they’ll chase down lures that other species would ignore. That makes them some of the most fun fish to target on artificial, but it also means that lure selection matters — not because dorado are picky, but because the right lure gets you more strikes, better hookups, and keeps the fish around the boat longer.

    Dorado show up in SoCal when water temperatures reach 68°F and above, typically from midsummer through fall. They’re almost always associated with floating structure — kelp paddies, debris lines, buoys, and anything else that creates shade and holds bait. Use the SST chart and chlorophyll map to find warm water with bait concentrations — that’s where the paddies form and the dorado stack up.

    ⚡ Quick Picks

    Best trolling lure: Cedar plugs — simple, cheap, and dorado crush them. Carry a dozen.

    Best trolling spread: Zuker feather jigs — run 4 at staggered distances in green/yellow and blue/white.

    Best casting lure: Tady 45 surface iron — burn it past a paddy and watch them light up.

    Best deep trolling: Rapala X-Rap Magnum — gets down where dorado hold under paddies.

    Best for keeping fish at the boat: Soft plastic swimbaits — cheap, easy to rig, and dorado eat them nonstop.

    Trolling Lures

    Trolling is the most common way to find dorado on the open ocean. You cover ground until you find paddies, debris, or temperature breaks, and the trolled lures work while you search. Run a spread of 4–6 lures at staggered distances behind the boat to cover more water and figure out which color and depth the fish want.

    Cedar Plugs

    Buy it on Amazon

    Cedar plugs are the workhorses of the paddy search. When you’re running 30–50 miles of open ocean looking for kelp, you want lures that stay fishing at 7–8 knots hour after hour without maintenance — and a cedar plug does exactly that. Green/yellow and blue/white are the top dorado colors; natural cedar also produces well. Run them 50–100 feet back so they work close enough to the boat for a quick pitch to any paddy you find. Dorado don’t need the long leads that line-shy bluefin require — they’re aggressive, competitive feeders that will chase a lure right to the transom. Keep a dozen on board because dorado teeth eventually chew through the finish, and a beat-up plug still catches fish but a split hook is a pulled bite.

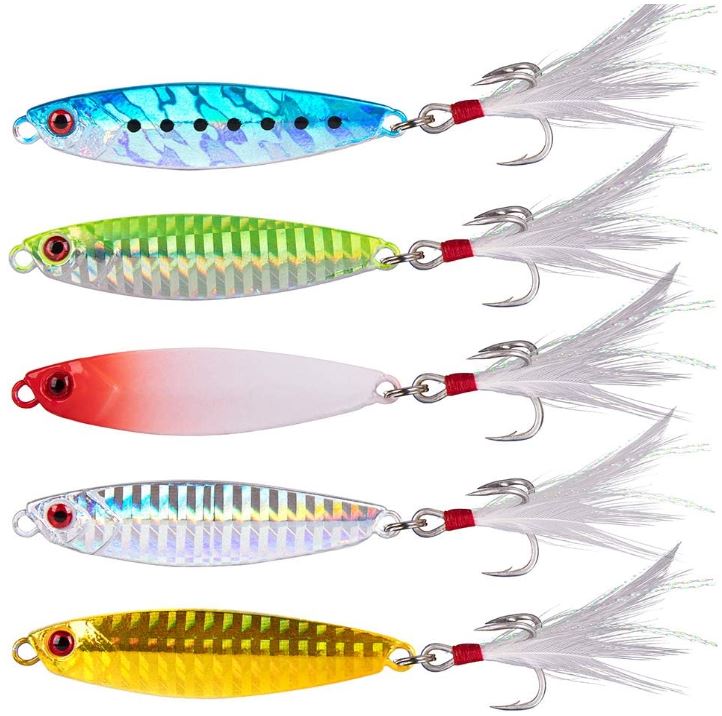
    Feather Jigs (Zuker / Tuna Feathers)

    Buy it on Amazon

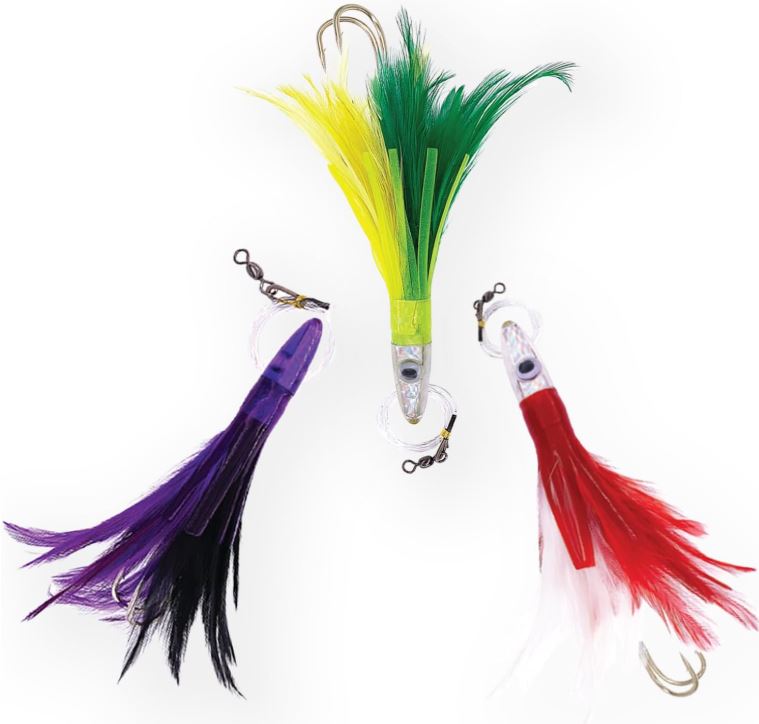
    A 4-feather spread in bright colors is the standard dorado paddy search setup. Green/yellow is the #1 dorado color — it imitates juvenile dorado, which triggers a territorial feeding response — followed by blue/white and root beer/orange. Stagger your spread: two short (20–30 feet back) in the prop wash and two long (60–80 feet back) on the outside. Dorado attack aggressively and often hit multiple lures in the spread at once, so use 5/0–7/0 J hooks pre-rigged in the skirt and check all positions after each hookup — they’ll frequently slash a second lure during the fight. When the search is on and paddies are far apart, a hookup on a feather tells you the temperature and bait situation is right and it’s worth slowing down to look harder.

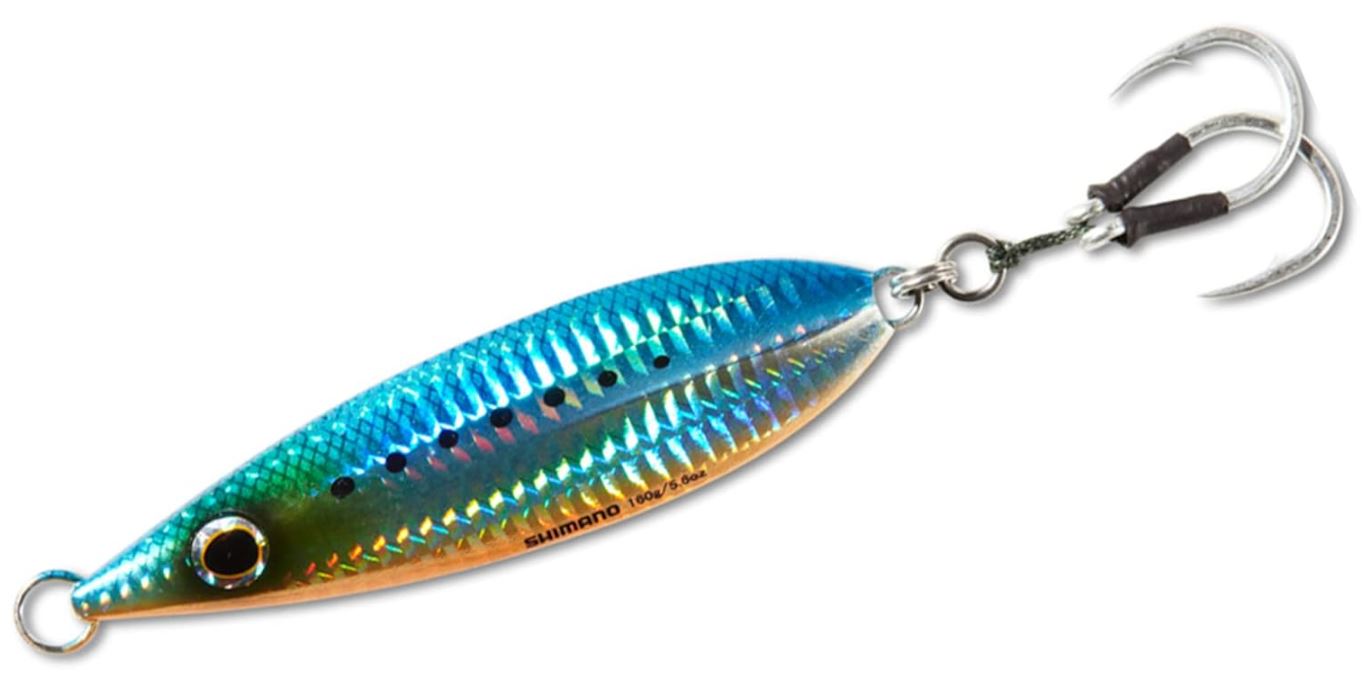
    Rapala X-Rap Magnum Series

    Buy it on Amazon

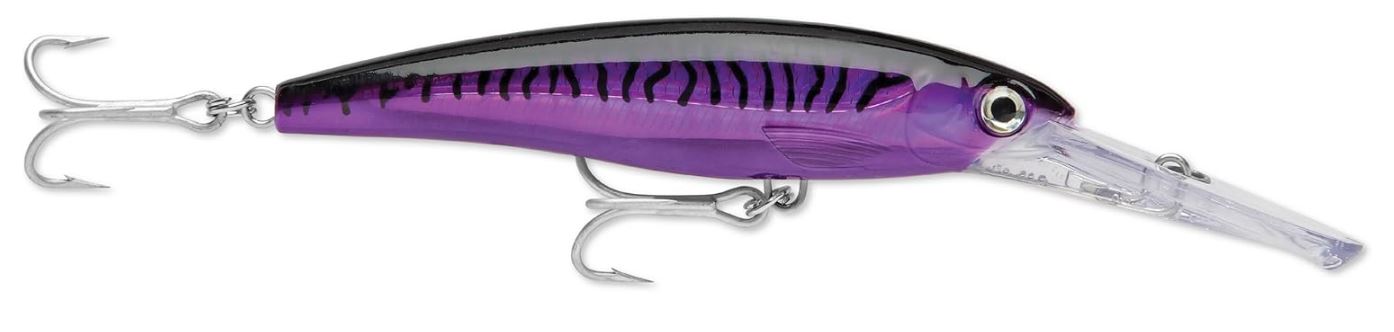
    The X-Rap Magnum earns its spot specifically when dorado are holding tight under a paddy and refusing surface lures. Kelp paddies create a shaded zone that dorado use to ambush bait — the bigger bull dorado often sit several feet below the canopy where cedar plugs and feathers run above them. A Rapala diving to 10–15 feet punches through that zone and puts the lure right in front of fish that are actively holding but won’t rise. Run it on the outside of your spread at 5–7 knots. Dorado gold, pilchard, and bonito patterns are the top producers. The 10 and 15 sizes cover most SoCal situations — step up to the 20 for Baja fish that average larger. When everyone is pulling their lines in at a paddy because the fish won’t eat, one rod with an X-Rap still trolling past often gets the first bite.

    Casting Lures (for Kelp Paddies)

    Once you’ve found dorado on a paddy, casting lures is the most exciting way to catch them. Dorado are competitive feeders — when one chases a lure, the rest follow. Keeping lures in the water keeps the school active and near the boat. The key is speed and aggression: cast past the paddy, retrieve fast, and keep casting. A dead boat with no lures in the water means the school disappears.

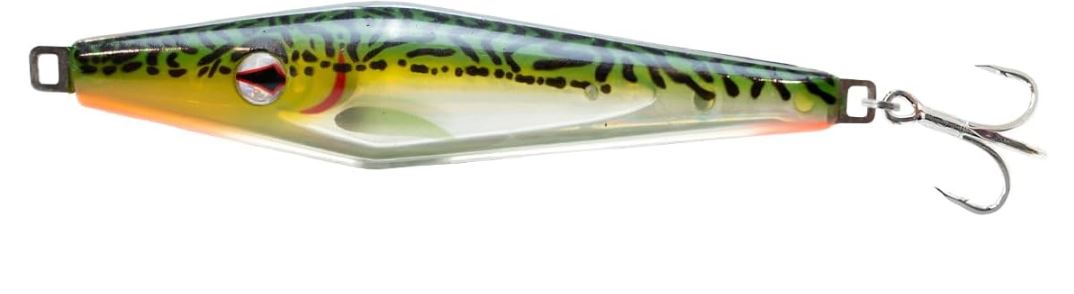
    Surface Iron (Tady 45 / Tady 4/0)

    Buy it on Amazon

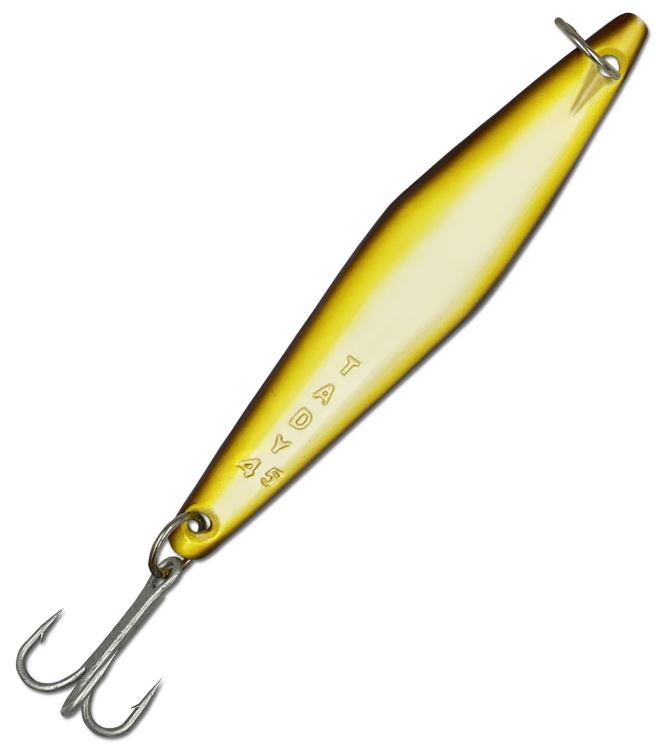
    The same irons you throw for yellowtail work beautifully on dorado. Cast past the paddy and burn the iron back through the school. Dorado will chase it aggressively — you’ll often see them racing the iron with their dorsal fin lit up electric blue. The Tady 4/0 in 2.6oz is particularly effective because the lighter weight lets you work it a bit slower, giving more fish a chance to track and commit. The heavier Tady 45 (2.9oz) is better when you need extra casting distance to reach paddies from a drifting boat. For a full breakdown of iron types and technique, see our jigs and irons guide and jigs vs irons vs poppers comparison.

    Poppers

    Buy it on Amazon

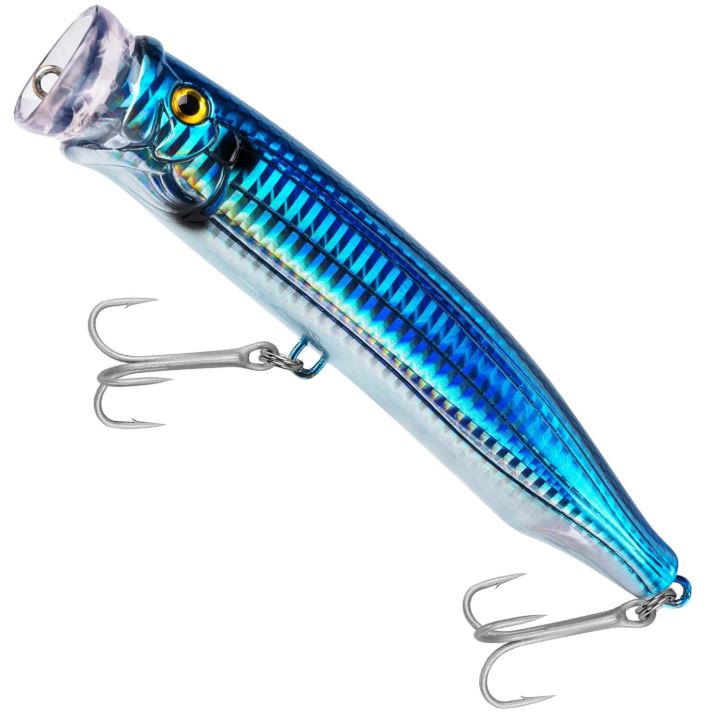
    Dorado go absolutely insane for poppers. The splash and commotion triggers their competitive instinct — you’ll often see multiple fish racing to be the first one to the lure. A medium-sized popper (80–120mm) in bone, sardine, or bright green/yellow patterns is deadly when cast near a paddy. Pop it aggressively and hold on. You don’t need the heavy-duty tuna poppers here — dorado average 5–15 lbs, so a lighter popper that’s easier to work all day is ideal. The strikes are some of the most violent surface eats in fishing.

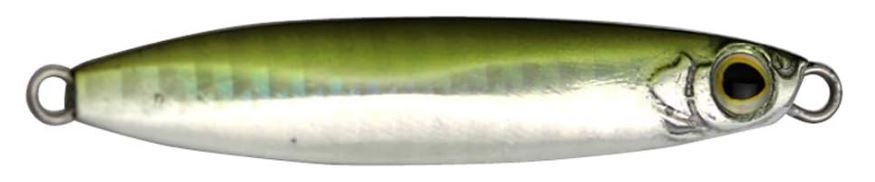
    Big Hammer Swimbaits

    Buy it on Amazon

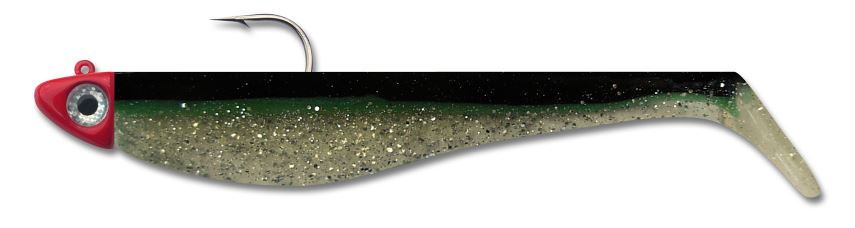
    A 4–6 inch soft plastic swimbait on a 1/2 to 1oz jig head is a simple, effective dorado lure that every angler on the boat can fish. The swimming tail action drives them crazy. Cast it past the paddy, let it sink a few feet, and retrieve with a moderate, steady pace. Green/yellow (imitating a small dorado — they’re cannibalistic), white, and sardine patterns work well. The advantage of soft plastics is they’re cheap — and dorado teeth chew through them fast, so you’ll go through several per session. Pack a bag of 20+. For more on soft plastic technique, see our swimbaits guide.

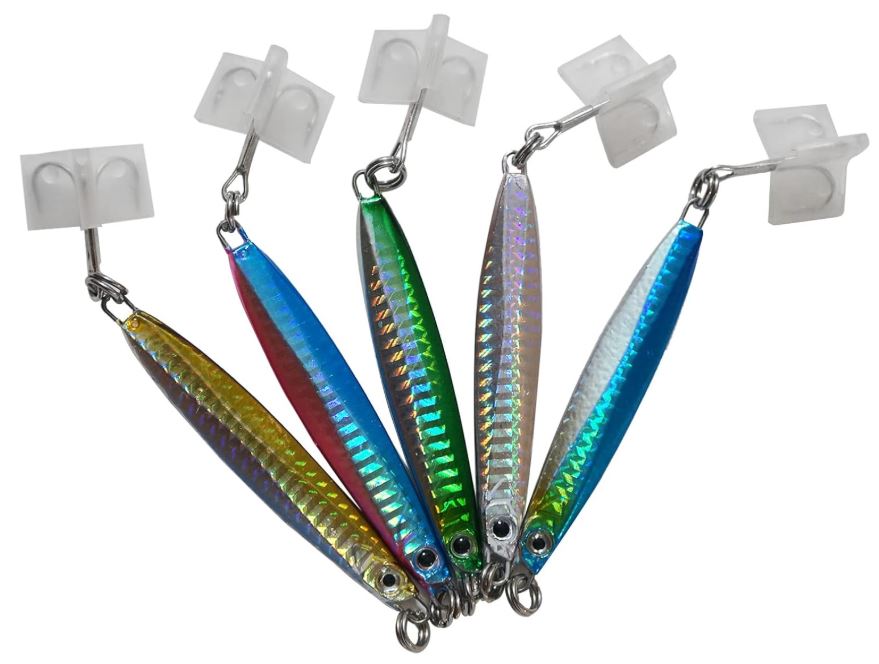
    Dr Fish Casting Spoons

    Buy it on Amazon

    A large, heavy casting spoon (2–3 oz) in chrome or gold produces a massive flash that draws dorado from distance. Particularly effective when the school is scattered and you need to attract fish to the boat from across a debris field. Cast it out, let it flutter down a few feet, then retrieve with an erratic pump-and-wind to create an injured baitfish action. The fluttering fall is often when the bite comes — dorado can’t resist a wounded, flashing target sinking away from them.

    Color Selection

    Dorado respond strongly to color — more so than most SoCal species. The top producers:

    • Green and yellow — imitates small dorado (they’re cannibalistic) and triggers a territorial response. The #1 dorado color.
    • Blue and white — sardine imitation, the universal SoCal choice that works on everything.
    • Chartreuse — high visibility in any water clarity, especially in off-color Baja water.
    • Pink / hot pink — surprisingly effective, especially on overcast days and in deeper water.
    • Natural / bone — clear water, bright days when flash alone is enough.
    • Root beer / orange — classic trolling feather color, works especially well in the morning.

    When in doubt, start with green/yellow — dorado chase their own kind, and this triggers the most aggressive, competitive response. If they’re not eating green/yellow (rare), switch to blue/white. Check the chlorophyll map for water clarity — in greener, dirtier water, go brighter (chartreuse, pink). In clean blue water, go natural or chrome.

    When to Throw What

    SituationLure TypeTop Pick
    Searching for paddies / covering groundTrolling spreadCedar plugs + feathers
    Dorado holding deep under paddyDeep-diving trollerRapala X-Rap Magnum
    Boiling on surface at paddySurface ironTady 45 or 4/0
    Multiple fish competing at paddyPopper80–120mm popper, green/yellow
    Keeping school at the boatSoft plastic swimbait5″ paddle tail, green/yellow
    Scattered school, need to attract fishCasting spoon2–3oz chrome spoon
    Picky fish, clear waterLight casting jigTady 4/0 (2.6oz) bone/chrome

    Keeping the School at the Boat

    The key to a big dorado session is keeping the school active and near the boat. Here’s the playbook:

    • Leave the first fish in the water. When you hook a dorado, don’t rush to boat it. Keep it swimming alongside the boat — its distress signals draw the rest of the school in close. A hooked dorado is the best chum you have.
    • Keep lures in the water. Have another angler casting while the first fish is being fought. Dead time with no lures in the water means the school drifts away.
    • Immediate re-cast. When you boat a fish, get another lure or bait back in the water immediately. Speed matters more than lure choice here — throw anything.
    • Chum when they fade. If the school starts to drift away, toss handfuls of bait (sardines or chunks) to keep them interested.
    • Don’t let the boat drift away from the paddy. Keep the boat positioned near the structure. If you drift too far, idle back to the paddy and restart.

    Gear for Dorado

    Dorado don’t require heavy gear — in fact, lighter gear means more fun and better lure action. A 20lb class setup handles most SoCal dorado perfectly.

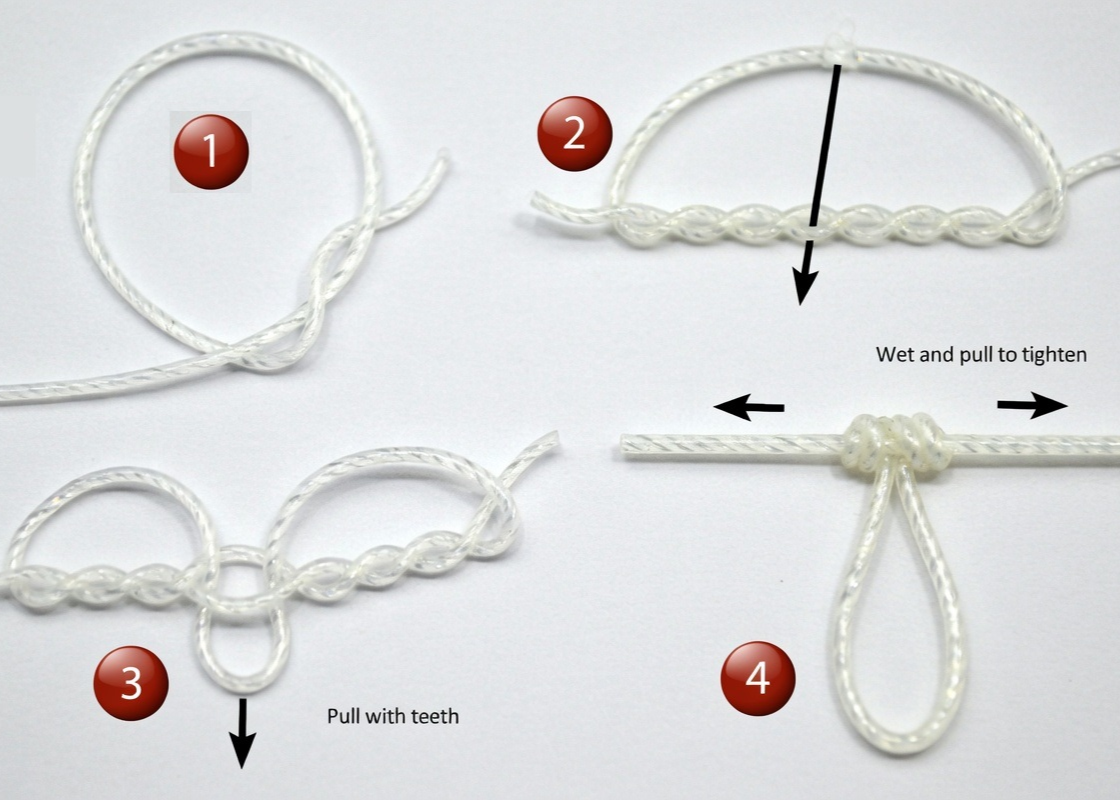
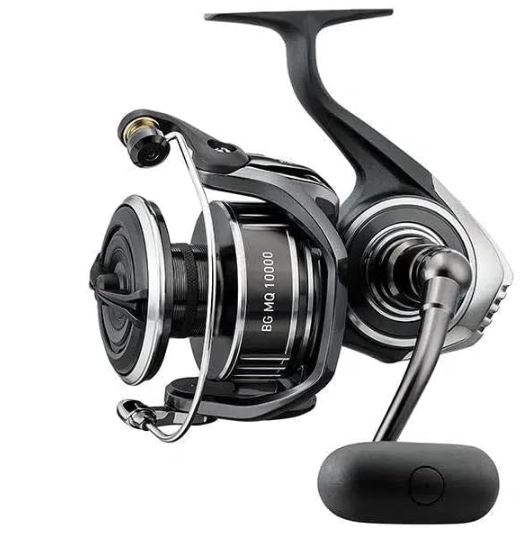
    Casting setup: A spinning reel in the 4000–6000 class — Shimano Saragosa 5000 or Daiwa BG MQ 4000 — on a 7-foot medium-heavy rod. Spool with 30lb braid and a 25lb fluorocarbon leader connected with an FG knot. This handles everything from soft plastics to surface iron.

    Iron setup: If you’re dedicated to throwing iron at paddies, step up to a Saragosa 6000 on an 8-foot rod for maximum casting distance. Same as your yellowtail iron setup — dorado just happen to eat it too.

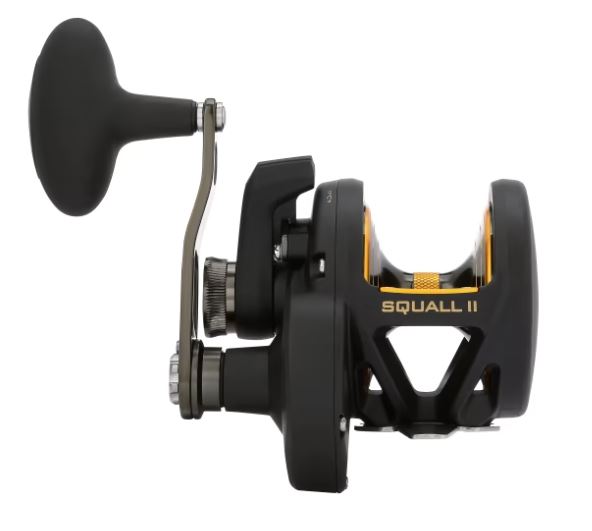
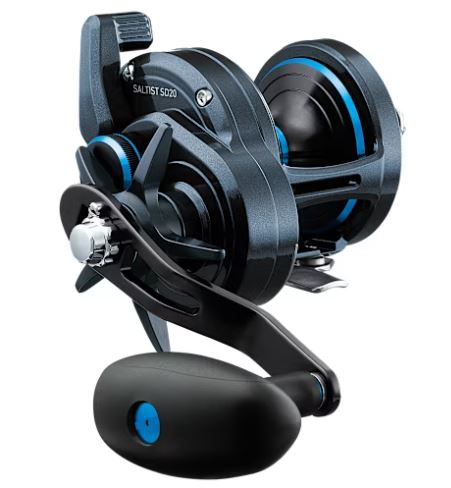
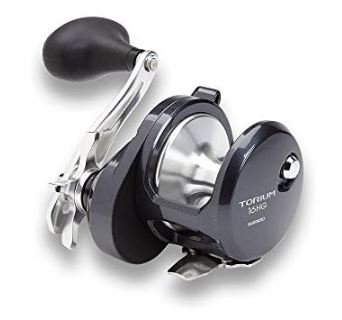
    Trolling setup: A 20–30lb class conventional reelPenn Squall II 25N or Shimano Talica 12 — on a 7-foot medium rod. Spool with 30–40lb braid or mono. Keep the drag light — dorado have soft mouths and heavy drag pulls hooks.

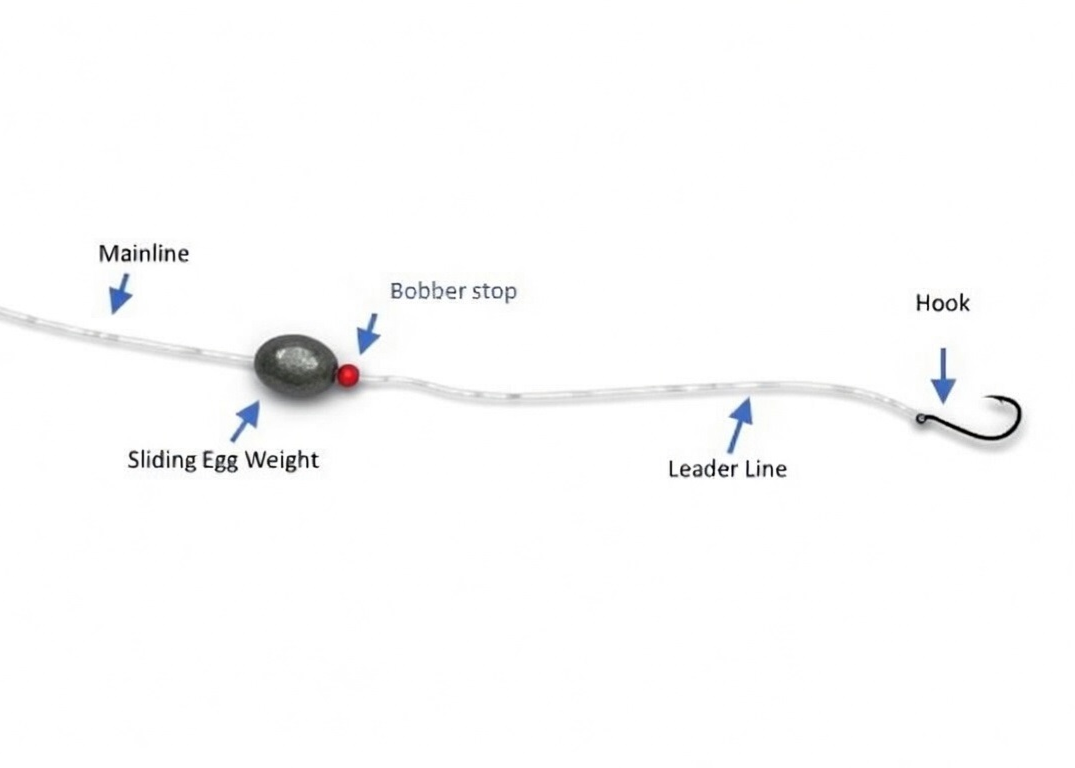
    Hooks: Use J hooks on trolling lures and jigs (you need the instant hookset). For live bait, circle hooks in 2/0–4/0 are better — dorado often swallow baits and circles prevent gut-hooking. See our hooks guide for specific sizes.

    For complete rod and reel pairing advice, see our best rod and reel combo guide, and check our fishing line guide for specific braid recommendations.

    Frequently Asked Questions

    What is the best all-around lure for dorado?

    For trolling: cedar plugs — cheap, simple, and they never stop producing. For casting at paddies: a Tady 45 surface iron in blue/white or green/yellow. If you could only bring two lure types on a dorado trip, those would be them.

    What color lure is best for dorado?

    Green and yellow is the #1 dorado color — it imitates small dorado and triggers aggressive, territorial strikes. Blue and white (sardine pattern) is the close #2 and works as a universal color for all SoCal species. When in doubt, start green/yellow.

    How do I find dorado in SoCal?

    Look for warm water (68°F+) on the SST chart, then locate kelp paddies and debris lines within that warm water. The chlorophyll map shows where bait is concentrating, and the fleet tracker shows where boats are finding dorado. Read our dorado temperature guide for seasonal patterns.

    Can I use the same lures for dorado and yellowtail?

    Yes — surface irons (Tady 45, Tady 4/0), poppers, and casting jigs all work on both species. Dorado tend to prefer brighter colors (green/yellow, chartreuse) while yellowtail lean toward blue/white and chrome. The main gear difference is you can fish lighter tackle for dorado since they average smaller.

    What rod and reel do I need for dorado?

    A 20lb class spinning setup is ideal — Saragosa 5000 or BG MQ 4000 on a 7-foot medium-heavy rod with 30lb braid. Lighter gear means more fun on dorado — they don’t require the 40lb class setups you’d use for bluefin tuna.

    What water temperature do dorado need?

    68°F and above — they’re a warm-water species that shows up in SoCal from midsummer through fall when offshore water heats up. The sweet spot is 72–78°F. Check our dorado temperature guide and the SST chart to find productive water.

    Do I need wire leader for dorado?

    No. Dorado have small, sandpaper-like teeth that abrade fluorocarbon slowly but won’t bite through it in a fight. A 25–30lb fluoro leader is plenty. Wire leader actually reduces strikes because dorado have good eyesight and feed in clear water. Retie your leader periodically if it’s getting chewed up.

    Plan Your Trip

    Dorado follow warm water and floating structure. Check conditions:

    Related Guides

    Tight lines!

  • Slider Rig for Live Bait Fishing

    Slider Rig for Live Bait Fishing

    The slider rig is one of the most effective live bait presentations for SoCal offshore fishing. It lets you adjust the depth your bait swims at without retying your rig — a critical advantage when fish are holding at a specific depth and you need to get your bait right in front of them. Whether you’re targeting yellowtail on a reef, white seabass in the kelp, or tuna under a kelp paddy, the slider rig gives you precise depth control with a natural bait presentation.

    What Is a Slider Rig?

    A slider rig uses a sliding sinker on your main line, held at a set depth by a bobber stop — a small knot or rubber stop that you can move up and down the line. The sinker slides freely down the line until it hits the bobber stop, and your bait hangs below on a fluorocarbon leader tied directly to the main line. When a fish takes the bait, the line pulls through the sinker freely — the fish feels no resistance, so it doesn’t drop the bait.

    The slider is different from a fly-line rig (which uses no weight and lets the bait swim freely) and a Carolina rig (which sits on the bottom). The slider suspends the bait at a specific depth in the water column — wherever you set the bobber stop.

    How to Set Up a Slider Rig

    What you need: A bobber stop, an egg sinker (1–3 oz), fluorocarbon leader (20–40lb), and a circle hook in 1/0–4/0 (or a J hook if the boat allows — see our hooks by species guide for size selection by target). That’s it — four components.

    On bobber stops: You have two options. A Rubber bobber stop are the best choice Buy on Amazon — they’re inexpensive, grip the line firmly, slide through rod guides cleanly, and are infinitely adjustable without retying anything. Keep a pack in your bag and you’ll always have them. Alternatively, if you’re on the water without one, a large enough knot in the main line can do the same job — a double overhand or a Palomar tag end left deliberately long will physically stop the sinker from sliding past it. It’s less adjustable than a proper stop but it works in a pinch.

    Step 1: Slide the bobber stop onto your main line at the depth you want your bait to fish. If you want your bait at 5 feet, measure 5 feet of line from your rod tip and place the stop there. The stop grips the line firmly enough to hold the sinker at depth but can be slid up or down with finger pressure when you need to adjust — no retying required.

    Step 2: Slide the egg sinker onto the line below the bobber stop. The sinker now floats freely on the line between the stop and the knot connecting your leader.

    Step 3: Tie your fluorocarbon leader directly to the end of your main line using a strong connection knot. The knot itself acts as a natural stop for the sinker — the sinker can’t slide past it. Cut 3–5 feet of leader.

    Step 4: Tie your hook to the end of the leader.

    The complete rig from top to bottom: main line → bobber stop → egg sinker (slides freely) → main line/leader knot → fluorocarbon leader → hook.

    How It Works

    When you drop the rig in the water, the sinker pulls the line down. The line slides through the sinker until the bobber stop reaches the sinker — at which point the rig stops descending. Your bait now hangs at the depth you set, swimming naturally on the leader below.

    When a fish takes the bait and swims away, the line pulls freely through the sinker. The fish feels only the weight of the bait and hook — no sinker resistance. This free-spool effect is why the slider rig gets more committed takes than fixed-weight rigs. By the time you engage the reel and come tight, the fish has the bait fully in its mouth and the circle hook rotates into the jaw corner.

    When to Use a Slider Rig

    Yellowtail on Structure

    When yellowtail are holding at a specific depth on a reef or kelp edge — say 40 feet down over 80 feet of water — a slider lets you put your bait right in their face. Set the stop at 40 feet, drop the rig, and your sardine swims at exactly the depth the fish are at. This is far more precise than fly-lining (where the bait goes wherever it wants) and more natural than a heavy dropper loop rig. When fish are off the bite on live bait, it’s also worth having a jig ready to drop — the slider and the iron cover the same fish from two angles. Check the yellowtail temperature guide for when they’re in range.

    White Seabass in the Kelp

    White seabass often suspend at mid-depth in the kelp canopy, feeding on squid. A slider rig with a live squid at 20–30 feet is the classic technique. The squid swims naturally in the kelp, the sinker keeps it at the right depth, and the free-slide lets the seabass eat without feeling resistance. This is how most trophy white seabass are caught from party boats and private boats during the spring spawning run.

    Tuna Under Kelp Paddies

    When tuna are holding 30–80 feet under a kelp paddy and won’t come to the surface, a slider rig gets your bait to their depth. Set the stop based on what the sonar shows, and let a live sardine or mackerel swim at the target depth. This is more effective than a fly-line (which won’t get deep enough) and more natural than a heavy sinker rig. On the same stop, keep a slow-pitch jig rigged and ready — when the slider bite slows, dropping a jig to the same depth often restarts it.

    Halibut Along Structure Edges

    When drifting along sandy bottom near structure, a slider rig set just above the bottom lets your bait swim naturally along the sand where halibut lie in wait. The free-slide ensures a halibut can pick up the bait and move without feeling the sinker.

    Dialing in the Details

    Sinker Weight

    Use the lightest weight that gets your bait to depth. In minimal current, 1 ounce is often enough. In moderate current, 2 ounces. In strong current or deep water (100+ feet), 3 ounces or more. Too much weight kills the bait faster and makes the presentation less natural. Too little and the bait never reaches the target depth.

    Leader Length

    3–5 feet is standard. Longer leaders give the bait more freedom to swim naturally but make the rig harder to manage on the boat. Shorter leaders keep better control but reduce the bait’s range of motion. For tuna in clear water, err longer (5 feet). For yellowtail on structure, 3 feet prevents the bait from swimming into the rocks.

    Adjusting Depth

    The biggest advantage of the slider rig is real-time depth adjustment. If the fish move shallower, slide the bobber stop down. If they drop deeper, slide it up. No retying, no re-rigging — just move the stop and drop again. This is where purpose-made bobber stops Buy on Amazon — really earn their keep over a knot: you can reposition them in seconds with two fingers while keeping your bait in the water. On a boat where conditions change throughout the day, that flexibility is invaluable.

    Slider Rig vs Other Live Bait Rigs

    RigBest ForLimitation
    Fly-lineSurface tuna, free-swimming baitNo depth control — bait goes where it wants
    Slider (this guide)Specific depth targeting, structure fishingSlightly more complex setup
    Carolina rigBottom fishing (halibut, surf)Bait stays on bottom only
    Dropper loopDeep bottom fish (rockfish)Fixed depth, less natural movement

    Gear Recommendations

    A 30lb conventional reel with a medium-heavy rod is the standard slider rig setup for yellowtail and white seabass. For tuna, step up to a 40lb+ setup. Braided main line is preferred because it’s thinner, allowing the line to slide more freely through the sinker, and the zero stretch gives you better sensitivity to feel the bite.

    Plan Your Trip

    Related Guides

    Tight lines!

  • Best 8-Foot Rods for Offshore Fishing

    Best 8-Foot Rods for Offshore Fishing

    An 8-foot rod gives you something a 7-footer can’t: casting distance. That extra foot of leverage translates to 15–20% more distance when throwing surface irons, and it gives live baits a longer, smoother launch that keeps them alive and swimming. The trade-off is less fish-fighting leverage (longer rod = more flex = fish has more room to work) and more fatigue over a full day. But for specific SoCal applications, an 8-footer is the right tool.

    ⚡ Quick Picks

    Best for iron/poppers: Shimano Grappler Type C 8’2″ H purpose-built for casting surface lures to pelagics.

    Best budget: Daiwa Proteus 8′ Heavy — capable iron rod at a fraction of the premium price.

    Best for live bait: Calstar Grafighter 800M — SoCal classic for lobbing big baits on long-range trips.

    Best for lighter popping: Shimano Grappler Type C 8’2″ MH — Easier to fish all day, handles school tuna and yellowtail.

    When You Need an 8-Foot Rod

    Surface iron casting: This is the primary reason SoCal anglers own 8-foot rods. When yellowtail or tuna are boiling on the surface 80+ yards from the boat, an 8-foot spinning rod loads a 4.5-ounce Tady 45 and launches it into territory a 7-footer can’t reach. Those extra yards of casting distance often determine whether you’re in the zone or falling short. See our complete surface iron guide and jigs vs irons vs poppers breakdown.

    Popper fishing: Same logic — poppers need the extra rod length to generate sufficient casting distance. The longer rod also gives you better leverage for working the popper’s action, because the increased rod travel per twitch creates a more pronounced pop.

    Live bait launching: On crowded party boats, getting your bait away from the boat and into clean water is critical. An 8-foot rod lets you lob a live sardine or mackerel farther from the boat with a gentler motion, reducing the chance of tearing the bait off the hook. A slider rig on a long rod is deadly for this.

    Long-range trips: Multi-day trips to the Baja banks and offshore islands often involve a mix of iron casting, popper work, and live bait — all situations where the 8-footer earns its spot in the rod rack. Don’t forget to check the overnight trip packing list.

    Best 8-Foot Rods for SoCal

    Best for Iron & Poppers: Shimano Grappler Type C 8’2″ Medium-Heavy (Spinning)

    Buy it on Amazon

    The Grappler Type C is Shimano’s purpose-built casting rod for offshore surface work — poppers, stickbaits, and heavy iron. The 8’2″ Heavy model is the sweet spot for SoCal iron fishing: it loads a Tady 45 or Salas 7X for maximum distance, and the Spiral-X / Hi-Power X blank construction makes it lighter and more rigid than anything else in this class. The fast action transmits your retrieve speed to the iron while the powerful butt section absorbs the shock of a tuna or yellowtail hitting at full speed. This is the rod SoCal tuna chasers are switching to. Pair with a Shimano Saragosa 6000 or Saragosa 14000 for heavier applications.

    Best for Lighter Popping: Shimano Grappler Type C 8’2″ Heavy (Spinning)

    Buy it on Amazon

    If the Heavy model feels like overkill — or if you’re casting lighter poppers and irons to yellowtail and school tuna rather than big bluefin — the MH version is significantly more fishable all day. Same Spiral-X / Hi-Power X construction, same 8’2″ casting distance, but a softer tip that loads easier with lighter lures and absorbs head shakes better during the fight. Better casting accuracy with lures in the 2–4 ounce range. If you’re mainly targeting yellowtail and yellowfin on iron, this is probably the better pick over the Heavy.

    Best Budget: Daiwa Proteus 8′ Heavy (Conventional)

    Buy it on Amazon

    A capable 8-foot iron rod at a fraction of the Grappler’s price. The graphite blank is a bit heavier than the Shimanos, and the guides aren’t quite as refined, but it casts irons well and has enough backbone to fight yellowtail and school tuna. A great entry-level iron rod or a backup to keep in the rod rack. If you’re trying iron fishing for the first time and don’t want to invest $300+ in a rod you might not love, start here. Pairs well with a Daiwa BG MQ 4000 or Saragosa 5000 for a complete budget setup.

    Best for Live Bait: Calstar Grafighter 800M (Conventional)

    Calstar Grafighter live bait rods

    An 8-foot conventional rod for live bait might seem unusual, but for long-range trip anglers, this setup shines. The extra length lets you lob big baits — sardines, mackerel, even small skipjack — farther from the boat with a smooth, controlled cast. The medium power with a moderate-fast action provides a soft tip that keeps baits alive and a progressive backbone for fighting big fish. A slider rig on a Calstar 800M is a proven long-range killer. Paired with a Shimano Talica 12 for yellowtail or a Talica 16 for tuna, this is a serious long-range tool.

    8-Foot vs 7-Foot: When to Grab Which

    SituationBest LengthWhy
    Surface iron casting8 footMaximum casting distance to reach boiling fish
    Popper fishing8 footBetter lure action and casting distance
    Party boat bait fishing7 footBetter fish-fighting leverage in tight quarters
    Vertical jigging7 foot or shorterShorter rod = better jigging mechanics
    Tuna on heavy gear5’6″–6’6″Maximum leverage for big fish straight below
    Long-range trip (one rod)7 footBest compromise of versatility and power
    Long-range trip (two rods)7′ + 8′7′ for bait, 8′ for casting — ideal combo

    Gear Pairings for 8-Foot Rods

    8-foot rods in this class pair primarily with spinning reels for casting applications. A 6000–14000 class spinning reel with 20+ pounds of drag and fast retrieve (6.0:1 or higher) matches the rod’s intended use. Spool with 40–65lb braid — the thinner diameter of braid maximizes the casting advantage that the longer rod provides. See our line guide for specific brand picks.

    ApplicationRodReelLine
    Heavy iron / bluefinGrappler Type C 8’2″ HSaragosa 14000 or Twin Power 600065lb braid / no leader
    Lighter iron / yellowtailGrappler Type C 8’2″ MHSaragosa 600050lb braid / no leader
    Budget ironProteus 8′ HSaragosa 5000 or BG MQ 400040lb braid / no leader
    Live bait long-rangeCalstar 800MTalica 12 or Talica 1640lb braid / 30lb fluoro leader

    For the conventional 8-foot bait rod (Calstar 800M), pair with a 30lb lever drag reel for yellowtail or a 40lb two-speed for tuna. Connect braid to leader with an FG knot.

    See our complete rod and reel combo guide for detailed pairing recommendations across all applications.

    Frequently Asked Questions

    Do I need an 8-foot rod for SoCal fishing?

    Not as your first rod — a 7-footer is more versatile and handles 80% of offshore situations. An 8-foot rod is your second rod, specifically for casting iron and poppers when fish are boiling out of range. If you fish iron regularly, it’s essential.

    What reel pairs best with an 8-foot iron rod?

    A 6000–14000 class spinning reel. The Shimano Saragosa 6000 is the most popular pairing for yellowtail iron, and the Saragosa 14000 or Stella SW 10000 for heavier tuna work. See our 30lb reel guide and 40lb reel guide for complete reviews.

    Should I get the Heavy or Medium-Heavy Grappler?

    Heavy if you’re throwing 4+ ounce iron to bluefin and big yellowtail. Medium-Heavy if you’re casting 2–4 ounce poppers and lighter iron to yellowtail and school tuna — it’s easier to fish all day and more forgiving on the cast.

    Can I use an 8-foot rod for bait fishing?

    It works for live bait launching (the Calstar 800M is specifically built for this), but it’s not ideal for general party boat bait fishing. A 7-foot rod gives you better leverage for fighting fish and is more manageable on a crowded rail.

    What line should I use for iron casting?

    40–65lb braided line with no leader for maximum distance. Some anglers add a short 40lb fluoro topshot for abrasion resistance, but most SoCal iron fishermen go straight braid. See our line guide for specific brands.

    Graphite or fiberglass for an 8-foot rod?

    Graphite for casting applications — you need the rod to be light enough to cast repeatedly all day, and graphite’s stiffness translates to better lure action. The Calstar bait rod uses a composite blank for shock absorption, which makes more sense for a rod that fights fish rather than casts lures.

    Plan Your Trip

    Check conditions before heading offshore:

    Related Guides

    Tight lines!

  • What to Bring on an Overnight Fishing Trip – Tips from experienced SoCal anglers.

    What to Bring on an Overnight Fishing Trip – Tips from experienced SoCal anglers.

    Your first overnight fishing trip out of San Diego is a rite of passage — 1.5 to 3 days on the water targeting yellowtail, tuna, dorado, and whatever else swims into range at the Coronado Islands, offshore banks, or the Baja coast. The fishing can be incredible, but the experience lives or dies on your preparation. Forget the right gear and you’ll spend the trip borrowing, improvising, or sitting out the best bites. Pack smart and you’ll be the one with a full sack while everyone else scrambles.

    This guide covers everything you need for overnight and multi-day trips out of San Diego landings like H&M, Fisherman’s Landing, and Point Loma Sportfishing.

    Tackle and Gear

    Rods and Reels

    Bring at least two setups — ideally three. Rods break, reels fail, and you don’t want to miss the bite because your only outfit went down. The standard overnight quiver:

    Setup 1 — Bait rod (25–30lb class): Your workhorse. A 7-foot medium-heavy rod paired with a lever drag conventional reel (Penn Squall II, Shimano Talica 12). Spooled with 40lb braid and rigged with 30lb fluorocarbon leader. This handles yellowtail, white seabass, school tuna, and everything else on live bait.

    Setup 2 — Iron / casting rod (30–40lb class): An 8-foot heavy spinning rod with a 6000–8000 spinning reel spooled with 50lb braid. For surface iron, poppers, and casting to breaking fish. Also doubles as a heavy live bait rod.

    Setup 3 (optional but recommended) — Heavy outfit (40lb+ class): If the trip targets bluefin tuna, bring a 40lb+ conventional setup. A 6-foot heavy rod with a two-speed reel (Shimano Talica 16) and 65lb braid. You may not need it, but if a 100-pound bluefin shows up and you don’t have it, you’ll regret it forever.

    Terminal Tackle

    Pack more than you think you need. Overnight trips burn through tackle fast, and the boat’s tackle shop charges premium prices.

    Hooks: The circle vs. J hook decision matters on overnights — circles are standard for live bait on most SoCal boats, J hooks shine for soaking chunk and working certain jig rigs. Bring both: circle hooks in 1/0, 2/0, 3/0, and 4/0 (at least 10 of each), plus a handful of J hooks in 2/0–4/0. Treble hooks to replace worn ones on your surface irons.

    Leader material: Fluorocarbon in 20lb, 25lb, 30lb, and 40lb — at least 25 yards of each. You’ll retie leaders constantly, especially after catching fish or hitting structure. Lighter fluoro for line-shy bluefin; heavier for dorado and yellowtail in kelp.

    Sinkers: Egg sinkers in 1oz, 2oz, and 3oz for slider rigs. A few torpedo sinkers in 6–8oz for dropper loop bottom fishing if the trip includes rockfish stops.

    Swivels: Barrel swivels in size 3 and 5. Snap swivels for quick jig changes.

    Jigs: This is where overnights get expensive fast — build your kit before you leave. For tuna, the Shimano Butterfly Flat-Fall (160g) and Tady 45 are the workhorses; our best tuna jigs and irons guide breaks down exactly what to pack by size and color for SoCal conditions. For dorado at the paddies, lighter irons and feathers shine — see our best dorado lures guide for the specific setups. If the trip includes trolling legs between spots, our tuna trolling lures guide covers the cedar plugs and feathers worth having in your kit. At minimum bring: 2 Tady 45s (blue/white and scrambled egg), 2 Flat-Falls (160g, different colors), and 1 lighter iron (Salas 7X). If you have poppers, bring one. See our jigs vs irons vs poppers guide for the full rundown on when to throw what.

    Yellowtail iron: Don’t neglect the yellows — a Tady 4/0 or Tady Heavy in blue/white is your go-to when the yellows are stacked at the Coronados or 9-Mile Bank. See the best yellowtail jigs guide for the full kit.

    Extras: Bead assortment, bobber stops (for slider rigs), a few pre-tied dropper loop rigs, split rings and solid rings for jig hooks, and a small hook file to sharpen points.

    Tools

    A pair of braided line scissors (regular scissors chew braid poorly), long-nose pliers for hook removal, a knife for cutting bait, and a small screwdriver for reel adjustments. A headlamp is essential — night fishing, early morning rigging, and navigating the dark bunk room all require one. Bring a spare battery.

    Clothing

    The ocean at night is cold, even in summer. Dress in layers and pack for conditions 20°F colder than the daytime forecast.

    Base layer: Moisture-wicking synthetic shirt and pants. Avoid cotton — it gets wet, stays wet, and you’ll freeze.

    Mid layer: Fleece jacket or hoodie. This is your comfort layer for nighttime and early morning.

    Outer layer: A waterproof jacket is non-negotiable. Spray, rain, and wave splash will find you. A quality fishing rain jacket with sealed seams keeps you dry and fishing while everyone else retreats to the cabin. Waterproof pants are optional for summer trips but essential in winter and spring.

    Footwear: Deck boots or waterproof shoes with non-marking soles. The deck is wet, slimy, and slippery — sandals and regular sneakers are a recipe for a fall. Bring a dry pair of socks in a ziplock bag for sleeping.

    Sun protection: Long-sleeve sun shirt (UPF 50), wide-brim hat or cap with neck flap, quality polarized sunglasses (essential for seeing fish and reading the water), and reef-safe sunscreen for face and hands. The sun on the water is brutal — burns happen fast and make the second day miserable.

    Gloves: Fingerless fishing gloves protect your hands when handling fish, tying knots with braid (which cuts bare skin), and fighting fish on the rail. Your hands will thank you on day two.

    Food and Drink

    Most overnight boats provide meals, but they’re basic and the timing doesn’t always align with when you’re hungry. Bring supplemental food:

    Water: At least 2 liters per day. Dehydration sneaks up on you, especially in the sun and wind. The boat has water, but having your own ensures you stay hydrated without leaving the rail during a bite.

    Snacks: Energy bars, trail mix, beef jerky, fruit, crackers — anything that’s easy to eat with one hand while keeping an eye on your rod. Avoid anything that needs refrigeration or creates a mess.

    Caffeine: Coffee is usually available on the boat, but bring your own if you’re particular. Energy drinks or caffeine gummies help on early morning bites when you’ve been up since 2 AM.

    Avoid: Alcohol in excess (dehydration + seasickness + heavy machinery = bad combo), heavy/greasy food if you’re prone to motion sickness, and anything that needs heating.

    Health and Comfort

    Seasickness prevention: If you have any history of motion sickness, take precautions before you leave the dock. Prescription scopolamine patches (applied behind the ear 8+ hours before departure) are the most effective. Over-the-counter options: Bonine (meclizine) taken the night before and morning of, or ginger chews as a supplement. Do not wait until you feel sick — by then it’s too late.

    Sleep: Bring a sleeping bag or warm blanket for the bunk. The bunks are narrow, the boat rocks, and the engine drones — earplugs and an eye mask dramatically improve sleep quality. Even 3–4 hours of solid sleep makes a huge difference on day two.

    Personal items: Toothbrush, any medications, small towel, hand sanitizer, and lip balm with SPF. A small dry bag keeps electronics and valuables safe from water.

    Packing Checklist

    CategoryItems
    Tackle2–3 rod/reel setups, circle & J hooks (multiple sizes), fluorocarbon leader (20–40lb), sinkers, swivels, tuna jigs, yellowtail irons, dorado lures, trolling feathers, poppers, pre-tied rigs, bobber stops, beads, split rings
    ToolsBraid scissors, pliers, knife, headlamp + spare battery, hook file, small screwdriver
    ClothingBase layer, fleece mid layer, waterproof jacket, deck boots, sun shirt, hat, polarized sunglasses, sunscreen, fingerless gloves, dry socks
    Food2+ liters water/day, energy bars, jerky, trail mix, fruit, caffeine source
    HealthSeasickness meds (take early!), prescription medications, lip balm SPF
    ComfortSleeping bag/blanket, earplugs, eye mask, small towel, hand sanitizer
    StorageSoft-sided bag (no hard suitcases — bunk space is tight), dry bag for electronics, ziplock bags for phone and wallet

    Before You Leave

    The night before your trip, check conditions on fishing-reports.ai so you know what to expect and can adjust your tackle accordingly:

    Related Guides

    Talk to the landing when you check in — they’ll tell you what’s been biting and recommend tackle. The deckhands on SoCal boats are some of the most knowledgeable fishing guides anywhere. Listen to them, tip them well, and you’ll have a trip to remember.

    Tight lines!

  • Surface Iron Fishing Guide for Southern California

    Surface Iron Fishing Guide for Southern California

    Surface iron fishing is one of the most exciting and uniquely Southern California techniques in all of saltwater fishing. There’s nothing quite like watching a boil of yellowtail or bluefin erupt on the surface, whipping a heavy chrome jig into the chaos, and feeling a fish hammer it on the retrieve. It’s raw, visual, and demands skill — which is why it’s become a badge of honor among SoCal anglers.

    This guide covers everything you need to know: the right irons, how to cast them, retrieval techniques, gear setup, and when conditions are right for throwing iron.

    What Is Surface Iron Fishing?

    Surface iron refers to heavy metal jigs — typically 3 to 7 ounces of chrome, lead, or zinc — cast to breaking fish and retrieved rapidly across the surface. The iron skips, wobbles, and darts, imitating a panicked baitfish fleeing a school of predators. The visual nature of the strikes is what hooks anglers for life — fish explode on the iron at the surface in full view.

    The technique originated in SoCal in the mid-20th century, and brands like Tady, Salas, and Jri are local legends. While jig fishing exists everywhere, the surface iron tradition — heavy jigs, fast retrieves, brutal strikes — is a distinctly Southern California thing.

    Essential Surface Irons

    You don’t need 50 different irons. A handful of proven models in the right sizes covers every situation. See our best yellowtail jigs guide and best tuna jigs guide for more detail on each model.

    Tady 45 (4.5 oz): The all-around standard. Casts well, has a wide wobble, and catches everything. If you own one iron, own this one. Blue/white, scrambled egg, and mint are the essential colors.

    Salas 7X (3 oz): The finesse option. Lighter weight matches smaller bait profiles. Great when fish are picky or the bait is small. Chrome and blue/white are reliable.

    Tady A1 (6 oz): The distance iron. When you need to reach fish that are boiling far from the boat, the extra weight gets it there. Also produces a deeper, wider action that big fish prefer. Doubles as a tuna iron.

    Salas 6X (4 oz): A narrower profile than the Tady 45, the 6X has a tighter, faster wobble. Excellent when fish want a slimmer bait profile. Many anglers keep both the 45 and 6X and switch between them until the fish tell them which one they want.

    Tady 9 (3.5 oz): A compact, heavy-for-its-size jig that sinks fast and casts like a bullet. Great for wind and when you need to get the iron down quickly before retrieving on the surface.

    Hooks: Replace the factory trebles on every iron you buy with Owner ST-66 trebles in 2/0–3/0. Factory hooks are made from soft wire that straightens on yellowtail and tuna. The ST-66 is 4X strong — it’s the single most important upgrade you can make. See our hooks by species guide for the right treble size for each iron.

    Gear Setup for Surface Iron

    Iron fishing demands specific gear. A spinning reel is preferred for casting distance — the open spool design lets you launch irons much farther than a conventional reel, which matters when fish are boiling 80+ yards away.

    Reel: Spinning reel in the 6000–10000 size class with a fast retrieve ratio (6.0:1 or higher). You need to burn the iron back fast, and a high-speed reel does the work. The reel also needs a strong, smooth drag — yellowtail will smoke you in the kelp if your drag hesitates. See our yellowtail reel guide and bluefin reel guide for specific models.

    Rod: 7–8 foot medium-heavy to heavy power with a fast action. You need the backbone to launch heavy irons and the stiffness to work them aggressively on the retrieve. A soft rod kills the iron’s action. A good iron rod has a moderate butt section for leverage and a fast tip for working the jig. See our 7-foot and 8-foot rod guides for specific models.

    Line: 40–65lb braided line. Braid’s thin diameter maximizes casting distance, and the zero stretch transmits every jig movement and every bite directly. No leader needed for most iron fishing — the speed of the retrieve and the flash of the iron means fish commit before they can inspect the connection. Some anglers add a short (3-foot) 40lb fluorocarbon leader for extra-clear water or line-shy bluefin. See our fishing line guide for specific braid recommendations and our knots guide for the FG knot connection.

    For complete rod and reel pairing advice, see our best rod and reel combo guide.

    How to Cast Surface Iron

    Casting a 4.5-ounce jig is different from casting a lure. The weight is substantial, and a bad cast can be dangerous to everyone on the boat.

    The overhead cast: Point the rod at the fish, open the bail, and load the rod behind you with a smooth, controlled backswing. Drive forward with your body and arms together — the power comes from your hips and core, not just your arms. Release the line at about 45 degrees above the horizon. The jig should fly in a tight arc, not wobble or helicopter. If it helicopters, you’re not loading the rod smoothly enough.

    The sidearm cast: Used when the wind is at your back or when you need a low trajectory to reach fish just beyond casting range. Same mechanics but on a horizontal plane. Keep the rod tip low and the arc tight.

    The lob: For shorter distances, a simple underhand lob gets the iron out without the drama of a full cast. Useful when fish pop up close to the boat unexpectedly.

    Safety: Always look behind you before casting. A 4.5-ounce chunk of metal traveling at high speed will seriously injure anyone in its path. Call out “casting!” so people around you know to duck. Keep your swing controlled — wild, uncontrolled casts are dangerous and inaccurate.

    Retrieval Techniques

    The speed burn: The most common surface iron retrieve. Crank the reel as fast as you can, keeping the rod tip low and the iron skipping on or just below the surface. The speed triggers a reaction strike from competitive fish. This is exhausting — your forearm will burn after a few casts — but it’s what catches fish in a frenzy.

    The yo-yo burn: Retrieve fast, but periodically drop the rod tip and let the iron sink 5–10 feet before burning it back to the surface. This mimics a baitfish trying to dive for safety and then being forced back up. The change of direction often triggers a strike from following fish that won’t commit to a straight retrieve.

    The slow roll: A moderate-speed retrieve that keeps the iron wobbling just below the surface. Used when fish are boiling lazily or when the bite is slow. Less dramatic but can be more effective when fish aren’t in full attack mode.

    The dead stick: Cast the iron past the boil, let it sink to the depth you think the fish are at, and then begin a medium-speed retrieve. Effective when fish are feeding subsurface and not breaking the top. Watch for subtle taps.

    When to Throw Iron

    Surface iron is at its best when fish are actively feeding on the surface. Look for these signs: boiling water (fish crashing bait on the surface), birds diving and circling, bait balls getting pushed to the surface, and meter marks showing fish high in the water column.

    In SoCal, the best iron fishing happens from late spring through fall when yellowtail and bluefin tuna push into the warm water that moves in. The Coronado Islands, La Jolla kelp, Catalina, and San Clemente Island are legendary iron grounds. Check the SST chart for warm water edges where bait concentrates and predators follow.

    Surface Iron vs Other Techniques

    SituationBest Approach
    Fish actively boiling on surfaceSurface iron (speed burn)
    Fish showing but not committingSwitch to lighter iron or poppers
    Fish deep on structureYo-yo jig or flat-fall
    No surface activity, fish on meterLive bait (fly-line or slider)
    Wind killing your cast distanceHeavy iron (Tady A1) or switch to bait

    For a complete comparison of all the artificial techniques, see our jigs vs irons vs poppers guide.

    When iron isn’t working: If fish are boiling but refusing iron, try poppers — the surface commotion triggers a different response than the flash-and-speed of iron, and fish that have been seeing the same Tady 45 from every angler on the boat will sometimes eat a popper without hesitation. See our dorado lures guide and tuna lures guide for other casting options including swimbaits and spoons.

    Plan Your Trip

    The best iron bite requires warm water, bait, and active fish. Check conditions:

    Related Guides

    Tight lines!

  • How to tie a Dropper Loop Rig for Saltwater Fishing

    How to tie a Dropper Loop Rig for Saltwater Fishing

    The dropper loop rig is the workhorse of SoCal bottom fishing. If you’ve ever fished a party boat targeting rockfish, sheephead, or whitefish, you’ve seen this rig on every rail. It’s simple, effective, and lets you fish multiple baits at different depths — which is exactly what you want when you’re working structure and don’t know exactly where the fish are sitting.

    This guide covers how to tie the dropper loop knot, how to set up a complete rig, and when to use it versus a Carolina rig or other bottom rigs.

    What Is a Dropper Loop Rig?

    A dropper loop rig places one or more hooks on short loops that extend perpendicular to your main line, with a weight at the bottom. The hooks sit above the weight, suspending your baits at specific depths off the bottom. This design is different from a Carolina rig where the bait sits on the bottom — a dropper loop keeps baits up in the water column where species like rockfish, whitefish, and sheephead actively feed.

    Most SoCal dropper loop rigs run two hooks — one about 12 inches above the sinker and another 12–18 inches above that. This covers a band of water column and doubles your chances of finding where the fish are holding.

    How to Tie the Dropper Loop Knot

    Step 1: Form a loop in your line where you want the hook to sit. Make the loop about 4–5 inches across — this will become the arm that holds your hook away from the main line.

    Step 2: Pinch the crossing point with one hand. With the other hand, twist the loop around itself 6–8 times. The more twists, the stiffer the loop arm will be (which is what you want — it keeps the hook from tangling with the main line).

    Step 3: Find the center of your twists and push the top of the loop through the middle opening. Pull it through firmly.

    Step 4: Moisten the knot and pull both ends of the main line to tighten. The loop should stand out perpendicular to the line. If it lays flat against the line, you didn’t use enough twists — retie with more wraps.

    Step 5: Clip one side of the loop to create a single tag end, then tie your hook to this tag using a Palomar knot. Alternatively, you can pass the hook directly through the uncut loop — this lets you change hooks quickly without retying. See our complete knot guide for step-by-step instructions on the Palomar and other terminal connections.

    Repeat the process at your second hook position. Then tie a sinker to the bottom of the rig using a simple overhand loop or a snap swivel for quick weight changes.

    Complete Rig Setup

    Main line: 30–50lb fluorocarbon or heavy monofilament. Many anglers pre-tie dropper loop rigs on heavy mono and attach them to their braided main line with a swivel. This lets you swap entire rigs quickly if one gets tangled or cut off on the rocks. See our fishing line guide for specific brand recommendations by pound test.

    Hook 1 (lower): Positioned 10–14 inches above the sinker. Use a circle hook in 2/0–4/0 for rockfish and whitefish, or a J-hook if you prefer setting the hook manually. The Owner Mutu Circle (5163) in 2/0–3/0 is the go-to for dropper loop rigs — the medium wire handles rockfish and sheephead without straightening, and the circle design means jaw-corner hookups for easy releases on short fish. The loop arm should be 3–4 inches long — long enough to keep the bait away from the main line but short enough to avoid tangles.

    Hook 2 (upper): Positioned 12–18 inches above the first hook. Same hook size and style. This hook fishes higher in the water column, which often catches a different species than the lower hook.

    Sinker: 4–16 ounces depending on depth and current. For party boat fishing in 150–300 feet of water, 8–12 ounces is standard. For shallower rockfish spots (50–100 feet), 4–6 ounces works. Use a torpedo or bank sinker — their streamlined shape cuts through current better than round sinkers.

    For a complete breakdown of hook models, wire weights, and sizes for every SoCal bottom species, see our hooks by species guide.

    Best Baits for a Dropper Loop Rig

    Squid strips are the all-time top bait for dropper loop rigs — tough, stays on the hook, and catches everything. Cut a squid into strips about 3–4 inches long and 1/2 inch wide. Thread the hook through one end so the strip trails behind.

    Other top baits: shrimp (whole or pieces) for sheephead, sardine chunks for rockfish, and live anchovies when you can get them. Tip: double up by putting squid on one hook and shrimp on the other — you’ll quickly learn what the fish prefer that day.

    Tackle Setup

    Bottom fishing with a dropper loop doesn’t require the heavy offshore gear you’d use for tuna, but you still need enough backbone to haul fish up from deep structure:

    Rod: A 7-foot medium to medium-heavy rod for most party boat bottom fishing. Enough backbone to lift 8–12 ounces of lead plus a fish from 200 feet, with enough sensitivity to feel the bite.

    Reel: A 20lb class conventional reel or 30lb class for deeper water. Conventional reels are preferred over spinning reels for dropper loop fishing because the vertical drop-and-retrieve is easier to control.

    Line: 30–40lb braid as mainline with your pre-tied dropper loop rig attached via a barrel swivel. Braid’s zero stretch lets you feel bites clearly from 200+ feet, and its thin diameter cuts through current better than mono. See our braid vs fluorocarbon guide for why braid mainline with a mono/fluoro rig is the standard setup.

    Hooks: Circle hooks in 2/0–4/0 are the best choice for dropper loops — jaw-corner hookups, fewer gut-hooks, and better survival on released fish. The Owner Mutu Circle (5163) and Owner SSW Circle (5178) are both excellent for bottom fishing. See our hooks by species guide for specific models and sizes for rockfish, sheephead, and whitefish.

    For complete rod and reel pairing advice, see our best rod and reel combo guide.

    When to Use a Dropper Loop vs Other Rigs

    SituationBest RigWhy
    Bottom fish on structure (rockfish, sheephead)Dropper loopBaits suspended above rocks, less snags
    Halibut on sandCarolina rigBait right on the bottom where halibut ambush
    Surf fishingCarolina rigSlides with current, natural presentation
    Deep water party boat (200+ ft)Dropper loopTwo baits cover more water column
    Tuna on live baitFly-line rigFree-swimming bait, no weight
    Yellowtail on live baitSlider rigAdjustable depth, natural swim

    Tips for Fishing the Dropper Loop

    Drop to the bottom, then reel up 2–3 cranks. This lifts your baits into the active feeding zone and reduces snags. When you feel a bite, don’t jerk — if you’re using circle hooks, just reel tight and the hook will set itself. With J-hooks, a moderate lift of the rod is enough. Big hooksets pull the bait away from the fish more often than not.

    If you’re getting bit on one hook consistently but not the other, adjust. If the lower hook is producing, the fish are tight to the bottom — consider shortening the distance between your sinker and first hook. If the upper hook is hot, the fish are suspended — add a third dropper loop even higher.

    Pre-tie several rigs at home and store them on a rig winder. On the boat, tangles happen — having backups ready means you spend more time fishing and less time retying. Use different hook sizes on each rig so you can match what the fish want that day.

    Plan Your Trip

    Check conditions before you head out:

    Related Guides

    Tight lines!

  • Best Jigs and Irons for Yellowtail Fishing

    Best Jigs and Irons for Yellowtail Fishing

    Yellowtail are arguably the most exciting fish to catch on iron in Southern California. When they’re crashing bait on the surface at the Coronado Islands or stacked up on a reef at Catalina, having the right jig in your arsenal makes all the difference. The wrong iron means missed strikes and short fish. The right one means bent rods and screaming drags.

    This guide covers the three main categories of yellowtail jigs — surface irons, yo-yo (vertical) jigs, and casting jigs — plus the specific models that consistently produce in SoCal waters. If you’re still dialing in your yellowtail setup, check our best reel for yellowtail guide first.

    ⚡ Quick Picks by Situation

    Surface boils: Tady 45 (2.9 oz) — the SoCal gold standard, nothing beats it.

    Finesse surface: Tady 4/0 (2.6 oz) — lighter, tighter action for picky fish.

    Distance / wind: Nomad Design Slidekick (4.25 oz) — aerodynamic, casts a mile.

    Deep structure: Shimano Butterfly Flat-Fall — the fall is the bite.

    Heavy yo-yo: Tady 4/0 Heavy (6 oz) — gets down fast, stays in the zone.

    Surface Irons

    Surface iron fishing is a SoCal tradition. When yellowtail are boiling on the surface, casting a heavy metal jig into the melee and burning it back is one of the most adrenaline-pumping techniques in fishing. The iron skips and darts across the surface, imitating a panicked baitfish, and the strikes are explosive. For a full breakdown of when to throw iron vs other lure types, see our jigs vs irons vs poppers guide.

    Tady 45 (2.9 oz / 6.5″)

    Buy it on Amazon

    The Tady 45 has been catching yellowtail in SoCal longer than most of us have been fishing, and nothing has replaced it. The key for yellows is the retrieve — don’t burn it at full tuna speed. Yellowtail will track a Tady 45 for 20 feet before committing, and too fast a retrieve pulls it away from trailing fish. A moderate-fast pace — enough to look like a fleeing sardine, slow enough for followers to close — is the sweet spot. Blue/white and scrambled egg are the consistent yellowtail colors at the Coronados and Catalina. The 2.9oz weight loads a 7-foot rod cleanly for all-day casting without shoulder fatigue. Replace the factory treble with an Owner ST-36 in 1/0 or 2/0 — strong enough for yellows without the extra weight of a tuna treble that can affect the action.

    Tady 4/0 (2.6 oz / 5.74″)

    Buy it on Amazon

    The 4/0 is the yellowtail finesse iron — reach for it when you’re watching fish track the 45 without committing. The smaller profile matches anchovies and small sardines more closely, which is often exactly what yellows are keyed on when they’re being selective. Slow the retrieve slightly from your 45 pace — the tighter, faster wobble of the 4/0 at moderate speed triggers commits from fish that have already refused the bigger iron. Chrome and bone are the go-to colors when the bite is tough and fish are line-shy. It doesn’t cast as far as the 45, so keep it for situations where yellows are within range and picky rather than distant and aggressive.

    Nomad Design Slidekick Surface Iron (4.25 oz)

    Buy it on Amazon

    The Slidekick earns its spot in the yellowtail bag specifically on windy days and when fish are boiling at the outer edge of casting range. A Santa Ana headwind drops a Tady 45’s distance by 30 yards or more — the Slidekick’s aerodynamic 4.25oz profile punches through that and lands where the fish are. At the Coronado Islands during a morning yellowtail feed, those extra yards are often the difference between in the school and falling short. The dart-and-slash action differs from the Tady’s wide wobble, which can trigger aggressive yellows that have already ignored the standard irons. Reach for it second, not first — the Tady 45 is still the opener — but when distance or wind is the problem, the Slidekick solves it.

    Yo-Yo (Vertical) Jigs

    When yellowtail are holding deep on structure — reefs, wrecks, rock piles, kelp edges — yo-yo jigging is how you get them to bite. Drop the jig to the bottom, then work it back up with sharp, aggressive rod pumps. The erratic darting action triggers reaction strikes from fish that might ignore a bait drifting by.

    Tady 4/0 Heavy Yo-Yo Iron (6 oz)

    Buy it on Amazon

    The go-to deep structure iron for yellowtail. When fish are on the meter at the 9-Mile Bank or along deep kelp edges at 80–150 feet and won’t come up, the Heavy’s 6oz gets down to them fast and stays in the zone even in moderate current. The yo-yo technique for yellows is aggressive — sharp upward rod pumps followed by a controlled fall back to depth. Yellows on structure eat it on both the rise and the fall, so watch your line during the drop for a tick or sudden slack that signals a bite you’d otherwise miss. This is the iron for the Coronado Canyon edges and anywhere the captain says fish are marking deep but not coming up to chum. Works best on a 30lb class conventional reel with 50lb braid for vertical control.

    Shimano Butterfly Flat-Fall Jig (160–200g)

    Buy it on Amazon

    The Flat-Fall changed deep structure fishing for yellowtail in SoCal. Unlike traditional knife jigs, the flat-fall design flutters and spirals on the drop — and that movement is what triggers the bite. For yellowtail specifically, the eat almost always comes on the rise off the bottom, not mid-column: drop it to structure, engage the reel, and pump aggressively. The first few strokes off the bottom are when yellows commit. At the 9-Mile Bank and La Jolla reefs you’re typically working 100–140 feet of water with fish in the bottom third — the 160g handles that range cleanly on a standard 30lb setup. Pink and blue sardine are the consistent yellowtail producers. Run a single assist hook in 3/0–4/0 on the top ring only — a rear hook fouls on the bottom constantly and kills the jig’s action.

    Nomad Design Streaker Deep Water Jig — Silver Glow Stripe

    Buy it on Amazon

    The Streaker’s slow-pitch flutter works on yellowtail when conventional yo-yo jigging has gone cold. If you’ve been hammering the bottom with a Tady Heavy and marking fish that won’t react, the Streaker’s long, lazy fall gives lethargic yellows time to look and commit without requiring a reaction strike. This is most useful on slack current when fish are sluggish — the extended flutter keeps the jig in their strike zone longer than any standard vertical iron. Silver Glow Stripe is the standout color for deep yellows specifically because it maintains visibility below 100 feet where blue sardine and pink start to lose their flash. Also deadly on white seabass holding on the same structure. Pair with a dedicated slow-pitch rod — a standard jig rod dampens the effect.

    Casting Jigs

    Not every yellowtail situation calls for iron or vertical jigging. Sometimes the fish want a faster-sinking, more compact presentation — or you need a jig that works the mid-water column where bait is suspending. See our jigs vs irons vs poppers guide for a full comparison of when to throw each type.

    MUSTAD Colt Sniper Jig

    Buy it on Amazon

    The Colt Sniper covers the mid-column gap — too deep for surface iron, not deep enough to justify dropping to structure. When yellows are suspending at 30–60 feet on the meter and won’t come up for a surface iron or down to a bottom jig, count the Sniper down to their depth and work it back with a pump-and-wind retrieve. It’s also the right call when yellows are scattered along a current line rather than stacked on structure — cast, count down, cover water. The through-wire construction holds up to yellowtail’s head shakes on fish over 20 pounds pushing toward structure. A reliable mid-column option that also works on school bluefin and big bonito when they mix in with yellows.

    Shimano Current Sniper Jig

    Buy it on Amazon

    Yellowtail ambush bait along current lines and reef edges — and the Current Sniper’s asymmetric profile is built for exactly those conditions. Standard symmetrical jigs spin in moving water and look wrong to fish that are keyed on natural bait getting swept in the current. The Current Sniper darts and slashes naturally in the flow instead. Cast up-current, let it sink while the current pushes it downcurrent, and retrieve with the flow — it looks like a baitfish getting swept along a kelp edge, which is exactly how yellows want to see it. This jig is specifically effective at the Coronado Islands and along the La Jolla kelp where current runs hard against structure and positions yellowtail in predictable ambush spots.

    Color Selection

    Keep it simple. In clear SoCal water, these colors cover almost every situation:

    • Blue and white — sardine imitation, the all-around best color
    • Chrome / silver — bright days, clear water
    • Scrambled egg (blue/yellow/white) — the classic SoCal pattern
    • Mint / green — overcast days, green water. Check the chlorophyll map for water clarity
    • Pink — surprisingly deadly on yellowtail, especially on vertical jigs and flat-falls
    • Silver glow stripe — deep water where light fades, adds visibility

    Match the bait when you can — if the fish are eating sardines, go blue and white. If they’re on squid, go pink or white. When in doubt, blue and white never fails.

    When to Throw What

    SituationBest Jig TypeTop Pick
    Surface boils, breaking fishSurface ironTady 45 blue/white
    Picky fish, small baitLight surface ironTady 4/0 chrome
    Wind, need distanceHeavy surface ironNomad Slidekick 4.25oz
    Fish on deep structureYo-yo ironTady 4/0 Heavy 6oz
    Deep, fish hitting on the fallFlat-fall jigButterfly Flat-Fall 160g
    Slow bite, finicky fishSlow-pitch jigNomad Streaker Silver Glow
    Mid-water, count-downCasting jigColt Sniper
    Heavy current, reef edgesCurrent jigCurrent Sniper

    Gear to Pair with Your Jigs

    Iron and jig fishing require specific tackle to work right:

    Surface iron: A spinning reel in the 5000–8000 class — Shimano Saragosa 6000 or Twin Power 6000 — paired with a 7-foot or 8-foot heavy spinning rod. Spool with 40–50lb braided line, no leader for maximum distance.

    Yo-yo jigging: A 30lb class conventional reelPenn Squall II 25N or Shimano Talica 12 — on a 7-foot medium-heavy rod. Spool with 50lb braid and 40lb fluorocarbon leader connected with an FG knot.

    Casting jigs: Either spinning or conventional works. A 20lb class spinning reel like the Saragosa 5000 is versatile for lighter casting jigs, or step up to the 30lb class for heavier models.

    Hooks: Rig flat-falls and vertical jigs with single assist hooks (3/0–5/0) — far better hookup ratio than treble hooks. See our hooks by species guide for specific sizes. Use J hooks on assist rigs for jigs, not circle hooks — you need the instant hookset on reaction strikes.

    For complete rod and reel pairing advice, see our best rod and reel combo guide, and check our fishing line guide for specific braid recommendations.

    Frequently Asked Questions

    What is the best all-around yellowtail jig?

    The Tady 45 (2.9 oz). It’s been the #1 surface iron in SoCal for decades and catches yellowtail in virtually every surface-feeding situation. If you buy one iron, buy a blue/white Tady 45.

    What jig should I use when yellowtail are deep?

    Start with a Shimano Butterfly Flat-Fall (160g) — pump it aggressively off the bottom and yellows eat it on the rise. If that’s not working, switch to a Tady 4/0 Heavy (6 oz) for an aggressive yo-yo presentation, or try the Nomad Streaker for a slower approach on lethargic fish.

    What’s the difference between surface iron and yo-yo iron?

    Surface irons are cast and retrieved fast across the top of the water for fish that are boiling. Yo-yo irons are dropped vertically and worked up with rod pumps for fish on deep structure. Different techniques for different situations — see our complete comparison guide.

    What reel do I need for iron fishing?

    For surface iron: a spinning reel in the 5000–8000 class like the Saragosa 6000. For yo-yo jigging: a 30lb conventional like the Penn Squall II 25N. See our yellowtail reel guide for complete recommendations.

    What rod length is best for casting iron?

    A 7-foot rod for general versatility, or an 8-foot rod for maximum casting distance when fish are boiling out of reach. The 8-footer gets you 15–20% more distance but is more tiring over a full day.

    What water temperature do yellowtail like?

    Yellowtail bite best in 62–70°F water, with the sweet spot at 64–68°F. Check our yellowtail temperature guide for seasonal patterns and how to use the SST chart to find them.

    Plan Your Trip

    Yellowtail follow warm water and bait. Check the conditions before you go:

    Related Guides

    Tight lines!

  • Best Reels for Bluefin Tuna — What You Actually Need

    Best Reels for Bluefin Tuna — What You Actually Need

    Bluefin tuna are the most demanding fish you’ll hook in Southern California waters. A 50-pound bluefin can run 300 yards in the first burst, fight for 30+ minutes, and put sustained pressure on your drag system that most reels simply can’t handle. When your reel fails on a bluefin, you don’t get a second chance.

    This guide covers exactly what you need in a bluefin reel — drag power, line capacity, two-speed vs. single speed, and where to put your money at every budget level.

    ⚡ Short Answer

    Most SoCal bluefin anglers need a two-speed conventional reel in the 40–50lb class with at least 25 lbs of max drag and 500+ yards of 50lb braid capacity. That covers everything from school-size 30-pounders to the occasional cow.

    👉 See our top picks: Best 40lb+ Reels for Tuna Fishing — specific models reviewed with pros, cons, and pricing.

    ⚡ Quick Picks

    Best overall: Shimano Talica 16 II — the SoCal bluefin standard. Smooth two-speed, 25+ lbs of drag.

    Best for giants: Shimano Talica 20 II — more drag, more capacity for 150+ lb fish.

    Best premium: Accurate Fury FX2 500N — smoothest drag in the business, built in California.

    Best value: Penn Fathom II 30 SD — legitimate tuna reel at a fraction of the price.

    Best spinning: Shimano Saragosa SW 14000 — for casting iron to surface bluefin.

    Now here’s everything you need to know to make the right choice.

    What a Bluefin Reel Must Have

    Drag: 25–40+ lbs of max drag. This is the single most important spec. Bluefin make long, powerful runs and you need to apply serious pressure to turn them before they spool you or reach structure. Your reel should deliver at least 25 lbs of max drag — and the drag must stay smooth and consistent under sustained load. Carbon fiber drag washers that dissipate heat are essential. Cheap drags overheat and fade, and a bluefin will exploit that instantly.

    Line capacity: 500+ yards of 50–65lb braid. A big SoCal bluefin can run 200–300 yards on the first pull. You need a minimum of 500 yards of heavy braided line (50–65lb) to survive those runs with a safety margin. Running out of line on a tuna is one of the most frustrating experiences in fishing — don’t let it happen. See our best fishing line by pound test guide for specific braid recommendations.

    Two-speed gearing. This is nearly non-negotiable for serious bluefin fishing. Two-speed reels let you switch between high gear (for fast retrieves and surface work) and low gear (for grinding power when a tuna goes deep and decides to circle). Fighting a 50+ pound fish from 200 feet deep in high gear only will destroy your back and potentially your reel gears.

    Heavy-duty construction. Machined aluminum frame, stainless steel gears, sealed bearings. Bluefin fights put extreme stress on every component. Stamped frames flex under load, weak gears strip, and unsealed bearings corrode. This is not the place to cut corners.

    Conventional vs Spinning for Bluefin

    Conventional reels are the standard for bluefin tuna. They deliver more drag power, more line capacity, and two-speed gearing — all critical advantages for this species.

    Large spinning reels (10000–18000 size) are used by some experienced anglers, particularly for casting poppers and stick baits to surface-feeding tuna. But spinning reels at this size are expensive, heavy, and their drag systems generally don’t hold up as well as conventional under prolonged stress. For the vast majority of anglers, conventional is the right choice.

    Reel Size Classes for Bluefin

    40lb class (medium conventional): The starting point for bluefin fishing. Handles fish in the 30–60lb range effectively. Good for school-size bluefin that SoCal boats encounter on day trips. Holds 500+ yards of 50lb braid with adequate drag. See our full 40lb+ reel reviews →

    50lb class: The sweet spot for SoCal bluefin. These reels hold 600+ yards of 65lb braid and deliver 30+ lbs of smooth drag. This is what most serious bluefin anglers run on overnight trips out of San Diego. They handle everything from 40-pound school fish to the occasional 100+ pound cow.

    60–80lb class (large conventional): For targeting trophy bluefin over 100 lbs or fishing long-range trips where you might encounter giant tuna. These are heavy, expensive reels that most anglers don’t need for typical SoCal bluefin. But if you’re making multi-day trips to Guadalupe Island or fishing known big-fish zones, stepping up makes sense.

    Not sure what class you need? If this is your first dedicated tuna reel, go with the 40–50lb class. It covers 90% of SoCal bluefin scenarios and pairs perfectly with a quality 8-foot offshore rod.

    Top Bluefin Reels by Budget

    For detailed reviews with specific models, features, and current pricing, see our Best 40lb+ Reels for Tuna Fishing guide. Here’s what to prioritize at each budget level:

    Entry level ($250–$400): At this price, you can find a solid two-speed conventional reel with 20+ lbs of drag and enough capacity for 50lb braid. These reels handle school-size bluefin (20–50 lbs) well. Look for carbon fiber drags and an aluminum frame. Penn and Shimano both offer strong options here.

    Mid-range ($400–$700): This bracket gets you into reels with 30+ lbs of max drag, larger spools for 600+ yards of heavy braid, and significantly better gear quality. Two-speed is standard at this price. These reels can handle bluefin up to 80+ lbs and are the most popular choice for SoCal overnight trips. Shimano, Daiwa, Okuma, and Penn all compete aggressively here.

    Premium ($700–$1,200+): Top-tier bluefin reels with 35–50 lbs of drag, precision machined components, and the kind of build quality that handles hundred-pound fish without breaking a sweat. Accurate, Shimano Talica/Trinidad, and Avet are the names most SoCal tuna anglers reach for at this level. These are buy-it-once reels that will last years of hard use.

    Setting Up Your Bluefin Reel

    Line: Spool with 50–65lb braid. Some anglers add a mono topshot (first 50–100 yards of mono over the braid) to provide stretch that cushions the initial strike and helps prevent pulled hooks on bait presentations. Our fishing line guide covers the best brands at every pound test.

    Leader: 40–80lb fluorocarbon, 6–15 feet long. Leader length depends on water clarity — clear water calls for longer leaders so the visible braid is farther from the fish. Connect braid to fluoro with an FG knot.

    Terminal: Circle hooks (4/0–7/0) for live bait, or various jigs and poppers for artificial presentations. Palomar knot or San Diego Jam for terminal connections — see our fishing knots guide for step-by-step instructions.

    Hooks: Check our best hooks by species guide for specific hook sizes and styles matched to bluefin presentations.

    Drag setting: Set your strike drag at about 1/3 of your weakest connection (usually the leader). For 60lb fluoro leader, that’s about 20 lbs of strike drag. Set it at home with a scale — don’t guess on the water. You can bump drag up during the fight once the fish is hooked and the line is already under tension.

    Rod Pairing

    A bluefin reel needs to be matched with the right rod:

    Bait fishing: An 8-foot medium-heavy to heavy rod with moderate action. The length provides lifting leverage and the moderate flex cushions the line during surges. Fiberglass or composite blanks are preferred for their shock absorption.

    Jigging: A shorter 5.5–6.5 foot heavy-action rod with a fast tip. These are stiffer for working jigs and have the backbone to fight fish vertically. Graphite or composite blanks work well here.

    Casting poppers/iron: A 7-foot to 8-foot heavy-action rod with a fast tip for launching heavy poppers and surface irons. This is where graphite rods excel — lighter weight for repeated casting.

    For complete rod and reel pairing advice, see our best rod and reel combo guide.

    Common Mistakes

    Underspending on the reel. Bluefin is the one species where a cheap reel will cost you fish. A $150 reel that “works fine for yellowtail” will fail when a 60-pound bluefin tests the drag for 20 straight minutes. Budget at least $300+ for a dedicated bluefin reel.

    Not enough line capacity. If you can’t hold 500+ yards of 50lb braid, you’re gambling every time a big fish takes a long run. Don’t put yourself in a position where you’re staring at a spool with 20 yards left and a fish still running.

    Single-speed for big fish. A single-speed reel can catch bluefin, but you’ll work three times as hard during the fight. When a tuna goes deep and starts circling, you need low gear. Paying the premium for two-speed is one of the best investments in tuna fishing.

    Not testing drag before the trip. Set your drag at home with a scale. Most anglers run their drag too loose because they’re afraid of breaking off. On bluefin, you need serious drag pressure to control the fight. Know your numbers before you leave the dock.

    Frequently Asked Questions

    What size reel do I need for bluefin tuna?

    A 40–50lb class two-speed conventional reel covers most SoCal bluefin scenarios. For school-size fish (30–60 lbs), the 40lb class is ideal. For targeting larger fish on overnight or multi-day trips, step up to a 50lb class for extra line capacity and drag power.

    Can I use a spinning reel for bluefin?

    You can, but conventional reels are strongly preferred. Spinning reels in the 10000–18000 size work for casting poppers to surface fish, but they lack the two-speed gearing and sustained drag performance that conventional reels provide for extended bluefin fights.

    How much drag do I need for bluefin tuna?

    At least 25 lbs of max drag for school-size bluefin, and 30–40+ lbs for larger fish. The drag must be smooth and heat-resistant — carbon fiber drag washers are essential. Set your strike drag at 1/3 of your weakest connection.

    What line should I use for bluefin tuna?

    50–65lb braided line with a 40–80lb fluorocarbon leader. You need at least 500 yards of braid on the spool. See our best fishing line guide for specific brand recommendations at every pound test.

    What’s the best rod to pair with a bluefin reel?

    An 8-foot medium-heavy to heavy rod is the most versatile choice. Fiberglass or composite blanks absorb shock better during long fights. See our combo guide for matched pairings.

    Plan Your Bluefin Trip

    Related Guides

    Tight lines!

  • Best Reels for Yellowtail Fishing in Southern California

    Best Reels for Yellowtail Fishing in Southern California

    Yellowtail are the ultimate test of your tackle in Southern California waters. They hit hard, run fast, and use every piece of structure within reach to cut you off. Your reel needs to handle 15–25 lbs of drag, hold 300+ yards of line, and keep working under sustained pressure.

    Choosing the wrong reel for yellowtail means getting spooled on the first run, burning out your drag in mid-fight, or simply not having the cranking power to pull them away from the kelp. Here are the reels that get it done.

    ⚡ Quick Picks

    Best overall: Shimano Talica 12 II — the SoCal yellowtail standard. Two-speed, bulletproof, perfect drag.

    Best budget: Penn Squall II 25N — lever drag conventional that punches way above its price.

    Best for iron: Shimano Saragosa 6000 — fast retrieve spinning reel for burning surface iron.

    Best premium: Accurate Valiant 300 — twin-drag system, machined perfection.

    Best mid-range: Penn Fathom II 30 Star Drag — solid two-speed at a great price point.

    What to Look for in a Yellowtail Reel

    Drag power: 15–25 lbs. Yellowtail make powerful initial runs, and you need enough drag to slow them before they reach structure. A reel with at least 15 lbs of max drag is the minimum — 20+ lbs is better for fish over 30 lbs. Look for smooth, carbon fiber drag systems that don’t heat up and fade during long fights.

    Line capacity: 300+ yards of 30–40lb braid. A big yellowtail can easily peel 150–200 yards of line on the first run. You need at least 300 yards of braided line in the 30–40lb class to survive those runs with safety margin. See our line guide for specific braid recommendations.

    Gear ratio: High for iron, low for bait. If you’re throwing jigs and irons, a high gear ratio (6:1+) lets you burn them back fast. If you’re mostly fishing live bait, a lower ratio (4:1–5:1) provides more cranking power. Two-speed reels give you both options in one reel — switch between high and low gear mid-fight.

    Build quality. Yellowtail fights are punishing. Cheap reels fail at the worst moments — gears strip, drag systems overheat, handles break. Invest in machined aluminum frames and stainless steel gears. This is one species where spending $200+ on a reel pays for itself.

    Conventional vs Spinning for Yellowtail

    Conventional reels are the standard for yellowtail. They deliver more drag, better line capacity, and superior cranking power in the line classes you need (25–40lb). On SoCal party boats, 90%+ of anglers targeting yellowtail are running conventional tackle.

    That said, spinning reels have a clear role: surface iron fishing and popper casting. When yellowtail are boiling on the surface and you need to launch a Tady 45 into the melee, a spinning reel on an 8-foot rod gets you the distance that conventional can’t match. Many serious yellowtail anglers carry both — a conventional setup for bait and a spinner for iron.

    Best Conventional Reels for Yellowtail

    Best Overall: Shimano Talica 12 II

    Buy it on Amazon

    The Talica 12 is the reel you’ll see on every SoCal long-range boat and in the hands of the most experienced yellowtail anglers. Two-speed gearing lets you retrieve jigs in high gear and switch to low for grinding fish off structure. The drag is silky smooth with no startup inertia — when a yellowtail hits and runs, the drag engages instantly without shock-loading your line. 18 lbs of max drag is more than enough for any yellowtail, and the narrow spool palms easily for thumbing runs. Holds 300+ yards of 40lb braid. This is the reel that does everything right for yellowtail. Pairs perfectly with a 7-foot medium-heavy to heavy rod.

    Best Budget: Penn Squall II 25N (Lever Drag)

    Buy it on Amazon

    If you’re not ready to spend Talica money, the Squall II 25N is where to start. Lever drag gives you precise, repeatable drag settings — a meaningful upgrade over star drag for yellowtail, where you need to crank drag quickly during the fight. The narrow spool design casts well for a conventional reel, and 15 lbs of max drag handles the vast majority of SoCal yellowtail. Single speed with a 6.1:1 ratio — fast enough for yo-yo jigging and retrieving. Holds 295 yards of 30lb braid. The best yellowtail reel under $150, period. See our full 20lb reel and 30lb reel roundups for more budget picks.

    Best Mid-Range: Penn Fathom II 30 Star Drag

    Buy it on Amazon

    The Fathom II 30 sits in the sweet spot between the Squall’s price and the Talica’s performance. Full metal body with machined aluminum frame, stainless steel main gear, and 25 lbs of max drag — more than you’ll ever need for yellowtail. The star drag is smooth and reliable, and the two-speed gearing (high 6.1:1 / low 2.6:1) gives you the same versatility as the Talica at a lower price. Heavier in hand than the Shimano, but that weight translates to a bombproof build that handles years of abuse. Holds 390 yards of 40lb braid — plenty of capacity. A great reel for dedicated yellowtail anglers who want two-speed capability without premium pricing.

    Best Premium: Accurate Valiant 300

    Buy it on Amazon

    The Valiant 300 is the reel you buy when you want the best and plan to fish it for the next decade. Accurate’s twin-drag system delivers 20+ lbs of perfectly smooth, heat-resistant drag pressure. The two-speed gearing shifts under load without hesitation. Every component is machined from solid aluminum and stainless steel — there’s nothing to flex, nothing to strip, nothing to break. Compact enough for a 7-foot rod, powerful enough for trophy yellowtail over 40 lbs. Also handles bluefin tuna if they show up on your yellowtail trip. This is a buy-once reel.

    Also Consider: Daiwa Saltist 30

    Buy it on Amazon

    A strong mid-range conventional with Daiwa’s Monocoque (MQ) body construction — the one-piece frame eliminates flex under heavy load. 22 lbs of max drag, two-speed gearing, and a smooth retrieve. A solid alternative to the Penn Fathom II if you prefer Daiwa’s ergonomics and build style. Especially popular among anglers who already run Daiwa spinning reels and want to stay in the same ecosystem.

    Also Consider: Shimano Torium 16

    Buy it on Amazon

    The Torium is a lighter-duty conventional that works well as a dedicated yo-yo jigging reel. Not as powerful as the Talica or Fathom — 18 lbs of max drag and single speed — but lighter in hand and more comfortable for working jigs all day. The 6.2:1 ratio is fast enough for burning iron and working vertical jigs. A good choice for anglers who mostly target schoolie yellowtail (10–25 lbs) and don’t need the brute power of a 30lb class two-speed.

    Best Spinning Reels for Yellowtail

    Best for Iron: Shimano Saragosa SW 6000

    Buy it on Amazon

    The Saragosa 6000 is the go-to spinning reel for SoCal iron fishing. 20 lbs of waterproof drag, 6.2:1 retrieve speed, and the casting distance to launch a Tady 45 or Nomad Slidekick into boiling yellowtail at maximum range. The X-Ship gearing stays smooth under load, and the Hagane body doesn’t flex. Pairs perfectly with an 8-foot heavy spinning rod or a 7-foot rod for lighter iron. Spool with 40–50lb braid — no leader for maximum casting distance. If you fish iron regularly, this is the reel.

    Best Budget Spinner: Shimano Saragosa SW 5000

    Buy it on Amazon

    The 5000 is lighter and more compact than the 6000, making it a better match for lighter iron and smaller yellowtail. Still packs 20 lbs of drag — plenty for schoolie yellows. The lighter weight makes it more comfortable for all-day casting and works well as a do-everything SoCal spinning reel for yellowtail, calico bass, and bonito. Pair with a 7-foot medium-heavy rod.

    Best Premium Spinner: Shimano Twin Power SW 6000

    Buy it on Amazon

    The Twin Power is the Saragosa’s premium big brother — same size and drag, but with Infinity Drive for reduced friction under load, tighter tolerances, and a noticeably smoother retrieve. When a yellowtail hits at full speed and the drag screams, the Twin Power’s smoothness shows itself. Worth the price jump if you fish iron frequently and want the best casting and retrieving experience. Also handles bluefin tuna if they crash the yellowtail party.

    Best Budget All-Around: Daiwa BG MQ 4000

    Buy it on Amazon

    Daiwa’s BG MQ is the budget king. The Monocoque body is way more rigid than most reels at this price, and 17.6 lbs of max drag handles schoolie yellowtail without flinching. Not as smooth as the Saragosa under heavy load, but at roughly half the price, it’s the best entry-level spinning reel for SoCal. Good choice if you’re building out your first yellowtail rod-and-reel setup — pair with a Daiwa Proteus rod for a complete budget rig.

    Which Reel for Which Situation

    SituationReel TypeTop Pick
    All-around yellowtail (live bait + jigs)Conventional, two-speedTalica 12
    Surface iron castingSpinning, 6000 classSaragosa 6000
    Budget party boatConventional, lever dragSquall II 25N
    Yo-yo jiggingConventional, single speedTorium 16
    Kelp / heavy structureConventional, two-speedFathom II 30
    Long-range tripConventional, premiumValiant 300
    Trophy yellowtail (30+ lbs)Conventional, two-speedTalica 16
    Budget spinning (iron + bait)Spinning, 4000 classBG MQ 4000

    Reel + Rod Pairings

    Your reel is only half the equation. Here are proven pairings for yellowtail:

    ApplicationReelRodLine
    Live bait — party boatSquall II 25N7′ MH30lb braid / 25lb fluoro leader
    Live bait — structureTalica 127′ H40lb braid / 30lb fluoro leader
    Yo-yo jiggingTorium 167′ MH40lb braid / 40lb fluoro leader
    Surface ironSaragosa 60008′ H spinning50lb braid / no leader
    Light iron / poppersSaragosa 50007′ H spinning40lb braid / no leader
    Trophy yellows / long-rangeValiant 3007′ H40lb braid / 40lb fluoro leader
    Budget all-aroundBG MQ 4000Proteus 7′ MH30lb braid / 25lb fluoro leader

    Connect braid to fluorocarbon leader with an FG knot. For complete rod and reel pairing advice across all species and line classes, see our best rod and reel combo guide.

    Best Reel Size for Yellowtail

    In conventional reel sizing, the reel classes that work best for yellowtail are:

    Small conventional (20–25lb class): Best for schoolie yellowtail (10–20 lbs), calico bass, and lighter applications. The Squall II 25N and Torium 16 fit here. These are narrower, lighter reels that pair well with 7-foot rods. Great as your all-around SoCal party boat reel. See our best 20lb reels guide.

    Medium conventional (30lb class): The sweet spot for dedicated yellowtail fishing. The Talica 12, Fathom II 30, and Saltist 30 live here. These hold 400+ yards of 40lb braid, offer 20+ lbs of drag, and have the cranking power to handle trophy-class yellows. See our best 30lb reels guide.

    Large conventional (40lb+ class): The Talica 16 bridges yellowtail and tuna. Overkill for most yellowtail situations, but if you’re fishing areas where big bluefin and wahoo mix with yellows, a larger reel covers all bases. See our best 40lb+ reels guide.

    Reel Maintenance for Saltwater

    Saltwater is brutal on fishing reels. A few simple habits will keep your yellowtail reel performing for years:

    Rinse after every trip. Spray the reel with fresh water after each use — focus on the drag stack, handle, and line roller. Don’t soak it; a light rinse is enough. Let it air dry completely before storing.

    Oil annually. Once a year (or more for heavy use), apply reel oil to the bearings and drag grease to the washers. Most reel manufacturers sell maintenance kits specific to their models.

    Check your drag before each trip. Set your drag at home using a scale. Yellowtail drag should be set at about 1/3 of your line strength — so 10 lbs of drag for 30lb line. Adjust up from there based on conditions and structure.

    Replace the braid annually. Even though braid lasts longer than mono, it still weakens over time from salt, sun, and abrasion. Strip and re-spool at the beginning of each yellowtail season. See our line guide for recommendations.

    Frequently Asked Questions

    What is the best all-around reel for yellowtail?

    The Shimano Talica 12 II. Two-speed gearing, 18 lbs of drag, compact size, and bulletproof reliability. It handles live bait, yo-yo jigging, and fighting fish on structure equally well. It’s the reel 90% of experienced SoCal yellowtail anglers run.

    Do I need a two-speed reel for yellowtail?

    You don’t need one, but it’s a significant advantage. High gear retrieves jigs fast, low gear gives you cranking power to pull fish off structure. If you can afford it, two-speed is worth it. If budget is tight, a single-speed like the Squall II 25N still catches plenty of yellowtail.

    Can I use a spinning reel for yellowtail?

    Yes, especially for iron fishing and casting poppers. A Saragosa 6000 on an 8-foot rod is the standard SoCal iron setup. For live bait on a party boat, conventional is better — more drag, more line capacity, more cranking power.

    What’s the best budget yellowtail reel?

    Conventional: Penn Squall II 25N — lever drag, fast retrieve, proven performer under $150. Spinning: Daiwa BG MQ 4000 — rigid Monocoque body, 17.6 lbs of drag, under $150.

    How much drag do I need for yellowtail?

    15 lbs minimum, 20+ lbs for fish over 30 lbs or when fishing around heavy structure (kelp, rocks, wrecks). Set your drag at roughly 1/3 of your line strength and adjust up from there during the fight.

    What line should I use for yellowtail?

    30–40lb braided line with a 25–40lb fluorocarbon leader for bait fishing. For iron fishing, most anglers go straight braid with no leader for maximum casting distance. Connect braid to leader with an FG knot. See our line guide for specific brands.

    What water temperature do yellowtail bite best at?

    62–72°F, with the sweet spot at 64–68°F. Use the SST chart to find water in that range, and read our yellowtail temperature guide for seasonal patterns.

    Plan Your Yellowtail Trip

    Related Guides

    Tight lines!

  • Best Water Temperature for Halibut Fishing in California

    Best Water Temperature for Halibut Fishing in California

    California halibut are one of the most accessible and rewarding species along the Southern California coast. They’re available year-round from both shore and boat, and they respond strongly to water temperature changes — making your SST chart one of the best tools for finding them.

    Halibut prefer water between 56°F and 68°F, with peak activity in the 59–65°F range. They’re a cooler-water species compared to pelagics like dorado or yellowfin tuna, which means the best halibut fishing often happens in spring and early summer before the offshore species show up.

    The Halibut Temperature Window

    Temperature Range Activity Level Notes
    Below 54°F Low Fish are sluggish, holding in deeper sand channels
    54–56°F Moderate Fish beginning to move toward shallower flats
    56–60°F High Active feeding, especially in bays and harbors
    60–65°F Peak Prime bite — fish are shallow and aggressive
    65–68°F Good Still active but may shift to deeper or cooler areas
    Above 68°F Declining Fish move to deeper, cooler sand flats

    The 60–65°F range is the money zone. When nearshore water hits this window in spring, halibut move onto shallow sandy flats to feed aggressively — from bays and harbors to the open surf zone.

    Seasonal Patterns in Southern California

    January–February: Water temps are at their lowest (54–58°F). Halibut hold in deeper water — sand channels in 40–80 feet, harbor entrances, and deep structure adjacent to sandy flats. Slow presentations like Carolina rigs with live bait work best.

    March–April: The spring warm-up begins. As nearshore water pushes into the upper 50s and low 60s, halibut start migrating to shallower flats for spawning. This is when surf fishing picks up dramatically. Watch the SST chart for the first bays and beaches to cross 58°F.

    May–June: Peak season. Water temps settle into the 60–66°F sweet spot. Halibut are on the shallow flats in force — the surf zone, bay mouths, jetties, and sandy points. Both shore anglers and boat fishermen see consistent action. This is the best window for halibut surf fishing — a swimbait in smelt or sardine pattern on a slow bottom retrieve is the go-to.

    July–August: Water temps push into the upper 60s and low 70s. Halibut shift from the shallowest flats to slightly deeper water (15–40 feet), but fishing remains productive, especially in areas with current flow that keeps water cooler. As the offshore water warms up, this is also when dorado and yellowfin start showing, so many anglers shift focus offshore.

    September–December: As water cools back through the 60s, there’s often a strong fall bite. Halibut feed heavily before winter, and the cooling water triggers aggressive feeding behavior. Don’t overlook fall halibut fishing — it can be as good as spring.

    How Temperature Affects Where Halibut Hold

    California halibut are ambush predators that lie flat on sandy bottoms waiting for baitfish to swim overhead. Water temperature doesn’t just affect their activity level — it determines where in the water column they position themselves.

    In cool water (54–58°F), halibut hold in deeper sand channels, often 40–80 feet, near structure that provides current breaks. They’re less willing to chase bait and prefer slow presentations dragged past their faces.

    In the sweet spot (59–65°F), halibut push into shallow water — 3–20 feet in the surf zone, bay flats, and nearshore sand bars. They’re actively hunting and will chase swimbaits, live bait, and even surface lures.

    In warm water (66–70°F+), halibut seek out areas with cooler water influence — deeper flats, areas near cold upwelling, river mouths, and harbor channels where tidal exchange brings cooler water.

    Using SST Charts for Halibut

    Unlike pelagic species where you’re scanning hundreds of miles of open ocean, halibut fishing is about finding the right nearshore conditions. Here’s how to use the SST chart:

    Find the 59–65°F band along the coast. Zoom into the nearshore zone and look for where your target beaches, bays, and harbors fall within this window.

    Look for warming trends. A beach that was 56°F last week and is now 60°F is more productive than one that’s been sitting at 62°F for a month. Rising temperatures trigger halibut to move shallow and feed aggressively.

    Compare nearby areas. South-facing beaches warm faster than north-facing ones. Bays and harbors warm faster than open coast. Use the SST chart to identify which specific areas are first to hit the sweet spot each spring.

    Check chlorophyll for bait. Chlorophyll maps show where bait is concentrated nearshore. Halibut follow the bait — if you find 60°F water with high chlorophyll (meaning lots of baitfish), that’s a prime halibut zone.

    Best Halibut Techniques by Temperature

    Cool water (54–58°F) — go slow:

    Use a Carolina rig with live bait (anchovy, smelt, or small perch) bounced slowly along the bottom. Dropper loop rigs with cut squid strips also produce in cold water. Fish deeper sand channels near structure.

    Sweet spot (59–65°F) — go active:

    This is swimbait time. A 4–6 inch swimbait in smelt or sardine pattern retrieved slowly along the bottom is the most effective halibut method in warm spring water. Fish the surf zone sandbars, bay flats, and jetty edges. Live bait under a bobber in 4–10 feet of water is deadly in bays.

    Warm water (66°F+) — go deep:

    Drop to deeper flats (30–60 feet) using Carolina rigs or swimbaits on heavier jigheads. Focus on areas with current flow — halibut will concentrate where tidal movement keeps water temperatures manageable.

    Shore vs. Boat Fishing

    Surf fishing is most productive when nearshore water is 59–65°F. Cast swimbaits or Carolina rigs past the first sand bar and work them back slowly. Dawn and dusk are prime. See our complete Doheny surf fishing guide and halibut surf fishing guide for specific techniques and locations.

    Bay and harbor fishing can be productive even when the open coast is too cold. Enclosed waters warm faster, so check the SST chart for bays that are running 2–4°F warmer than the nearby coast. Mission Bay, Newport Bay, and Dana Point Harbor are all productive halibut spots.

    Boat fishing lets you cover more ground and dial into specific bottom contours. Drift across sandy flats in 20–60 feet, using your electronics to find sand-to-rock transitions where halibut ambush bait.

    Halibut Gear and Lure Guides

    Once you’ve found the right water temperature, you need the right gear to capitalize. Here are our complete halibut guides:

    Tackle Setup

    Halibut don’t require heavy gear, but you need sensitivity to detect their subtle bites:

    Rod: A 7-foot medium to medium-heavy rod for boat fishing, or a 9–11 foot surf rod for shore casting. Graphite rods are preferred for their sensitivity — halibut bites are often just a slight “tick.”

    Reel: A 3000–5000 size spinning reel for surf and bay, or a 20lb conventional for boat fishing. See our spinning vs conventional guide if you’re deciding between the two.

    Line: 15–20lb braid with a 15–20lb fluorocarbon leader. The light leader is important — halibut have good eyesight and can be line-shy in clear water.

    Hooks: 2/0–4/0 circle hooks for live bait, or 3/0–5/0 jigheads for swimbaits. Connect everything with a Palomar knot. See our hooks by species guide for specific sizes.

    Plan Your Trip

    Related Guides

    Tight lines!