• Best Water Temp for King Salmon: Great Lakes Guide

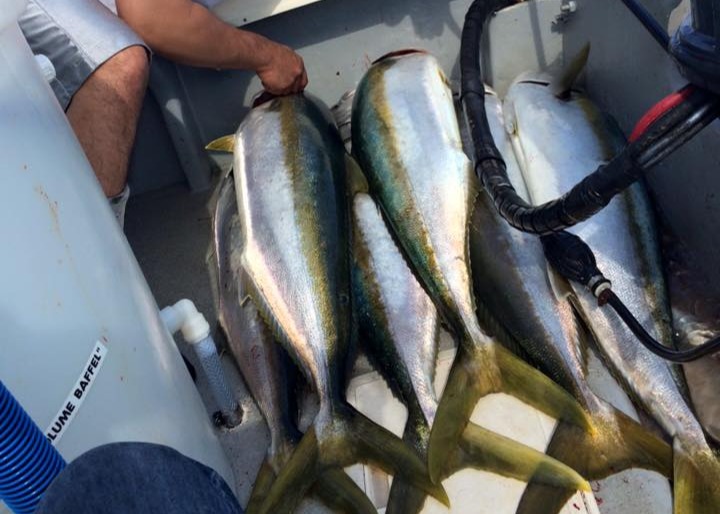
    King salmon — Chinook — are the most temperature-driven fish in the Great Lakes. They don’t just prefer cold water; they require it. A 4°F shift can mean the difference between marking fish stacked at 80 feet and an empty sonar screen. Every Great Lakes charter captain I’ve spoken with says the same thing: find the right temperature band, and you find the fish.

    I haven’t trolled Lake Michigan myself — my fishing background is SoCal saltwater and freshwater — but the temperature dynamics work the same way they do for Pacific salmon. The data is consistent across DNR reports, captain logs, and decades of charter fleet history. This guide pulls all of it together: the temperature ranges that produce, the seasonal patterns that move kings through the water column, and how to use SST charts to find them.


    Let’s go Fishing!
    Search for the Perfect Fishing Trip or Charter
    Great Lakes & Trophy Kings
    Verified reviews · Free cancellation · 90-day price match
    Powered by FishingBooker · Affiliate partner

    The Quick Answer

    King salmon prefer water temperatures between 50°F and 58°F (10–14°C). The sweet spot for Great Lakes trolling is 52–56°F. Below 48°F, kings become sluggish and feed less aggressively. Above 60°F, they push deeper or move to find cooler water — often dropping below the thermocline where bait isn’t present.

    The single most important thing to understand: kings follow the thermocline, not the surface. By July and August, surface temperatures on Lake Michigan can hit 70°F+ while kings are stacked at 60–120 feet down in 52°F water. Your downrigger depth matters far more than what the surface temperature shows.

    Temperature Range Breakdown

    Condition Temp Range What to Expect
    Too Cold Below 45°F Kings present but feeding slow. Pre-thermocline spring water. Slow trolling speeds (1.8–2.2 mph).
    Marginal 45–50°F Active but scattered. Early-season fish on shallow shelves. Browns and lake trout mixed in.
    Prime 50–58°F Peak feeding. Kings stack tight to bait. Standard trolling speeds 2.4–2.8 mph. This is the band you want.
    Warm Edge 58–62°F Kings push to bottom edge of band. Often suspended just below the thermocline. Bait may be above them.
    Too Warm Above 62°F Kings move deeper or leave the area entirely. Surface fishing essentially over.

    The narrower window than other salmonids — a 6-degree prime band compared to 8–10 degrees for coho — is why king salmon trolling is so tied to electronics. You need to know exactly where the right temperature is, then put your spread right in it.

    Understanding the Thermocline

    The thermocline is the layer where water temperature drops rapidly with depth. In the Great Lakes, it forms in late spring as surface water warms while deep water stays cold. By midsummer, a typical Lake Michigan profile looks like this:

    • Surface to 40 ft: 65–72°F (warm, mostly empty for kings)
    • 40–60 ft: Rapid drop through the thermocline (70°F → 50°F in 20 feet)
    • 60–120 ft: 48–55°F (the king zone)
    • Below 120 ft: 42–48°F (too cold, lake trout territory)

    Kings stage along the thermocline because that’s where bait pushes against the cold barrier. Alewives — the primary forage — concentrate where warm and cold water meet. Your trolling spread needs to be at thermocline depth, not 20 feet above or below it.

    A temperature/speed probe like the Fish Hawk gives you the exact thermocline depth at downrigger depth. Without one, you’re estimating from surface temp and depth charts. Most charter captains run probes; many serious recreational anglers do too.

    Seasonal Patterns

    Spring (April–May): Shallow and Scattered

    Surface temperatures are still in the 40s. No thermocline has formed yet — the water column is roughly uniform from top to bottom. Kings are scattered, often shallow, mixed with brown trout and coho. Target water in the 45–52°F range, typically along temperature breaks where slightly warmer water concentrates bait. Downriggers are optional this time of year; planer boards and lead core lines do the work. Watch for temp breaks of 2–3°F — even a small variation pulls bait and predators.

    Early Summer (June): Thermocline Forms

    As surface temps climb through the 50s into the 60s, the thermocline begins to set up. Kings push deeper, following the 52–56°F band downward through the water column. Mid-June is when downrigger fishing becomes the dominant technique. The kings are usually 30–60 feet down at this point, holding right at thermocline depth. Trolling speeds pick up to 2.4–2.6 mph as the fish become more active.

    Peak Summer (July–August): Deep and Stacked

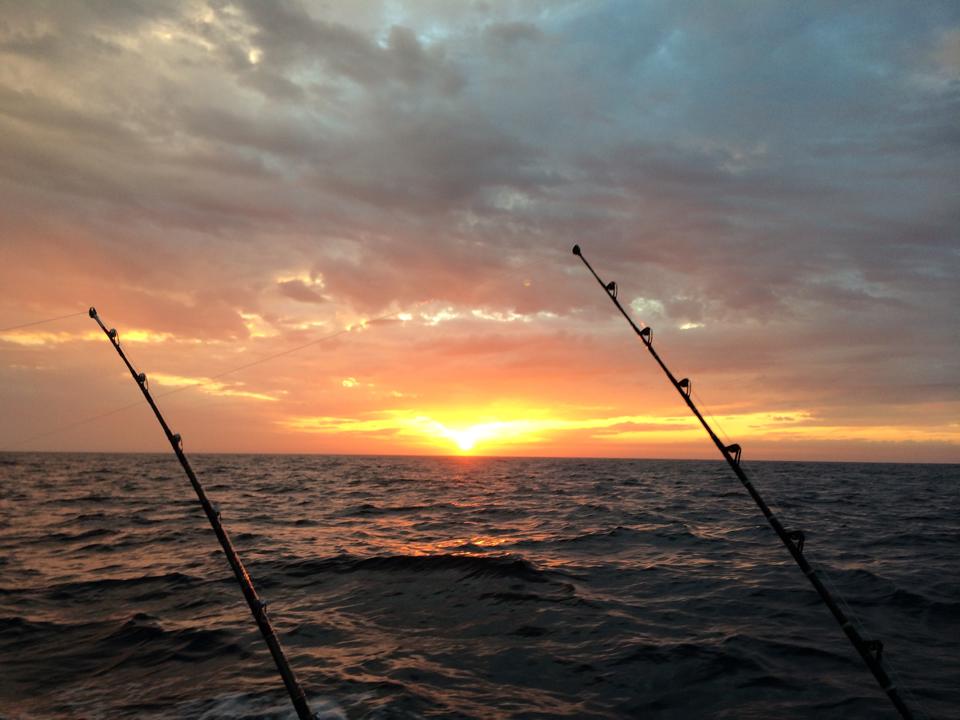
    The thermocline has fully set up by July. Kings are stacked at 60–120 feet down, holding tight to the thermocline edge. Surface temps mean nothing now — what matters is downrigger depth and the temperature at that depth. Anglers with temp probes drop riggers right to the 52–56°F band and put their flashers and spoons in the zone. Without a probe, depth recommendations from charter reports become essential. This is the bluewater grind: long days, big spreads, fish counted in pounds not numbers.

    Pre-Spawn Stage (Late August–Early September): Approaching Shore

    This is the moment Great Lakes anglers wait all year for. As kings start their pre-spawn movement toward the rivers, they push into shallower water — often 40–80 feet — while still seeking the 52–56°F band. They stage near the major tributary mouths (Manistee, Salmon River, Niagara). Surface temps are still warm but the kings are heavier, bigger, and more aggressive. The fish are full-weight before the spawn and feeding hard.

    Fall Run (September–October): Shallow and Aggressive

    Kings push into the river mouths and tributaries. Water temps in the rivers and harbors run cooler than the lake by this point, often 55–62°F. Pier fishing and river fishing dominate. The fish are no longer feeding the same way — they’re focused on spawning — but they still hit out of aggression. This is when shore-based anglers get their shot.

    Winter (November–March): Lake Trout Take Over

    King salmon season is effectively done. The surviving fish are in the rivers (post-spawn) or have moved to deep, stable water. Anglers shift to lake trout, which thrive in the 45–50°F water that’s now everywhere. See the lake trout temperature guide for the winter fishery.

    Temperature vs Other Factors

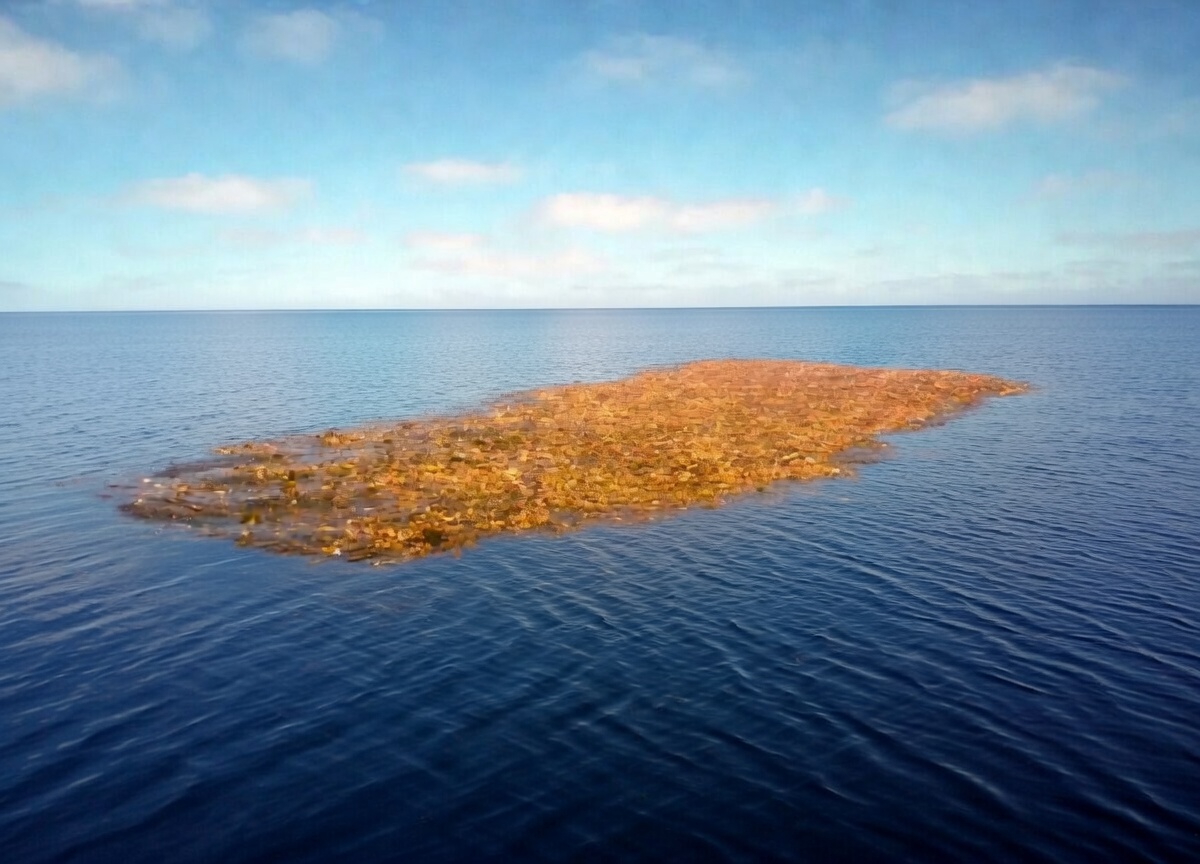
    Bait availability — Temperature gets you in the right zone, but bait makes the fish bite. Alewives concentrate in specific depth bands tied to temperature and oxygen. When kings, alewives, and the right temperature line up at the same depth, that’s where the fishing happens. A chlorophyll map shows where the productive water is — chlorophyll-rich water feeds alewives, alewives feed kings.

    Light and time of day — Kings feed best in low light. Pre-dawn through about 9 AM, then again from 6 PM to dusk. Midday in bright sun, fish push deeper than the temperature alone would suggest. Add 10–20 feet to your normal trolling depth at high noon.

    Currents and upwelling — Great Lakes upwelling events push cold water to the surface near shore. After a strong northeast wind on Lake Michigan, surface temps near the east shore can drop 10°F overnight as 50°F water gets pulled up from depth. Kings follow these temperature shifts aggressively — a shore-side upwelling concentrates fish in places they wouldn’t normally be.

    Moon and barometric pressure — Pre-frontal conditions (falling barometer) trigger feeding. Stable high pressure for 3+ days produces tough fishing. Major and minor moon periods produce noticeable bumps in catch rates on charter logs.

    How to Use SST Charts to Find Kings

    Surface temperature charts on the Great Lakes work differently than they do in saltwater. The surface temp itself doesn’t tell you where the kings are — what it tells you is where the thermocline likely sits and where temperature breaks are forming.

    1. Open the SST charts and look at your target lake. Note the general temperature range.
    2. Identify temperature breaks — places where surface temp changes 3°F or more over a short distance. These almost always indicate underwater structure or current convergence that concentrates bait.
    3. Cross-reference with depth contours. Temperature breaks over structure (sharp dropoffs, points, humps in 80–150 feet) are king salmon highways.
    4. Check the chlorophyll map for productive (greenish-yellow) water adjacent to the temp break. Bait + temp break + structure = the magic intersection.
    5. Plan your trolling pass to run along the temperature break, not across it. Kings hold to one side or the other depending on which side the bait is on.
    6. Check the fleet tracker to see where charter boats are working. Charter captains find fish first — their AIS tracks are a free fishing report.

    Recommended Gear

    The right temperature is half the battle. The other half is putting your lures in that temperature zone with the right speed and presentation. Core gear for king salmon trolling:

    Water Temperature Guides for Other Species

    Once you know how to use temperature for kings, the same logic applies across species — though each one has its own preferred band:

    Frequently Asked Questions

    What temperature do king salmon prefer in the Great Lakes?

    King salmon (Chinook) feed most actively at 50–58°F, with 52–56°F being the prime window. They will tolerate temperatures from about 45°F to 62°F but become sluggish below 48°F and push deeper above 60°F. The narrow prime band is why precise temperature targeting matters so much for kings.

    How deep do I need to fish for kings in summer?

    By July and August on Lake Michigan, kings are typically 60–120 feet down — wherever the thermocline puts the 52–56°F water. A temperature/speed probe at downrigger depth is the most reliable way to find the exact zone. Without one, start at 60 feet and work down until your spread is in the band that’s producing.

    Can I catch king salmon without downriggers?

    In spring (April–May) yes, with planer boards and lead core. By June the kings are deep enough that downriggers become essential for boat anglers. From shore, pier and river fishing during the August–October pre-spawn run produces fish without any specialized depth gear.

    What’s the difference between king and coho temperature preferences?

    Coho prefer slightly warmer water (54–60°F) and are more tolerant of variation. Kings are tighter to the 52–56°F band and push deeper faster when surface temps warm. In mixed-species water, coho will often be 20–40 feet shallower than kings holding at the same time.

    How does upwelling affect king salmon fishing?

    Upwelling events push cold deep water to the surface near shore, usually after sustained winds blow surface water offshore. Kings follow these temperature changes aggressively, sometimes appearing in shallow water within 24 hours of an upwelling event. Watch surface temperature drops of 10°F or more along a shoreline as a tip-off.

    What’s the best time of year to target trophy kings?

    Late August through mid-September is peak for trophy kings. Pre-spawn fish are at maximum weight after feeding all summer, and they stage near tributary mouths in accessible depths. Boat trolling near the river mouths and pier fishing both produce trophies in this window.

    Plan Your Trip

    Related Guides

    Tight lines!

  • Best Water Temp for Coho Salmon: Great Lakes Guide

    Coho salmon — silvers — are the more forgiving cousin of the Chinook. They feed across a wider temperature band, push shallower in summer, and stay aggressive through more variable conditions. For anglers learning Great Lakes trolling, coho are the species that builds confidence. The temperature window is more generous, the strikes more enthusiastic, and the fish are willing to chase a lure faster and farther than kings.

    That said, “more forgiving” isn’t the same as “doesn’t care.” Coho still concentrate in specific temperature bands tied to bait, structure, and season. The anglers who consistently put coho in the box are the ones who understand those bands and use them to set their trolling depth, speed, and spread. This guide pulls together the temperature patterns from DNR data and Great Lakes charter reports so you can do the same.


    Let’s go Fishing!
    Search for the Perfect Fishing Trip or Charter
    Great Lakes Coho Country
    Verified reviews · Free cancellation · 90-day price match
    Powered by FishingBooker · Affiliate partner

    The Quick Answer

    Coho salmon prefer water temperatures between 54°F and 60°F (12–16°C). The sweet spot for Great Lakes trolling is 55–58°F. Coho will feed actively from about 50°F up to 62°F, making them more tolerant than kings, but they push to the deeper edge of that band when surface temps climb. Below 48°F, coho slow down dramatically — though early spring fish are an exception, often feeding hard right after ice-out at 42–48°F.

    Compared to kings, coho run 2–4°F warmer in their preferred zone. That means in summer, coho typically hold 20–40 feet shallower than the kings on the same water — often in the upper portion of the thermocline rather than below it.

    Temperature Range Breakdown

    Condition Temp Range What to Expect
    Spring Burst 42–50°F Post-ice-out feeding window. Shallow, aggressive, often near shore. Lighter tackle, planer boards.
    Marginal 50–54°F Active but pre-peak. Building toward summer pattern. Mixed with brown trout, lake trout.
    Prime 54–60°F Peak feeding. Coho stack on bait, willing to chase. Trolling 2.5–3.0 mph. The bread-and-butter band.
    Warm Edge 60–64°F Coho push deeper or move to find cooler water. Bait may be above them. Lure speed often picks up.
    Too Warm Above 64°F Coho leave the surface column entirely or migrate to cooler areas. Mid-water fishing essentially over.

    The wider prime band — 6 degrees vs the kings’ tight 4–6 — gives coho anglers more flexibility. When kings are tough because the thermocline shifted overnight, coho often stay in the game.

    Why Coho Are Easier Than Kings

    A few practical differences worth knowing if you’re transitioning from king-focused fishing:

    Wider temperature tolerance. Coho can sit in 56°F water all day; kings get restless and move. This means you don’t have to chase tiny temperature shifts the way kings demand.

    Higher in the water column. Even in peak summer, coho often hold at 30–60 feet while kings are 80–120. Shorter downrigger setups work. Lead core lines and dipsy divers reach them effectively.

    More aggressive strikes. Coho hit lures with reckless commitment. Kings often follow and refuse; coho commit. This means hook-up rates are higher and missed strikes are less common.

    Faster trolling speeds work. Coho will run down a 3.0 mph spoon all day. Kings prefer 2.4–2.6 mph. If you’re searching unfamiliar water, troll faster — you’ll cover more ground and the coho will still hit.

    Seasonal Patterns

    Early Spring (April): The Shallow Burst

    Post-ice-out is the underrated coho window. Surface temps are still in the low to mid 40s — colder than the official prime band — but coho push shallow to feed aggressively after winter. They’re often inside the 50-foot contour, sometimes within casting distance of pier anglers. Planer boards with small spoons and crankbaits in 5–25 feet of water produce. The fish are smaller (3–6 lbs typically) but plentiful and willing.

    Late Spring (May): Transition

    Surface temps climb into the high 40s and 50s. Coho start spreading out and pushing slightly deeper as the warmer surface water layer develops. Brown trout fishing peaks during this period — coho mix in with the browns on the shallow reefs. This is when planer board fishing transitions to early downrigger setups, usually 15–35 feet down.

    Early Summer (June): Thermocline Begins

    The thermocline starts to form. Coho push to its upper edge — typically 30–50 feet down where surface water meets the colder layer. Downriggers become the dominant technique. Speeds bump up to 2.5–2.8 mph. The fish are 6–9 lbs by this point and feeding hard on alewives that concentrate at the thermocline boundary.

    Peak Summer (July–August): Above the Kings

    The thermocline is fully developed. Surface temps are 65–72°F. Coho hold in the 56–60°F band, which puts them at 40–70 feet down — above the kings holding deeper in 52–56°F water. Mixed-species trolling spreads work well in this period: shallower riggers and dipsies for coho, deeper ones for kings. Charter boats often run 6–8 rod spreads to cover both depth ranges.

    Fall Run (September–October): The Big Show

    This is when coho fishing peaks. As surface temps drop back into the 50s and 60s, coho push into shore and stage near tributary mouths for their spawning run. Pier and river fishing produces double-digit fish counts on good days. The coho run is shorter and more concentrated than the king run, but the fish are often more accessible to shore-based anglers. The Salmon River in New York, the Manistee in Michigan, and the Sheboygan in Wisconsin are classic fall coho destinations.

    Winter (November–March): Done

    Coho season ends with the spawn. The surviving fish die after spawning (Pacific salmonid life cycle), and adult coho aren’t a winter target. Next year’s class is finning the rivers as smolts.

    Temperature vs Other Factors

    Bait location — Coho follow alewives more aggressively than kings do. If alewives are at 30 feet because of where the chlorophyll-rich water sits, coho will be there even if 30 feet isn’t strictly in the prime temperature band. The chlorophyll map often predicts coho location better than the SST chart alone.

    Light penetration — Coho feed in brighter light than kings. Midday coho fishing produces better than midday king fishing. That said, dawn and dusk are still the best windows.

    Water clarity — Coho prefer clearer water than kings. After heavy rain that pushes muddy water out of tributaries, coho often move offshore until clarity returns. Kings tolerate dirty water better.

    Wind direction — A west or southwest wind on Lake Michigan piles bait against the east shore and concentrates coho into manageable areas. East winds push bait offshore and scatter coho into harder-to-find pods.

    How to Use SST Charts for Coho

    1. Check the SST charts for surface temperatures in your target area. Coho often sit very close to the surface temp band when conditions are right.
    2. Look for moderate temperature breaks — 2–4°F changes over short distances. Coho aren’t as tied to sharp breaks as kings; they spread along gentler temperature gradients.
    3. Cross-reference the chlorophyll map. Greenish productive water within the 54–60°F band is where the alewives are, and where the coho will be.
    4. Plan to fish shallower than for kings. If kings are at 80 feet, coho are typically at 40–60. Plan your trolling spread accordingly.
    5. Check the fleet tracker for charter activity. Most Great Lakes charters target whatever’s biting; if boats are running, the fish are there.

    Recommended Gear

    Water Temperature Guides for Other Species

    Frequently Asked Questions

    What temperature do coho salmon prefer?

    Coho prefer 54–60°F, with 55–58°F being the prime band. They tolerate temperatures from about 48°F to 64°F and feed across that range, but the highest catch rates come in the prime window. Spring coho will feed in colder water (42–48°F) but only briefly during the post-ice-out feeding burst.

    Are coho easier to catch than king salmon?

    Generally yes. Coho feed across a wider temperature band, hold shallower in the water column, hit lures more aggressively, and tolerate faster trolling speeds. For anglers new to Great Lakes trolling, coho are the more forgiving species to learn on. Kings demand more precision.

    How deep are coho in summer?

    Typically 30–60 feet down by July, depending on where the thermocline sits and where bait is concentrated. This is shallower than kings, which usually hold below 60 feet by the same point in the season. Coho stay in the upper portion of the thermocline rather than below it.

    When is the fall coho run?

    The fall run peaks in late September and early October on most Great Lakes tributaries. Coho stage near river mouths in the harbors and piers before pushing into the rivers themselves. The run is shorter and more concentrated than the king run — typically a 2–3 week peak window — but produces excellent shore-based fishing.

    What’s the difference between coho and king salmon temperature preferences?

    Coho run 2–4°F warmer than kings in their preferred band. In mixed-species water, coho will be 20–40 feet shallower than kings holding at the same time. Coho also tolerate more temperature variability — a 4°F shift that scatters kings may not move coho at all.

    Can I catch coho without a boat?

    Yes — especially in spring and during the fall run. Spring coho push shallow enough that pier and surfcasting produces. The fall run brings coho into the rivers and harbors where shore anglers, pier fishermen, and waders all have access. Mid-summer coho are harder to reach without a boat.

    Plan Your Trip

    Related Guides

    Tight lines!

  • Best Water Temp for Atlantic Salmon: Great Lakes Guide

    Atlantic salmon are the underrated member of the Great Lakes salmon family. They don’t get the attention kings and coho do — the Pacific salmon program in the Great Lakes started in the 1960s and Atlantics arrived later — but the fishery has grown into something special, particularly on Lake Huron and the St. Marys River system. Anglers who target Atlantics talk about them like a different kind of fish: harder fighting pound-for-pound than Pacific salmon, more acrobatic, and more selective about water temperature and bait.

    The temperature dynamics for Atlantics overlap with kings but with key differences. They hold in similar water but use it differently — staging in current, suspending in slightly shallower bands, and reacting more strongly to barometric shifts. This guide pulls together the temperature patterns from Michigan DNR data, Ontario fishery reports, and Atlantic-focused charter logs.


    Let’s go Fishing!
    Search for the Perfect Fishing Trip or Charter
    Lake Huron, Ontario & St. Marys
    Verified reviews · Free cancellation · 90-day price match
    Powered by FishingBooker · Affiliate partner

    The Quick Answer

    Atlantic salmon prefer water temperatures between 50°F and 58°F (10–14°C). The sweet spot for Great Lakes Atlantics is 54–58°F. They will feed actively from about 48°F up to 62°F, with optimal aggression in the upper part of the prime band. Below 46°F they slow down significantly. Above 64°F they push deep or move to seek cooler water.

    While the headline range looks similar to king salmon, Atlantics actually trend slightly warmer than kings within that range — closer to coho preferences. The 54–58°F window is the sweet spot rather than the cooler 50–54°F kings often prefer.

    Temperature Range Breakdown

    Condition Temp Range What to Expect
    Too Cold Below 46°F Atlantics present but feeding sporadically. Slow trolling and finesse presentations needed.
    Marginal 46–50°F Active in spring conditions. Mixed with browns and lake trout. Often in shallower water than peak summer.
    Prime 54–58°F Peak feeding. Atlantics aggressive on spoons and stickbaits. Trolling 2.4–2.8 mph. This is the sweet spot.
    Warm Edge 58–62°F Atlantics push deeper, often suspending just below the thermocline. Bait may be above them.
    Too Warm Above 64°F Surface fishing essentially over. Fish move to deep current-influenced areas or upwelling zones.

    What Makes Atlantics Different

    A few traits set Atlantics apart from Pacific salmon and shape how temperature affects them:

    Multi-spawn life cycle. Unlike Pacific salmon, Atlantics don’t all die after spawning. Many survive and return to spawn multiple times. This means the population includes fish of varied sizes and ages, often holding at different depths in the same water.

    Current preference. Atlantics are drawn to flowing water and current edges far more than kings or coho. This is why the St. Marys River — connecting Lake Huron to Lake Superior — is the premier Great Lakes Atlantic fishery. They stage in current seams and feed on bait being pushed past them.

    Selective feeding. Atlantics will refuse lures that coho would hammer. Color, action, and trolling speed matter more for Atlantics than for the other species. Spoons that produce one day may be ignored the next.

    Acrobatic fighter. When hooked, Atlantics jump repeatedly. A 12-pound Atlantic puts on more visual display than a 25-pound king. Loose drag and a long rod with give matter — they pull treble hooks easier than Pacific salmon.

    Seasonal Patterns

    Spring (April–June): Nearshore and Aggressive

    Post-ice-out is prime time on Lake Huron and the St. Marys system. Atlantics push into shallow water — 10–30 feet — to feed on smelt and emerald shiners. Surface temperatures in the 40s and low 50s find the fish active and willing. Planer board trolling with stickbaits and small spoons in colors like blue/silver, green/silver, and gold produces. This is when shore-based anglers and small-boat operators have their best window before the fish push offshore.

    Early Summer (June–July): Thermocline Setup

    As surface temps climb into the 60s, the thermocline forms. Atlantics push to the upper part of it — typically 25–55 feet down, holding above the kings. Downriggers come into play but lead core and dipsy divers are still effective because the fish aren’t as deep as kings yet. The St. Marys River fishery transitions: river-mouth and nearshore fishing slows as fish push out to lake water, but the river current itself still holds resident Atlantics that don’t make the same offshore migration.

    Peak Summer (July–August): The Deep Push

    The thermocline is fully developed. Atlantics hold at 50–90 feet down in the 54–58°F band. Lake Huron’s deep basin produces well during this period, particularly the western shore from Rogers City to Alpena. Atlantics often suspend above structure rather than holding on it — a different pattern from lake trout in the same water. Look for clouds of bait on the sonar with Atlantics above them.

    Pre-Spawn (Late August–September): River Bound

    Atlantics that spawn move toward tributaries. Unlike Pacific salmon, not every Atlantic spawns every year, and not every fish dies after spawning — but a significant portion of the population stages near tributary mouths in early fall. The St. Marys River fishery is the most accessible, with fish holding in the rapids and current seams. Pier and shore fishing produces in this window.

    Fall and Winter (October–March): Mixed Strategy

    Post-spawn surviving Atlantics return to the lake. They feed during stable weather windows but become harder to target consistently. Winter ice fishing for Atlantics is a niche but real fishery, particularly on Lake Ontario embayments and parts of Lake Huron near tributary mouths.

    Where Atlantic Salmon Fishing Happens

    Atlantic salmon distribution in the Great Lakes is much more concentrated than kings or coho. The major fisheries:

    Lake Huron — the Atlantic stronghold. Particularly the northern part of the lake from Hammond Bay south to Tawas. Rogers City and Alpena are the popular charter ports. The combination of cold water, current from connecting waterways, and stocked populations makes this the best Atlantic salmon water in the lower 48.

    St. Marys River. Connecting Lake Huron to Lake Superior, this fast-flowing river holds resident Atlantics year-round and pulls in lake-run fish during spawning. The rapids section near Sault Ste. Marie is famous water. Fly fishing and pier fishing both produce.

    Lake Ontario. The Atlantic salmon restoration program has been working for decades. The fishery is less dense than kings or coho but real, with fish concentrated near the eastern basin and tributaries like the Salmon River, Little Salmon, and Black River.

    Lake Michigan. Limited Atlantic salmon presence. Mostly stray fish from other lakes or limited stocking. Not a primary target.

    Temperature vs Other Factors

    Current and structure — Atlantics relate to current more than other Great Lakes salmonids. Even in open lake water, they often hold along current edges created by underwater structure, river plumes, or wind-driven flow. Temperature gets them in the area; current concentrates them on specific spots.

    Bait type — Atlantics in lake water primarily feed on alewives and smelt. In the St. Marys River, emerald shiners and small whitefish are dominant. Match the hatch — fly anglers in particular need to size and color their patterns to local forage.

    Barometric pressure — Atlantics are notably sensitive to pressure changes. Falling barometer before a front triggers feeding. Stable high pressure for several days produces tough fishing. This is more pronounced for Atlantics than for kings or coho.

    Water clarity — Atlantics prefer clear water. After heavy rain or wind that pushes muddy water out of tributaries, Atlantics move offshore until clarity returns. This is one reason the St. Marys River fishery is reliable — the water there is consistently clear.

    How to Use SST Charts for Atlantics

    1. Open the SST charts for your target lake — likely Lake Huron or Ontario. Identify areas in the 54–58°F band.
    2. Look for current convergences — places where surface water moves in different directions, often indicated by surface debris lines or color changes. These current edges concentrate Atlantic salmon disproportionately.
    3. Cross-reference with structure — points, reefs, and dropoffs that interact with current. The intersection of cold water, structure, and current is prime Atlantic water.
    4. Check the chlorophyll map for productive bait water in the prime temperature zone.
    5. Plan to fish above the thermocline rather than below it. Atlantics typically hold higher in the water column than kings.
    6. Check the fleet tracker for charter activity, particularly out of Lake Huron’s Atlantic-focused ports.

    Recommended Gear

    Water Temperature Guides for Other Species

    Frequently Asked Questions

    What’s the best water temperature for Atlantic salmon?

    Atlantic salmon feed most actively at 54–58°F. They tolerate temperatures from 46°F to 62°F but the prime band is narrower than coho and trends slightly warmer than kings within the overlap zone.

    Where can I catch Atlantic salmon in the Great Lakes?

    Lake Huron is the strongest Atlantic salmon fishery, particularly the northern half between Hammond Bay and Tawas. The St. Marys River connecting Huron to Superior holds Atlantics year-round. Lake Ontario has a growing fishery in the eastern basin and tributary mouths.

    How are Atlantic salmon different from king and coho?

    Atlantics don’t all die after spawning, may spawn multiple times, prefer water with current, are pickier about lure presentation, and are more acrobatic when hooked. They hold higher in the water column than kings and prefer clear water more than coho.

    Can I catch Atlantic salmon from shore?

    Yes, especially in spring when fish push shallow, and during the fall pre-spawn run when they stage near tributary mouths. The St. Marys River rapids are wadeable in places and produce excellent shore fishing. Pier fishing in Lake Huron’s Atlantic ports also produces during the spring run.

    When is the best time to fish for Atlantics?

    Spring (April–June) for nearshore, accessible fish. Summer (June–August) for offshore trolling with downriggers. Late August through September for pre-spawn river fish in the St. Marys system.

    What lures work best for Atlantic salmon?

    Spoons in blue/silver, green/silver, gold, and chartreuse patterns. Smaller stickbaits like Husky Jerks for spring. Cleo and Krocodile spoons for casting. In rivers, flies sized to local bait. Atlantics are pickier than coho or kings — be willing to change colors and sizes more frequently.

    Plan Your Trip

    Related Guides

    Tight lines!

  • Slider Rig for Live Bait Fishing

    Slider Rig for Live Bait Fishing

    The slider rig is one of the most effective live bait presentations for SoCal offshore fishing. It lets you adjust the depth your bait swims at without retying your rig — a critical advantage when fish are holding at a specific depth and you need to get your bait right in front of them. Whether you’re targeting yellowtail on a reef, white seabass in the kelp, or tuna under a kelp paddy, the slider rig gives you precise depth control with a natural bait presentation.

    What Is a Slider Rig?

    A slider rig uses a sliding sinker on your main line, held at a set depth by a bobber stop — a small knot or rubber stop that you can move up and down the line. The sinker slides freely down the line until it hits the bobber stop, and your bait hangs below on a fluorocarbon leader tied directly to the main line. When a fish takes the bait, the line pulls through the sinker freely — the fish feels no resistance, so it doesn’t drop the bait.

    The slider is different from a fly-line rig (which uses no weight and lets the bait swim freely) and a Carolina rig (which sits on the bottom). The slider suspends the bait at a specific depth in the water column — wherever you set the bobber stop.


    Book a Yellowtail Charter
    Southern California & Baja · Verified reviews · Free cancellation

    Powered by FishingBooker


    How to Set Up a Slider Rig

    What you need: A bobber stop, an egg sinker (1–3 oz), fluorocarbon leader (20–40lb), and a circle hook in 1/0–4/0 (or a J hook if the boat allows — see our hooks by species guide for size selection by target). That’s it — four components.

    On bobber stops: You have two options. A Rubber bobber stop are the best choice Buy on Amazon — they’re inexpensive, grip the line firmly, slide through rod guides cleanly, and are infinitely adjustable without retying anything. Keep a pack in your bag and you’ll always have them. Alternatively, if you’re on the water without one, a large enough knot in the main line can do the same job — a double overhand or a Palomar tag end left deliberately long will physically stop the sinker from sliding past it. It’s less adjustable than a proper stop but it works in a pinch.

    Step 1: Slide the bobber stop onto your main line at the depth you want your bait to fish. If you want your bait at 5 feet, measure 5 feet of line from your rod tip and place the stop there. The stop grips the line firmly enough to hold the sinker at depth but can be slid up or down with finger pressure when you need to adjust — no retying required.

    Step 2: Slide the egg sinker onto the line below the bobber stop. The sinker now floats freely on the line between the stop and the knot connecting your leader.

    Step 3: Tie your fluorocarbon leader directly to the end of your main line using a strong connection knot. The knot itself acts as a natural stop for the sinker — the sinker can’t slide past it. Cut 3–5 feet of leader.

    Step 4: Tie your hook to the end of the leader.

    The complete rig from top to bottom: main line → bobber stop → egg sinker (slides freely) → main line/leader knot → fluorocarbon leader → hook.

    How It Works

    When you drop the rig in the water, the sinker pulls the line down. The line slides through the sinker until the bobber stop reaches the sinker — at which point the rig stops descending. Your bait now hangs at the depth you set, swimming naturally on the leader below.

    When a fish takes the bait and swims away, the line pulls freely through the sinker. The fish feels only the weight of the bait and hook — no sinker resistance. This free-spool effect is why the slider rig gets more committed takes than fixed-weight rigs. By the time you engage the reel and come tight, the fish has the bait fully in its mouth and the circle hook rotates into the jaw corner.

    When to Use a Slider Rig

    Yellowtail on Structure

    When yellowtail are holding at a specific depth on a reef or kelp edge — say 40 feet down over 80 feet of water — a slider lets you put your bait right in their face. Set the stop at 40 feet, drop the rig, and your sardine swims at exactly the depth the fish are at. This is far more precise than fly-lining (where the bait goes wherever it wants) and more natural than a heavy dropper loop rig. When fish are off the bite on live bait, it’s also worth having a jig ready to drop — the slider and the iron cover the same fish from two angles. Check the yellowtail temperature guide for when they’re in range.

    White Seabass in the Kelp

    White seabass often suspend at mid-depth in the kelp canopy, feeding on squid. A slider rig with a live squid at 20–30 feet is the classic technique. The squid swims naturally in the kelp, the sinker keeps it at the right depth, and the free-slide lets the seabass eat without feeling resistance. This is how most trophy white seabass are caught from party boats and private boats during the spring spawning run.

    Tuna Under Kelp Paddies

    When tuna are holding 30–80 feet under a kelp paddy and won’t come to the surface, a slider rig gets your bait to their depth. Set the stop based on what the sonar shows, and let a live sardine or mackerel swim at the target depth. This is more effective than a fly-line (which won’t get deep enough) and more natural than a heavy sinker rig. On the same stop, keep a slow-pitch jig rigged and ready — when the slider bite slows, dropping a jig to the same depth often restarts it.

    Halibut Along Structure Edges

    When drifting along sandy bottom near structure, a slider rig set just above the bottom lets your bait swim naturally along the sand where halibut lie in wait. The free-slide ensures a halibut can pick up the bait and move without feeling the sinker.

    Dialing in the Details

    Sinker Weight

    Use the lightest weight that gets your bait to depth. In minimal current, 1 ounce is often enough. In moderate current, 2 ounces. In strong current or deep water (100+ feet), 3 ounces or more. Too much weight kills the bait faster and makes the presentation less natural. Too little and the bait never reaches the target depth.

    Leader Length

    3–5 feet is standard. Longer leaders give the bait more freedom to swim naturally but make the rig harder to manage on the boat. Shorter leaders keep better control but reduce the bait’s range of motion. For tuna in clear water, err longer (5 feet). For yellowtail on structure, 3 feet prevents the bait from swimming into the rocks.

    Adjusting Depth

    The biggest advantage of the slider rig is real-time depth adjustment. If the fish move shallower, slide the bobber stop down. If they drop deeper, slide it up. No retying, no re-rigging — just move the stop and drop again. This is where purpose-made bobber stops Buy on Amazon — really earn their keep over a knot: you can reposition them in seconds with two fingers while keeping your bait in the water. On a boat where conditions change throughout the day, that flexibility is invaluable.

    Slider Rig vs Other Live Bait Rigs

    RigBest ForLimitation
    Fly-lineSurface tuna, free-swimming baitNo depth control — bait goes where it wants
    Slider (this guide)Specific depth targeting, structure fishingSlightly more complex setup
    Carolina rigBottom fishing (halibut, surf)Bait stays on bottom only
    Dropper loopDeep bottom fish (rockfish)Fixed depth, less natural movement

    Gear Recommendations

    A 30lb conventional reel with a medium-heavy rod is the standard slider rig setup for yellowtail and white seabass. For tuna, step up to a 40lb+ setup. Braided main line is preferred because it’s thinner, allowing the line to slide more freely through the sinker, and the zero stretch gives you better sensitivity to feel the bite.

    Plan Your Trip

    Related Guides

    Tight lines!

  • How Swell and Wind Affect Fishing in Southern California

    How Swell and Wind Affect Fishing in Southern California

    Water temperature gets all the attention in fishing planning, but swell and wind are just as important — sometimes more. A perfect SST chart with 65°F water and bait everywhere means nothing if there’s a 10-foot south swell blowing out the surf zone or 25-knot winds making the offshore run miserable. Knowing how to read swell and wind data — and what conditions are actually fishable for your target — is a skill that separates consistently successful anglers from the ones who “should have checked the forecast.”

    This guide breaks down how swell and wind affect every major type of SoCal fishing, plus what to look for on the marine weather page before you commit to a trip.

    Understanding Swell

    Swell is the organized wave energy moving through the ocean. It’s measured by three numbers: height (how tall the waves are), period (the time in seconds between wave crests), and direction (where the swell is coming from). All three matter for fishing.

    Swell Height

    Swell height is reported in feet and is the most obvious factor. But raw height doesn’t tell the whole story — a 4-foot swell at 15-second intervals is a completely different animal than a 4-foot swell at 8-second intervals. The longer period swell is smooth, powerful, and manageable. The short period swell is steep, choppy, and miserable.

    General guidelines for SoCal: under 3 feet is calm and fishable for everything. 3–5 feet is moderate — fine for offshore boats, manageable for surf fishing, and worth checking the period before committing. 5–8 feet starts limiting options — surf fishing gets dangerous, smaller boats should stay in, and even larger boats will have a rough ride. Over 8 feet is serious — big boat trips only, and even those can be uncomfortable.

    Swell Period

    Period is the sleeper stat that most anglers ignore. A long period (14+ seconds) means the swell was generated far away — these are deep-water swells that are well-organized and predictable. A short period (under 10 seconds) means the swell was generated locally by wind — these are steep, choppy, and uncomfortable.

    The magic number for SoCal: 12+ second period generally means clean, fishable conditions even if the height looks intimidating. Under 8 seconds means messy, windy conditions regardless of height. Between 8–12 seconds is the gray zone — check the wind.

    Swell Direction

    SoCal’s coastline runs roughly northwest-to-southeast, which means different swell directions hit differently. South swells (180–210°) wrap into most SoCal beaches and harbors, creating challenging surf and surge even at moderate heights. West swells (260–280°) are the most common and hit the coast head-on — standard conditions most of the year. Northwest swells (300–330°) are partially blocked by Point Conception and the Channel Islands, so the same height NW swell produces smaller surf in San Diego than Santa Barbara.

    For surf fishing specifically, the best conditions are a moderate west swell (2–4 feet, 12+ second period) with light wind. This creates clean, defined sandbars with clear troughs where fish patrol.

    Understanding Wind

    Wind affects fishing in two ways: it creates surface chop and current (making boat control harder and lure presentation more difficult) and it stirs up the water column (reducing visibility and changing where fish hold).

    Wind Speed

    Under 10 knots is ideal for nearly all SoCal fishing. 10–15 knots is manageable but starts affecting casting accuracy and boat drift speed. 15–20 knots makes offshore fishing uncomfortable and surf fishing difficult — white caps start forming and line management becomes a challenge. Over 20 knots cancels most fishing plans — stay home or fish a protected bay.

    Wind Direction

    Offshore wind (blowing from land toward the ocean — typically east or northeast in SoCal) is generally the best for fishing. It flattens the ocean surface, creates calm nearshore conditions, and pushes bait against the kelp line. Santa Ana winds are extreme offshore winds that can create glass-calm ocean conditions — some of the best fishing days of the year happen during mild Santa Anas.

    Onshore wind (blowing from ocean toward land — typically west or southwest) is the most common and the most problematic. It builds chop, creates messy surf, reduces visibility in shallow water, and makes casting into the wind a battle. Afternoon onshore winds are almost guaranteed in SoCal from spring through fall — plan to fish early.

    How Conditions Affect Each Type of Fishing

    Surf Fishing

    Surf fishing is the most swell-sensitive type of fishing. You need enough wave action to create troughs and move sand (which concentrates fish) but not so much that you can’t fish safely or keep your bait in place.

    Ideal conditions: 2–4 foot swell, 12+ second period, under 10 knot wind, west or northwest swell direction. These conditions create clean sandbars with defined troughs where halibut, corbina, and perch feed actively. A 9–10 foot surf casting rod paired with a smooth 4000–6000 class surf reel gives you the casting distance to reach the outer trough edge where fish hold on moderate swell days. For halibut specifically, a 4–6 inch paddle tail swimbait ticked slowly along the bottom is the most reliable artificial in clean surf conditions. See our videos on Doheny surf fishing and finding halibut from shore for tips on reading the beach and working the troughs.

    Avoid: Rising south swell (creates dangerous shorebreak), short period wind swell (messy, churned-up water), or anything over 5 feet without significant experience. When the surf exceeds 5 feet, corvina and halibut move off the exposed beaches entirely — wait for the swell to drop or target a protected pocket beach instead.

    Inshore Boat Fishing (Kelp, Bays, Islands)

    Inshore fishing is moderately affected by swell and wind. The kelp beds and island lee sides provide some protection, but wind-driven current changes where fish hold and affects bait presentation.

    Ideal conditions: Under 4-foot swell, under 12 knots wind. Light wind days produce the best kelp fishing because your boat holds position naturally and your bait presentation stays clean. The islands (Catalina, San Clemente, Coronado) have lee sides that are protected from the prevailing swell — fish the sheltered side on bigger swell days.

    What changes in wind: Yellowtail and calico bass often feed more aggressively on the current edges created by moderate wind. A light chop can actually improve the bite by breaking up the surface and making fish less wary. Dead calm isn’t always best — a little texture on the water helps. When yellows are actively feeding in a chop, a fast-retrieved surface iron or flat-fall jig on a 40lb setup outproduces live bait because you can cover more water along the current edge.

    Offshore Fishing (Banks, Open Ocean, Paddies)

    Offshore fishing is primarily affected by wind because you’re far from the coast with no protection. Swell matters less for boat comfort (long-period swell just rolls under you) and more for how it affects surface feeding activity.

    Ideal conditions: Under 15 knots wind, long-period swell. Calm days are best for surface iron fishing and popper fishing because you can see surface activity and cast accurately. Kelp paddy hunting requires calm enough conditions to spot paddies at distance — when it’s glassy, you can see a paddy from a quarter mile; in 15-knot chop, you’ll drive right past it.

    Choosing your lure by conditions: Calm days are the time to throw surface poppers and work flat-fall jigs in the upper column where you can watch the bite develop. When wind picks up and the surface goes messy, drop down — a slow-pitch jig fished at depth keeps producing when surface presentations fall apart. For dorado hunting at the paddies, calm conditions also let you get the most out of surface-oriented dorado lures like poppers and stick baits that don’t work well in chop. On calmer days when the boat is trolling between spots, it’s worth having a set of trolling feathers or cedar plugs running — you can pick up tuna and dorado between bites without stopping.

    Wind’s effect on tuna: Moderate wind (10–15 knots) can actually push bait into concentrated areas, creating feeding opportunities. Some of the best tuna bites happen on days with moderate wind and messy conditions — the fish are focused on feeding, not on your boat. But iron fishing becomes much harder in wind because casting distance and accuracy suffer significantly.

    Surf Species by Conditions

    SpeciesPreferred SwellPreferred WindNotes
    Halibut2–4 ft, long periodLight, any directionNeeds clean water, defined troughs. Check temp guide for seasonal timing.
    Corbina1–3 ft, cleanCalm to light offshoreBest in very clear water, small surf
    Barred perch2–5 ft, any periodNot pickyFeeds in the wash, handles rough conditions
    Spotfin croaker1–3 ftLightSand crab exposed by small waves
    Bat rays / sharksAny, up to 6 ftAnyTolerant of rough conditions

    Reading the Forecast

    Check the marine weather page before every trip. Here’s a quick decision framework:

    Go fishing: Swell under 4 feet, period over 12 seconds, wind under 12 knots. These conditions are good for almost everything.

    Fish with caution: Swell 4–6 feet or wind 12–18 knots. Stick to protected areas — island lee sides, bays, or calm beaches. Avoid open ocean in smaller boats.

    Stay home (or fish a bay): Swell over 6 feet, wind over 20 knots, or a short period (under 8 seconds) wind swell building. The risk isn’t worth it, and the fishing is usually poor in these conditions anyway.

    Cross-reference the weather with the SST chart and chlorophyll map — sometimes mediocre conditions with great water temperatures and bait presence still produce excellent fishing. And sometimes perfect conditions with poor water produce nothing. Use all the data together.

    Plan Your Trip

    Related Guides

    Tight lines!

  • What to Bring on an Overnight Fishing Trip – Tips from experienced SoCal anglers.

    What to Bring on an Overnight Fishing Trip – Tips from experienced SoCal anglers.

    Your first overnight fishing trip out of San Diego is a rite of passage — 1.5 to 3 days on the water targeting yellowtail, tuna, dorado, and whatever else swims into range at the Coronado Islands, offshore banks, or the Baja coast. The fishing can be incredible, but the experience lives or dies on your preparation. Forget the right gear and you’ll spend the trip borrowing, improvising, or sitting out the best bites. Pack smart and you’ll be the one with a full sack while everyone else scrambles.

    This guide covers everything you need for overnight and multi-day trips out of San Diego landings like H&M, Fisherman’s Landing, and Point Loma Sportfishing.

    Tackle and Gear

    Rods and Reels

    Bring at least two setups — ideally three. Rods break, reels fail, and you don’t want to miss the bite because your only outfit went down. The standard overnight quiver:

    Setup 1 — Bait rod (25–30lb class): Your workhorse. A 7-foot medium-heavy rod paired with a lever drag conventional reel (Penn Squall II, Shimano Talica 12). Spooled with 40lb braid and rigged with 30lb fluorocarbon leader. This handles yellowtail, white seabass, school tuna, and everything else on live bait.

    Setup 2 — Iron / casting rod (30–40lb class): An 8-foot heavy spinning rod with a 6000–8000 spinning reel spooled with 50lb braid. For surface iron, poppers, and casting to breaking fish. Also doubles as a heavy live bait rod.

    Setup 3 (optional but recommended) — Heavy outfit (40lb+ class): If the trip targets bluefin tuna, bring a 40lb+ conventional setup. A 6-foot heavy rod with a two-speed reel (Shimano Talica 16) and 65lb braid. You may not need it, but if a 100-pound bluefin shows up and you don’t have it, you’ll regret it forever.

    Terminal Tackle

    Pack more than you think you need. Overnight trips burn through tackle fast, and the boat’s tackle shop charges premium prices.

    Hooks: The circle vs. J hook decision matters on overnights — circles are standard for live bait on most SoCal boats, J hooks shine for soaking chunk and working certain jig rigs. Bring both: circle hooks in 1/0, 2/0, 3/0, and 4/0 (at least 10 of each), plus a handful of J hooks in 2/0–4/0. Treble hooks to replace worn ones on your surface irons.

    Leader material: Fluorocarbon in 20lb, 25lb, 30lb, and 40lb — at least 25 yards of each. You’ll retie leaders constantly, especially after catching fish or hitting structure. Lighter fluoro for line-shy bluefin; heavier for dorado and yellowtail in kelp.

    Sinkers: Egg sinkers in 1oz, 2oz, and 3oz for slider rigs. A few torpedo sinkers in 6–8oz for dropper loop bottom fishing if the trip includes rockfish stops.

    Swivels: Barrel swivels in size 3 and 5. Snap swivels for quick jig changes.

    Jigs: This is where overnights get expensive fast — build your kit before you leave. For tuna, the Shimano Butterfly Flat-Fall (160g) and Tady 45 are the workhorses; our best tuna jigs and irons guide breaks down exactly what to pack by size and color for SoCal conditions. For dorado at the paddies, lighter irons and feathers shine — see our best dorado lures guide for the specific setups. If the trip includes trolling legs between spots, our tuna trolling lures guide covers the cedar plugs and feathers worth having in your kit. At minimum bring: 2 Tady 45s (blue/white and scrambled egg), 2 Flat-Falls (160g, different colors), and 1 lighter iron (Salas 7X). If you have poppers, bring one. See our jigs vs irons vs poppers guide for the full rundown on when to throw what.

    Yellowtail iron: Don’t neglect the yellows — a Tady 4/0 or Tady Heavy in blue/white is your go-to when the yellows are stacked at the Coronados or 9-Mile Bank. See the best yellowtail jigs guide for the full kit.

    Extras: Bead assortment, bobber stops (for slider rigs), a few pre-tied dropper loop rigs, split rings and solid rings for jig hooks, and a small hook file to sharpen points.

    Tools

    A pair of braided line scissors (regular scissors chew braid poorly), long-nose pliers for hook removal, a knife for cutting bait, and a small screwdriver for reel adjustments. A headlamp is essential — night fishing, early morning rigging, and navigating the dark bunk room all require one. Bring a spare battery.

    Clothing

    The ocean at night is cold, even in summer. Dress in layers and pack for conditions 20°F colder than the daytime forecast.

    Base layer: Moisture-wicking synthetic shirt and pants. Avoid cotton — it gets wet, stays wet, and you’ll freeze.

    Mid layer: Fleece jacket or hoodie. This is your comfort layer for nighttime and early morning.

    Outer layer: A waterproof jacket is non-negotiable. Spray, rain, and wave splash will find you. A quality fishing rain jacket with sealed seams keeps you dry and fishing while everyone else retreats to the cabin. Waterproof pants are optional for summer trips but essential in winter and spring.

    Footwear: Deck boots or waterproof shoes with non-marking soles. The deck is wet, slimy, and slippery — sandals and regular sneakers are a recipe for a fall. Bring a dry pair of socks in a ziplock bag for sleeping.

    Sun protection: Long-sleeve sun shirt (UPF 50), wide-brim hat or cap with neck flap, quality polarized sunglasses (essential for seeing fish and reading the water), and reef-safe sunscreen for face and hands. The sun on the water is brutal — burns happen fast and make the second day miserable.

    Gloves: Fingerless fishing gloves protect your hands when handling fish, tying knots with braid (which cuts bare skin), and fighting fish on the rail. Your hands will thank you on day two.

    Food and Drink

    Most overnight boats provide meals, but they’re basic and the timing doesn’t always align with when you’re hungry. Bring supplemental food:

    Water: At least 2 liters per day. Dehydration sneaks up on you, especially in the sun and wind. The boat has water, but having your own ensures you stay hydrated without leaving the rail during a bite.

    Snacks: Energy bars, trail mix, beef jerky, fruit, crackers — anything that’s easy to eat with one hand while keeping an eye on your rod. Avoid anything that needs refrigeration or creates a mess.

    Caffeine: Coffee is usually available on the boat, but bring your own if you’re particular. Energy drinks or caffeine gummies help on early morning bites when you’ve been up since 2 AM.

    Avoid: Alcohol in excess (dehydration + seasickness + heavy machinery = bad combo), heavy/greasy food if you’re prone to motion sickness, and anything that needs heating.

    Health and Comfort

    Seasickness prevention: If you have any history of motion sickness, take precautions before you leave the dock. Prescription scopolamine patches (applied behind the ear 8+ hours before departure) are the most effective. Over-the-counter options: Bonine (meclizine) taken the night before and morning of, or ginger chews as a supplement. Do not wait until you feel sick — by then it’s too late.

    Sleep: Bring a sleeping bag or warm blanket for the bunk. The bunks are narrow, the boat rocks, and the engine drones — earplugs and an eye mask dramatically improve sleep quality. Even 3–4 hours of solid sleep makes a huge difference on day two.

    Personal items: Toothbrush, any medications, small towel, hand sanitizer, and lip balm with SPF. A small dry bag keeps electronics and valuables safe from water.

    Packing Checklist

    CategoryItems
    Tackle2–3 rod/reel setups, circle & J hooks (multiple sizes), fluorocarbon leader (20–40lb), sinkers, swivels, tuna jigs, yellowtail irons, dorado lures, trolling feathers, poppers, pre-tied rigs, bobber stops, beads, split rings
    ToolsBraid scissors, pliers, knife, headlamp + spare battery, hook file, small screwdriver
    ClothingBase layer, fleece mid layer, waterproof jacket, deck boots, sun shirt, hat, polarized sunglasses, sunscreen, fingerless gloves, dry socks
    Food2+ liters water/day, energy bars, jerky, trail mix, fruit, caffeine source
    HealthSeasickness meds (take early!), prescription medications, lip balm SPF
    ComfortSleeping bag/blanket, earplugs, eye mask, small towel, hand sanitizer
    StorageSoft-sided bag (no hard suitcases — bunk space is tight), dry bag for electronics, ziplock bags for phone and wallet

    Before You Leave

    The night before your trip, check conditions on fishing-reports.ai so you know what to expect and can adjust your tackle accordingly:

    Related Guides

    Talk to the landing when you check in — they’ll tell you what’s been biting and recommend tackle. The deckhands on SoCal boats are some of the most knowledgeable fishing guides anywhere. Listen to them, tip them well, and you’ll have a trip to remember.

    Tight lines!

  • Jigs vs Irons vs Poppers for Saltwater Fishing

    Jigs vs Irons vs Poppers for Saltwater Fishing

    Walk into any SoCal tackle shop and you’ll find walls of metal — surface irons, vertical jigs, flat-falls, slow-pitch jigs, poppers, stick baits, and more. If you’re not sure what the difference is or when to throw each one, you’re not alone. The categories overlap, the marketing gets confusing, and different anglers use different names for the same thing.

    This guide breaks it all down. What each type of artificial does, how it works, and — most importantly — when to reach for it on the water.

    The Three Main Categories

    Surface Irons

    Surface irons are heavy metal jigs (3–7 oz) designed to be cast long distances and retrieved rapidly across the surface. They skip, wobble, and dart, imitating a fleeing baitfish. The original SoCal technique — brands like Tady, Salas, and Jri built the tradition. For a complete breakdown of technique and specific models, read our surface iron fishing guide.

    How they work: Cast into or past breaking fish. Retrieve fast — the speed creates the action. The iron’s flat or contoured body generates its own wobble and flash as it moves through the water. No rod-tip action needed, just reel speed.

    Best for: Yellowtail, bonito, and bluefin tuna feeding on the surface. Any situation where fish are actively crashing bait in the top 10 feet of the water column.

    Limitations: Requires fish on the surface. Ineffective when fish are deep. Heavy — demanding to cast and retrieve all day. Requires a spinning reel for maximum casting distance.

    Vertical Jigs (Yo-Yo / Flat-Fall / Slow-Pitch)

    Vertical jigs are designed to be dropped straight down and worked with rod action rather than reel speed. This category includes several sub-types.

    Yo-yo (knife) jigs are narrow, heavy jigs that sink fast and are worked with aggressive, sharp rod pumps. Drop to the bottom or to the depth fish are marking, then rip the rod up and let the jig flutter back down. The erratic darting action triggers reaction strikes. Classic models include the Salas CX and Shimano Coltsniper.

    Flat-fall jigs are wide, flat jigs designed to flutter and spiral on the fall. The Shimano Butterfly Flat-Fall changed SoCal fishing when it came out — most of the bites come on the drop as the jig slowly spirals down, imitating a dying baitfish. Less physically demanding than yo-yo jigging because the jig does the work on the fall.

    Slow-pitch jigs are center-weighted jigs designed for a specific rod technique where short, rhythmic rod movements create a slow, hypnotic action. Deadly on finicky fish that won’t commit to aggressive presentations. The Nomad Streaker and Shimano Ocea are popular slow-pitch options.

    Best for: Fish holding on structure or suspended at specific depths. Yellowtail on reefs, rockfish on pinnacles, tuna under kelp paddies. Any time fish aren’t showing on the surface. See our yellowtail jigs guide for specific models.

    Limitations: Limited casting range — primarily a vertical technique. Requires knowing the depth fish are at (electronics help). Slow-pitch and flat-fall need specific rod actions to work properly.

    Poppers & Stick Baits

    Poppers are floating or slow-sinking lures with a cupped or angled face that creates a splash, bubble trail, and popping sound when worked with sharp rod twitches. Stick baits (also called pencil poppers or walk-the-dog lures) are similar but create a side-to-side walking action rather than a pop.

    How they work: Cast to or near feeding fish. Work with sharp rod twitches — each twitch pulls the popper forward and creates a commotion on the surface. The splash and noise imitates a baitfish being attacked, which draws predators in from a distance. Stick baits use a rhythmic twitch-pause-twitch to create a zigzag surface walk.

    Best for: Tuna that are following surface iron but not committing. Bluefin that have seen too many irons and need something different. Fish feeding just below the surface where a popper’s commotion draws them up. See our best poppers for tuna guide for specific models.

    Limitations: Shorter casting range than heavy surface irons. Requires more rod technique than iron. Can fatigue your wrist on long sessions. Not effective when fish are deep.

    When to Use What

    ScenarioBest ChoiceWhy
    Fish boiling on surface, wide openSurface ironMaximum casting distance, speed matches frantic bait
    Fish boiling but ignoring ironPopper or stick baitDifferent presentation breaks their pattern
    Fish showing but not breaking surfaceFlat-fall jigFlutter on the fall reaches fish just below surface
    Fish deep on structure/reefYo-yo knife jigFast sink rate, aggressive action at depth
    Fish deep but finickySlow-pitch jigSubtle action triggers cautious fish
    Kelp paddy fishingSurface iron or flat-fallCast iron past paddy; or drop flat-fall under it
    Blind casting with no visible fishSurface iron or popperCovers water, noise draws fish from distance
    Fish on sonar at specific depthFlat-fall to that depthPrecise depth targeting with fluttering action

    Gear Crossover

    One of the nice things about these categories is the gear overlaps. A spinning reel in the 6000–8000 class with a 7-foot medium-heavy fast rod handles both surface irons and poppers. A conventional reel in the 20–30lb class with a medium-heavy rod handles all three vertical jig types. You don’t need a separate setup for each category — two well-chosen outfits cover everything.

    For line, 40–65lb braid is standard across all categories. For surface iron, most anglers skip the leader for maximum casting distance. For vertical jigging, a short 40lb fluorocarbon leader protects against abrasion on structure. For poppers, a 4-foot 50–60lb fluorocarbon leader is standard to prevent bite-offs from toothy tuna.

    Building Your Arsenal

    If you’re starting from zero, here’s the order to buy:

    First purchase: Tady 45 in blue/white and scrambled egg (2 irons). This handles the most common SoCal scenario — fish on the surface — and the Tady 45 is the most versatile iron ever made.

    Second purchase: Shimano Butterfly Flat-Fall in 160g (2 colors — blue sardine and pink). This covers the second most common scenario — fish on structure or suspended — and the flat-fall is the easiest vertical technique to learn.

    Third purchase: A popper in the 60–80g range (1 popper). Nomad Design Chug Norris or Shimano Ocea Bomb Dip are both excellent. This gives you a third option when fish are rejecting irons.

    Fourth purchase: Fill in gaps. A lighter surface iron (Salas 7X), a heavy iron (Tady A1), a slow-pitch jig, and more colors in your flat-falls. At this point you’re covering 95% of situations.

    Reading the Conditions

    The ocean tells you what to throw if you know how to read it. Check the SST chart for temperature breaks where bait and predators concentrate. Warm water pushing against cooler coastal water creates feeding zones. The chlorophyll map shows where bait is thickest — green water near blue water edges is prime territory. Our species-specific temperature guides for yellowtail, bluefin, and yellowfin tell you what temperatures each species prefers.

    Plan Your Trip

    Check conditions before you go — the right artificial technique depends on what the fish are doing that day:

    Tight lines!

  • Surface Iron Fishing Guide for Southern California

    Surface Iron Fishing Guide for Southern California

    Surface iron fishing is one of the most exciting and uniquely Southern California techniques in all of saltwater fishing. There’s nothing quite like watching a boil of yellowtail or bluefin erupt on the surface, whipping a heavy chrome jig into the chaos, and feeling a fish hammer it on the retrieve. It’s raw, visual, and demands skill — which is why it’s become a badge of honor among SoCal anglers.

    This guide covers everything you need to know: the right irons, how to cast them, retrieval techniques, gear setup, and when conditions are right for throwing iron.

    What Is Surface Iron Fishing?

    Surface iron refers to heavy metal jigs — typically 3 to 7 ounces of chrome, lead, or zinc — cast to breaking fish and retrieved rapidly across the surface. The iron skips, wobbles, and darts, imitating a panicked baitfish fleeing a school of predators. The visual nature of the strikes is what hooks anglers for life — fish explode on the iron at the surface in full view.

    The technique originated in SoCal in the mid-20th century, and brands like Tady, Salas, and Jri are local legends. While jig fishing exists everywhere, the surface iron tradition — heavy jigs, fast retrieves, brutal strikes — is a distinctly Southern California thing.

    Essential Surface Irons

    You don’t need 50 different irons. A handful of proven models in the right sizes covers every situation. See our best yellowtail jigs guide and best tuna jigs guide for more detail on each model.

    Tady 45 (4.5 oz): The all-around standard. Casts well, has a wide wobble, and catches everything. If you own one iron, own this one. Blue/white, scrambled egg, and mint are the essential colors.

    Salas 7X (3 oz): The finesse option. Lighter weight matches smaller bait profiles. Great when fish are picky or the bait is small. Chrome and blue/white are reliable.

    Tady A1 (6 oz): The distance iron. When you need to reach fish that are boiling far from the boat, the extra weight gets it there. Also produces a deeper, wider action that big fish prefer. Doubles as a tuna iron.

    Salas 6X (4 oz): A narrower profile than the Tady 45, the 6X has a tighter, faster wobble. Excellent when fish want a slimmer bait profile. Many anglers keep both the 45 and 6X and switch between them until the fish tell them which one they want.

    Tady 9 (3.5 oz): A compact, heavy-for-its-size jig that sinks fast and casts like a bullet. Great for wind and when you need to get the iron down quickly before retrieving on the surface.

    Hooks: Replace the factory trebles on every iron you buy with Owner ST-66 trebles in 2/0–3/0. Factory hooks are made from soft wire that straightens on yellowtail and tuna. The ST-66 is 4X strong — it’s the single most important upgrade you can make. See our hooks by species guide for the right treble size for each iron.

    Gear Setup for Surface Iron

    Iron fishing demands specific gear. A spinning reel is preferred for casting distance — the open spool design lets you launch irons much farther than a conventional reel, which matters when fish are boiling 80+ yards away.

    Reel: Spinning reel in the 6000–10000 size class with a fast retrieve ratio (6.0:1 or higher). You need to burn the iron back fast, and a high-speed reel does the work. The reel also needs a strong, smooth drag — yellowtail will smoke you in the kelp if your drag hesitates. See our yellowtail reel guide and bluefin reel guide for specific models.

    Rod: 7–8 foot medium-heavy to heavy power with a fast action. You need the backbone to launch heavy irons and the stiffness to work them aggressively on the retrieve. A soft rod kills the iron’s action. A good iron rod has a moderate butt section for leverage and a fast tip for working the jig. See our 7-foot and 8-foot rod guides for specific models.

    Line: 40–65lb braided line. Braid’s thin diameter maximizes casting distance, and the zero stretch transmits every jig movement and every bite directly. No leader needed for most iron fishing — the speed of the retrieve and the flash of the iron means fish commit before they can inspect the connection. Some anglers add a short (3-foot) 40lb fluorocarbon leader for extra-clear water or line-shy bluefin. See our fishing line guide for specific braid recommendations and our knots guide for the FG knot connection.

    For complete rod and reel pairing advice, see our best rod and reel combo guide.

    How to Cast Surface Iron

    Casting a 4.5-ounce jig is different from casting a lure. The weight is substantial, and a bad cast can be dangerous to everyone on the boat.

    The overhead cast: Point the rod at the fish, open the bail, and load the rod behind you with a smooth, controlled backswing. Drive forward with your body and arms together — the power comes from your hips and core, not just your arms. Release the line at about 45 degrees above the horizon. The jig should fly in a tight arc, not wobble or helicopter. If it helicopters, you’re not loading the rod smoothly enough.

    The sidearm cast: Used when the wind is at your back or when you need a low trajectory to reach fish just beyond casting range. Same mechanics but on a horizontal plane. Keep the rod tip low and the arc tight.

    The lob: For shorter distances, a simple underhand lob gets the iron out without the drama of a full cast. Useful when fish pop up close to the boat unexpectedly.

    Safety: Always look behind you before casting. A 4.5-ounce chunk of metal traveling at high speed will seriously injure anyone in its path. Call out “casting!” so people around you know to duck. Keep your swing controlled — wild, uncontrolled casts are dangerous and inaccurate.

    Retrieval Techniques

    The speed burn: The most common surface iron retrieve. Crank the reel as fast as you can, keeping the rod tip low and the iron skipping on or just below the surface. The speed triggers a reaction strike from competitive fish. This is exhausting — your forearm will burn after a few casts — but it’s what catches fish in a frenzy.

    The yo-yo burn: Retrieve fast, but periodically drop the rod tip and let the iron sink 5–10 feet before burning it back to the surface. This mimics a baitfish trying to dive for safety and then being forced back up. The change of direction often triggers a strike from following fish that won’t commit to a straight retrieve.

    The slow roll: A moderate-speed retrieve that keeps the iron wobbling just below the surface. Used when fish are boiling lazily or when the bite is slow. Less dramatic but can be more effective when fish aren’t in full attack mode.

    The dead stick: Cast the iron past the boil, let it sink to the depth you think the fish are at, and then begin a medium-speed retrieve. Effective when fish are feeding subsurface and not breaking the top. Watch for subtle taps.

    When to Throw Iron

    Surface iron is at its best when fish are actively feeding on the surface. Look for these signs: boiling water (fish crashing bait on the surface), birds diving and circling, bait balls getting pushed to the surface, and meter marks showing fish high in the water column.

    In SoCal, the best iron fishing happens from late spring through fall when yellowtail and bluefin tuna push into the warm water that moves in. The Coronado Islands, La Jolla kelp, Catalina, and San Clemente Island are legendary iron grounds. Check the SST chart for warm water edges where bait concentrates and predators follow.

    Surface Iron vs Other Techniques

    SituationBest Approach
    Fish actively boiling on surfaceSurface iron (speed burn)
    Fish showing but not committingSwitch to lighter iron or poppers
    Fish deep on structureYo-yo jig or flat-fall
    No surface activity, fish on meterLive bait (fly-line or slider)
    Wind killing your cast distanceHeavy iron (Tady A1) or switch to bait

    For a complete comparison of all the artificial techniques, see our jigs vs irons vs poppers guide.

    When iron isn’t working: If fish are boiling but refusing iron, try poppers — the surface commotion triggers a different response than the flash-and-speed of iron, and fish that have been seeing the same Tady 45 from every angler on the boat will sometimes eat a popper without hesitation. See our dorado lures guide and tuna lures guide for other casting options including swimbaits and spoons.

    Plan Your Trip

    The best iron bite requires warm water, bait, and active fish. Check conditions:

    Related Guides

    Tight lines!

  • Circle Hooks vs J Hooks for Saltwater Fishing

    Circle Hooks vs J Hooks for Saltwater Fishing

    The circle hook vs J hook debate is one of the most common questions in saltwater fishing, and the answer isn’t as simple as “one is better.” Each hook design works fundamentally differently, and choosing wrong for the situation means missed fish, gut-hooked fish, or both. Understanding when to use each one will immediately improve your hookup rate. For specific hook models and sizes by species, see our best hooks by species guide.

    How They Work

    Circle hooks have a point that curves inward toward the shank, forming a circular shape. When a fish eats the bait and swims away, the hook slides through the throat and rotates to catch in the corner of the mouth. The fish essentially hooks itself. The angler’s job is to reel tight — not set the hook. A traditional hookset with a circle hook actually pulls it out of the fish’s mouth.

    J hooks have a point that runs parallel to the shank, forming a J shape. They require the angler to set the hook — when you feel the bite, you swing the rod to drive the point into whatever it touches. J hooks can penetrate anywhere in the fish’s mouth, throat, or gut, which means they hook up in more locations but also cause more deep-hooking.

    When to Use Circle Hooks

    Circle hooks excel in situations where the fish takes the bait and runs, giving time for the hook to rotate into position.

    Tuna on live bait. This is the #1 application for circle hooks in SoCal. When fly-lining sardines or mackerel for bluefin and yellowfin, a circle hook lands in the jaw corner almost every time. The tuna eats and turns, you reel tight, and the hook sets itself. This is critical when fishing lighter leader for picky tuna — a circle hook gives you a solid jaw hookup even on 25lb fluorocarbon, whereas a J hook might bury in the gut and get cut off by the tuna’s teeth. The Owner Mutu Light Circle (5114) in 2/0–4/0 is the go-to for tuna fly-lining — see our hooks guide for the full breakdown. Check our bluefin temperature guide for when to target them.

    Soaking bait from a boat or pier. Any time you’re fishing bait and waiting for a bite — bottom fishing with a dropper loop rig, soaking squid for white seabass, or chunking on anchor — circle hooks dramatically reduce gut-hooking. If you’re not holding the rod and actively watching for bites, circle hooks are the safer choice. The Owner Mutu Circle (5163) is the best all-around option for bait soaking.

    Surf fishing with bait. On a Carolina rig, circle hooks work perfectly. When a halibut picks up the bait and moves off, the circle rotates into the jaw. You don’t need lightning reflexes — just reel down and come tight.

    Catch and release fishing. The jaw-corner hookup of circle hooks means easier, less harmful releases. For undersized fish or species you want to release, circles significantly improve survival rates.

    When to Use J Hooks

    J hooks are better when you need to set the hook yourself and timing is critical.

    Live bait with active rod in hand. When you’re holding the rod, watching the bait, and ready to react instantly — like fishing live bait off the stern for yellowtail — a J hook gives you a direct, immediate hookset. You feel the bite, you swing, and the hook drives home. Some experienced anglers prefer this control over the passive hookup of a circle.

    Trolling. When lures or bait are moving behind the boat, J hooks set on the strike — the fish’s own momentum combined with the boat’s movement drives the point. Most trolling jigs, feathers, and cedar plugs come pre-rigged with J hooks for this reason.

    Artificial lures and jigs. Surface irons, swimbaits, and casting jigs almost exclusively use J-style hooks (or trebles, which are essentially three J hooks joined together). The instant a fish hits the lure, the hookset needs to happen — there’s no bait for the fish to hold onto while a circle hook rotates into position. Replace factory trebles on all your iron with Owner ST-66 trebles — factory hooks straighten on tuna and big yellowtail. See our hooks guide for the right treble size for each jig.

    Short-striking fish. When fish are nipping at baits without committing — common with calico bass in the kelp or sheephead on structure — a J hook lets you drive the point on even a brief contact. A circle hook requires the fish to take the whole bait and turn, which doesn’t happen with short bites.

    Direct Comparison

    FactorCircle HookJ Hook
    Hookset techniqueReel tight, no swingTraditional rod swing
    Hook locationJaw corner (90%+)Varies — jaw, throat, gut
    Gut-hook rateVery lowHigher, especially with bait
    Release survivalExcellentLower if gut-hooked
    Best for bait soakingYesOnly if actively watching
    Best for lures/jigsNoYes
    Learning curveMust resist hookset instinctNatural, intuitive
    Hookup rate (bait)High with proper techniqueHigh with good timing

    Hook Size Guide by Species

    Matching hook size to your target species and bait is just as important as choosing circle vs J. Too big and the fish won’t eat it. Too small and it won’t hold. For specific hook models, wire weights, and point styles, see our complete hooks by species guide.

    SpeciesCircle Hook SizeJ Hook SizeNotes
    Bluefin tuna3/0–5/04/0–6/0Match to bait size, lighter wire for picky fish
    Yellowfin tuna2/0–4/03/0–5/0Circle preferred for live bait fly-lining
    Yellowtail2/0–4/02/0–4/0J-hook for iron, circle for bait
    White seabass4/0–6/04/0–6/0Circle with squid, J with lures
    Halibut2/0–4/01/0–3/0Circle on Carolina rig is deadly
    Calico bass1/0–2/01/0–2/0J-hook for swimbaits and reactionary
    Rockfish2/0–4/02/0–4/0Either works on dropper loops
    Corbina/perch2–1/04–1/0Small circle on light Carolina rigs

    The Bottom Line

    Use circle hooks when bait fishing and you want consistent jaw hookups with minimal gut-hooking — especially for tuna, halibut, and any catch-and-release scenario. Use J hooks when fishing artificial lures, when you need an immediate hookset, or when fish are short-striking. Many SoCal anglers carry both and switch based on the situation, which is the smart play.

    For more on rigging with these hooks, check our guides on Carolina rigs, dropper loop rigs, fly-line rigs for tuna, and slider rigs for live bait. For the specific hook models we recommend — including Owner circle hooks, Owner J hooks, and Owner ST-66 trebles — see our best hooks by species guide.

    Plan Your Trip

    Check conditions before heading out:

    Related Guides

    Tight lines!

  • Fly-Line Rig for Tuna Fishing

    Fly-Line Rig for Tuna Fishing

    The fly-line rig is the most natural live bait presentation in saltwater fishing. No weight, no float, no hardware — just a hook tied to fluorocarbon leader connected to your main line, with a live bait swimming freely. When tuna are finicky and rejecting weighted rigs, the fly-line is usually what gets bit.

    If you’ve fished a SoCal tuna trip, you’ve heard the deckhand yell “fly-line it!” during a bait stop. This is what they mean, and knowing how to do it right can be the difference between going home with fish or going home with a story about the one that got away.

    What Is a Fly-Line Rig?

    A fly-line rig is as simple as it gets: your braided main line connects to a fluorocarbon leader via an FG or Alberto knot, and the leader terminates in a single hook. No sinker, no swivel, nothing else. You hook a live bait — sardine, anchovy, or small mackerel — and let it swim away from the boat naturally.

    The bait determines the depth and direction. A healthy sardine will swim away from the boat and gradually work its way down. Tuna see a baitfish behaving normally, not dragged down by weight or impeded by hardware, and they eat it. It’s the most natural presentation possible.

    How to Set Up a Fly-Line Rig

    Main Line

    40–65lb braided line, depending on whether you’re targeting school-sized fish (40lb) or larger bluefin (65lb). Braid’s thin diameter lets the bait swim more freely than mono, and zero stretch means you feel the bite instantly. See our fishing line guide for specific braid recommendations by target size. For a full breakdown of why braid mainline is the standard, see our braid vs mono vs fluorocarbon guide.

    Leader

    25–40lb fluorocarbon, 6–10 feet long. Fluorocarbon is essential — tuna have excellent eyesight, and the near-invisibility of fluoro in clear water makes a huge difference. For bluefin specifically, longer leaders (8–10 feet) in lighter test (25–30lb) get more bites but increase the risk of break-offs. For school tuna and yellowfin, 6 feet of 40lb fluoro is fine. Use an FG knot for the braid-to-fluoro connection — it passes through the guides smoothly when a tuna runs. See our line guide for specific fluorocarbon brand recommendations.

    Hook

    Circle hooks are the standard for fly-lining tuna. A 2/0–4/0 circle hook — match the size to your bait (2/0 for sardines, 3/0–4/0 for mackerel) — allows you to just reel tight when you feel the bite. The circle hook rotates and lodges in the corner of the tuna’s jaw. No hookset required — in fact, setting the hook with a circle hook usually pulls it out.

    The Owner Mutu Light Circle (5114) is the go-to fly-line hook for tuna. The light wire penetrates easily on a reel-tight hookset, and the Mutu point design finds the jaw corner consistently. Use 2/0 for sardines and small anchovies, 3/0 for large sardines and small mackerel, and 4/0 for full-sized mackerel. Ringed hooks (where the eye has a ring rather than being bent) are preferred because they allow freer bait movement.

    For picky bluefin that are refusing the Mutu Light, drop down to an even lighter wire hook — less hardware means a more natural bait presentation. When fish are eating aggressively and you need holding power, step up to the Owner Mutu Circle (5163) in the same sizes — the heavier wire handles big bluefin without straightening. See our hooks by species guide for the complete breakdown of which hook model to use for each situation.

    Tie your hook to the leader with a Palomar knot — it retains 90–95% strength on fluorocarbon and is fast to tie on a rocking boat.

    How to Hook the Bait

    Bait presentation matters enormously when fly-lining for tuna. A poorly hooked bait dies quickly, swims erratically, and gets ignored.

    Nose hook (best for sardines): Pass the hook through the nose or upper lip of the bait. This lets the bait swim forward naturally and is the most common hooking method for fly-lining. The bait stays lively the longest with a nose hook because you’re not damaging any vital areas.

    Collar hook (best for mackerel): Pass the hook through the collarbone area — the hard bony plate just behind and below the gill plate. This is a strong hold that works well with larger baits. The bait swims slightly angled, which can actually attract attention from tuna.

    Thread the bait (finicky fish): For ultra-picky tuna, some anglers thread the hook through the bait’s nostril or lower jaw and out through the top of the head. This completely hides the hook in the bait’s body. More advanced technique, but deadly when fish are being selective.

    How to Fish the Fly-Line

    Step 1: Grab a lively bait from the tank. Pin it quickly and gently — handling time kills bait. Hook it and get it in the water immediately.

    Step 2: Open your bail (spinning) or put your reel in freespool (conventional). Let the bait swim away from the boat freely. Don’t thumb the spool or impede the line — let the bait take line at its own pace.

    Step 3: Watch your line. As the bait swims out, your line will peel off steadily. If it suddenly accelerates or changes direction, a tuna has picked up the bait.

    Step 4: When you see the bite, close the bail or engage the reel and reel tight. Don’t swing. Just come tight and the circle hook does its job. If you’re using a J-hook, wait until you feel heavy weight, then set with a firm lift.

    Step 5: Fight the fish. With no weight on the line, it’s a pure connection between you and the tuna. Keep steady pressure and let the drag work.

    Rod and Reel for Fly-Lining

    The fly-line rig works on any tuna setup, but the right rod and reel make it significantly more effective:

    School bluefin and yellowfin (15–40 lbs): A 30–40lb class setupShimano Talica 12 or Penn Squall II 25N — on a 7-foot medium-heavy rod. Spool with 40–50lb braid.

    Big bluefin (50–150+ lbs): Step up to a 40lb+ class conventional on an 8-foot rod with 65lb braid. You need stopping power for a fish that wants to take 300 yards on the first run.

    Spinning option: A spinning reel in the 6000–8000 class — Shimano Saragosa 6000 — works well for fly-lining because the open bail lets line flow freely as the bait swims out. Many anglers prefer spinning for fly-lining specifically because of how naturally the line peels off.

    See our bluefin reel guide and rod and reel combo guide for complete recommendations.

    When Fly-Lining Works Best

    Fly-lining is most effective when the water is clear and the tuna are near the surface. In SoCal, this typically means fishing the clean blue water offshore where bluefin and yellowfin cruise. Check the SST chart for warm water edges — tuna follow temperature breaks where bait concentrates. The chlorophyll map shows you where bait is stacking up along these edges.

    Fly-lining is less effective in dirty or green water (the visual advantage of no hardware is reduced), in deep water where fish are holding below 100 feet (the unweighted bait won’t get down there), and in strong current that pushes the bait in the wrong direction. For those situations, switch to:

    • Sinker rig — add a rubber-core sinker 3–4 feet above the hook to get the bait down
    • Slider rig — adjustable depth, works in current
    • Flat-fall jig — when fish are deep on the meter and won’t come up for bait
    • Surface iron or poppers — when fish are boiling on top and you need to cover water fast

    Common Fly-Line Mistakes

    Thumbing the spool too much. Let the bait swim. Impeding the line kills the natural presentation that makes fly-lining work.

    Leader too heavy. 60lb fluoro on a sardine looks like a rope to a tuna. Match your leader weight to the situation — lighter gets more bites, heavier gives more insurance.

    Leader too light for big bluefin. 25lb fluoro on a 150-pound fish is a gamble. But sometimes it’s the only way to get bit. Know the trade-off.

    Killing the bait. Hook it quickly and gently. Don’t squeeze it, don’t drop it, don’t hold it out of the water longer than necessary. A dead bait on a fly-line rig is just a chunk of fish sinking slowly — and tuna can tell the difference.

    Setting the hook with circle hooks. The biggest mistake. With circle hooks, just reel tight. A big swing pulls the hook straight out of the fish’s mouth. Reel, come tight, and the hook finds the jaw corner on its own.

    Fly-Line Quick Reference

    TargetMain LineLeaderHook
    School bluefin (15–40 lb)40lb braid25–30lb fluoro, 8 ft2/0 Mutu Light Circle
    Big bluefin (50–150+ lb)65lb braid30–40lb fluoro, 10 ft3/0–4/0 Mutu Circle
    Yellowfin tuna50lb braid30lb fluoro, 6 ft2/0–3/0 Mutu Light
    Yellowtail (bonus)40lb braid25lb fluoro, 6 ft2/0 circle

    Plan Your Trip

    Tuna follow warm water and bait. Check conditions before you go:

    Related Guides

    Tight lines!